Mac 源码部署 xiaozhi-esp32-server
brew 常用命令
|
|
Nginx
安装与路径说明
-
实际安装目录
/opt/homebrew/Cellar/nginx/1.27.5
(包含二进制文件、配置模板等) -
常用操作路径(符号链接)
/opt/homebrew/opt/nginx
推荐使用该路径进行命令操作。 -
核心配置文件
/opt/homebrew/etc/nginx/nginx.conf
修改端口、服务器块、日志等主要编辑此文件。 -
站点配置目录
/opt/homebrew/etc/nginx/servers/
可在此目录下添加多个.conf文件(如myapp.conf、api.conf),Nginx 会自动加载。 -
网站根目录
/opt/homebrew/var/www
默认网页存放路径,访问http://localhost:8080时显示此目录下的index.html。如需更改,可修改nginx.conf或servers/*.conf。 -
日志文件
- 错误日志:
/opt/homebrew/var/log/nginx/error.log - 访问日志:
/opt/homebrew/var/log/nginx/access.log
- 错误日志:
常用操作命令
| 功能 | 命令 |
|---|---|
| 启动 Nginx(服务方式) | brew services start nginx |
| 停止 Nginx | brew services stop nginx |
| 重启 Nginx | brew services restart nginx |
| 测试配置文件语法 | /opt/homebrew/opt/nginx/bin/nginx -t |
| 重新加载配置(热重载) | /opt/homebrew/opt/nginx/bin/nginx -s reload |
| 查看 Nginx 版本 | /opt/homebrew/opt/nginx/bin/nginx -v |
- 默认端口为 8080,无需 sudo 即可运行。
- 如需前台运行,可用:
/opt/homebrew/opt/nginx/bin/nginx -g 'daemon off;'
MySQL
安装
|
|
常用路径
-
实际安装目录
/opt/homebrew/Cellar/mysql/<版本号> -
常用操作路径(符号链接)
/opt/homebrew/opt/mysql -
配置文件
/opt/homebrew/etc/my.cnf -
数据目录
/opt/homebrew/var/mysql -
日志文件
/opt/homebrew/var/mysql/*.err
常用操作命令
| 功能 | 命令 |
|---|---|
| 启动 MySQL(服务方式) | brew services start mysql |
| 停止 MySQL | brew services stop mysql |
| 重启 MySQL | brew services restart mysql |
| 登录 MySQL | mysql -u root -p |
| 修改 root 密码 | mysqladmin -u root password '新密码' |
| 查看版本 | mysql --version |
初次使用
-
启动服务:
brew services start mysql -
设置 root 密码(首次登录无需密码):
1mysqladmin -u root password '你的新密码' -
登录 MySQL:
1mysql -u root -p
- 默认端口为 3306。
- 如遇到权限或启动问题,可尝试重启服务或检查日志文件。
安装 DBeaver
地址:https://dbeaver.io/download/
遇到 Public Key Retrieval is not allowed 的错误提示
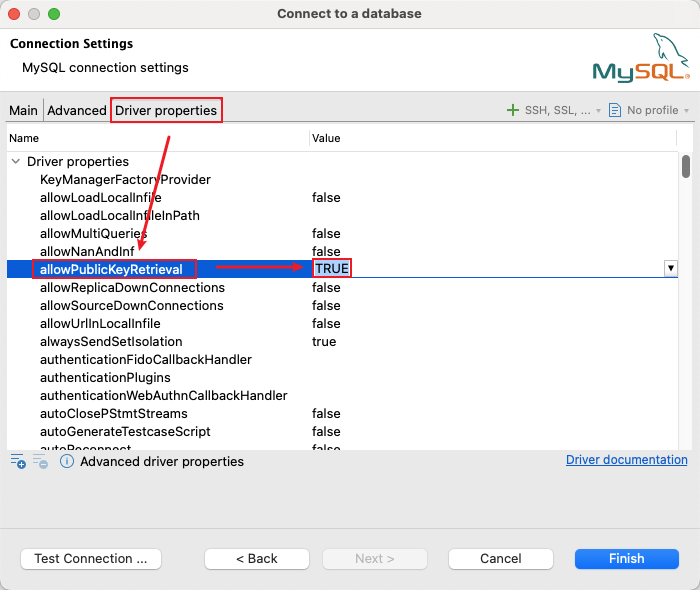
图1)安装 Redis
安装
|
|
常用路径
-
实际安装目录
/opt/homebrew/Cellar/redis/<版本号> -
常用操作路径(符号链接)
/opt/homebrew/opt/redis -
配置文件
/opt/homebrew/etc/redis.conf -
数据目录
/opt/homebrew/var/db/redis -
日志文件
/opt/homebrew/var/log/redis.log
常用操作命令
| 功能 | 命令 |
|---|---|
| 启动 Redis(服务方式) | brew services start redis |
| 停止 Redis | brew services stop redis |
| 重启 Redis | brew services restart redis |
| 启动 Redis(前台) | redis-server /opt/homebrew/etc/redis.conf |
| 连接 Redis | redis-cli |
| 查看版本 | redis-server --version |
初次使用
-
启动服务:
brew services start redis -
连接 Redis:
1redis-cli -
测试连接:
在redis-cli中输入ping返回
PONG表示连接成功。
- 默认端口为 6379。
- 如遇到启动或连接问题,可检查日志文件或重启服务。
安装 Another Redis Desktop Manager
地址:https://github.com/qishibo/AnotherRedisDesktopManager?tab=readme-ov-file
Java 环境
JDK 21
地址:https://www.oracle.com/java/technologies/downloads/#jdk21-mac
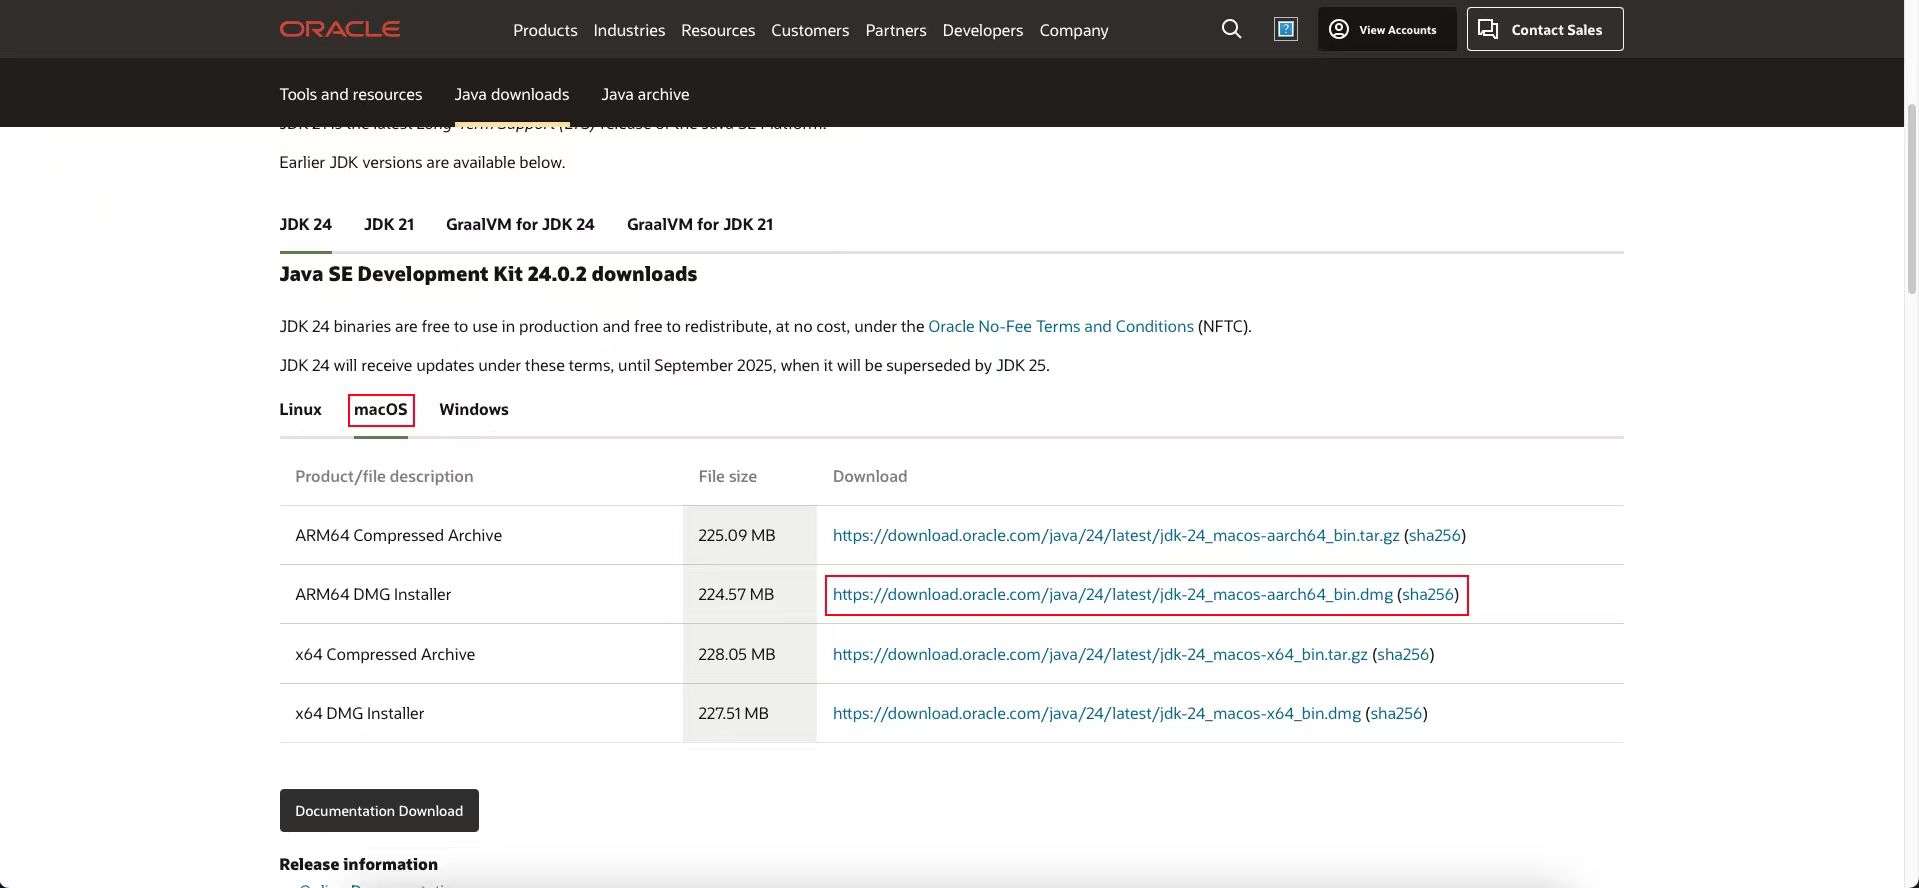
图2)根目录:资源库/Java/JavaVirtualMachines/jdk-21.jdk/Contents/Home
主要通过 IDEA 使用 Java 所以就不配置环境变量了
Maven
地址:https://maven.apache.org/download.cgi
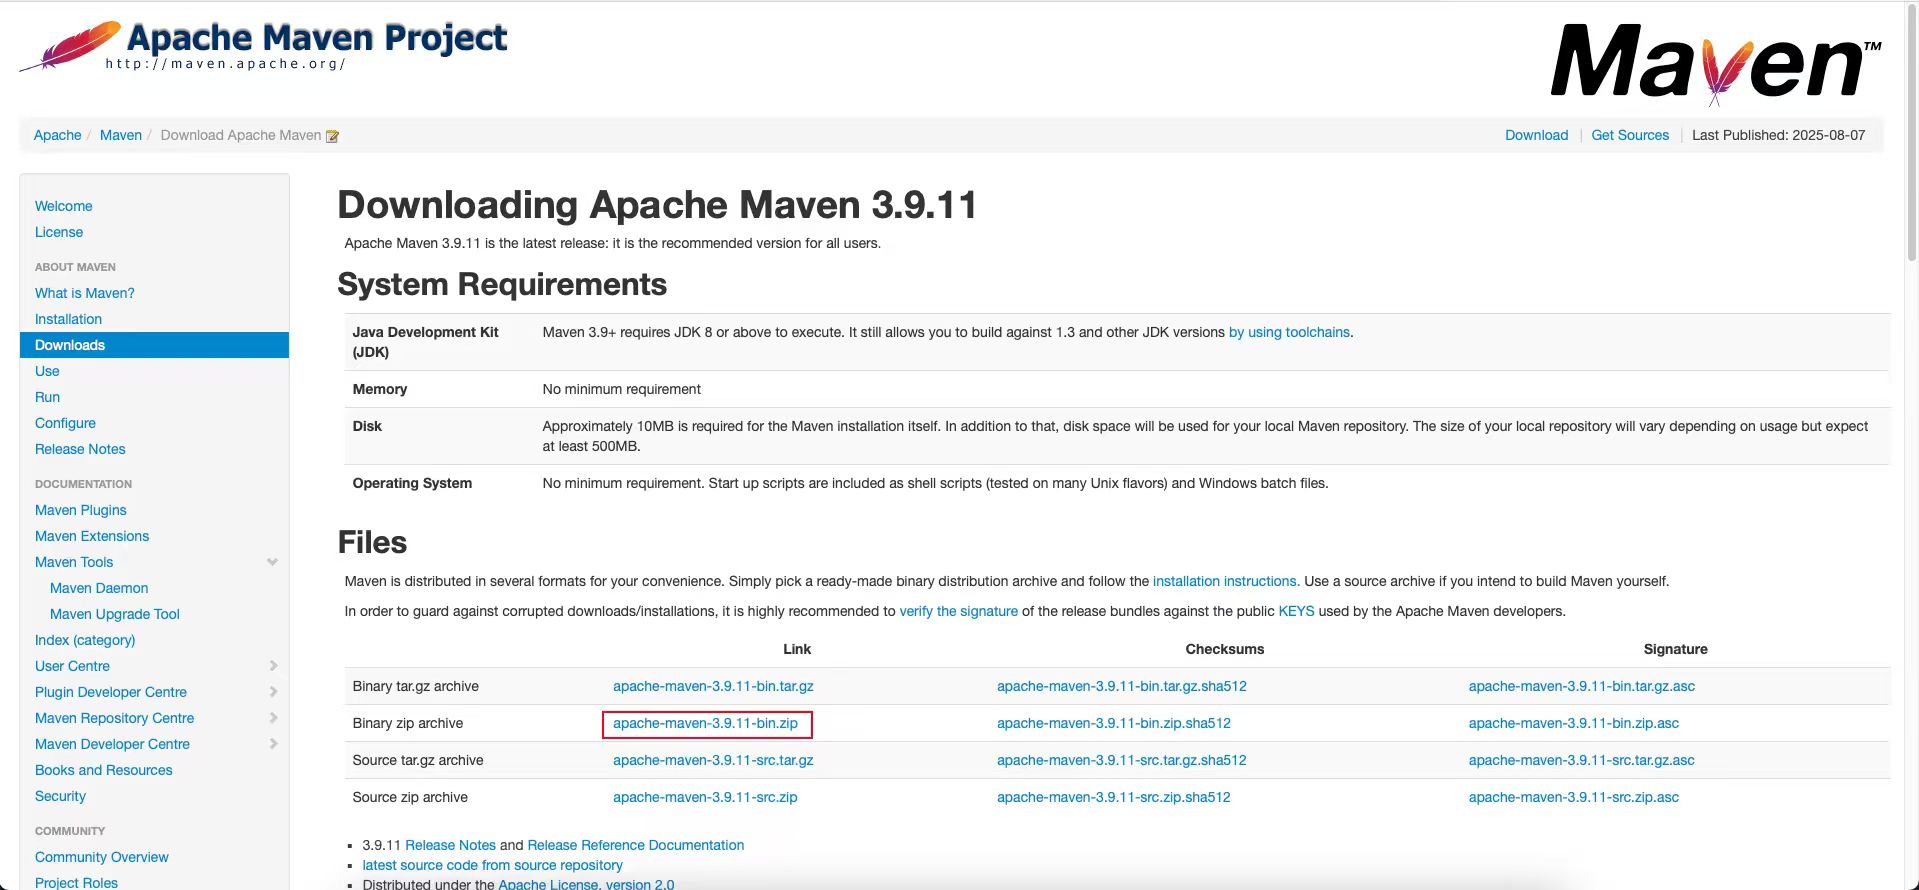
图3)配置 IDEA
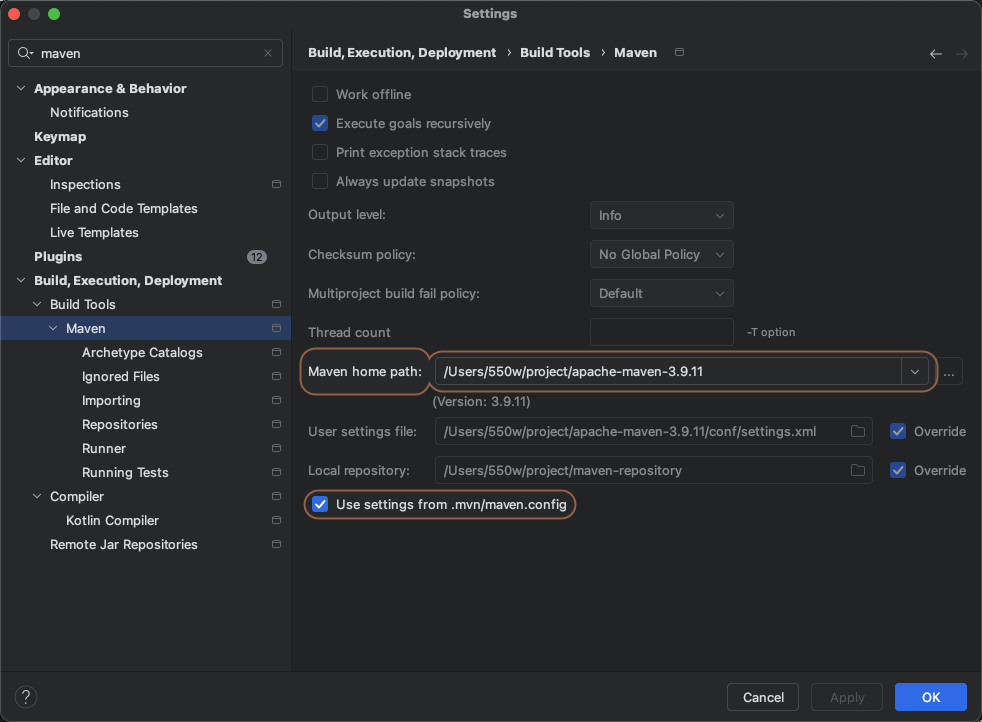
图4)
图5)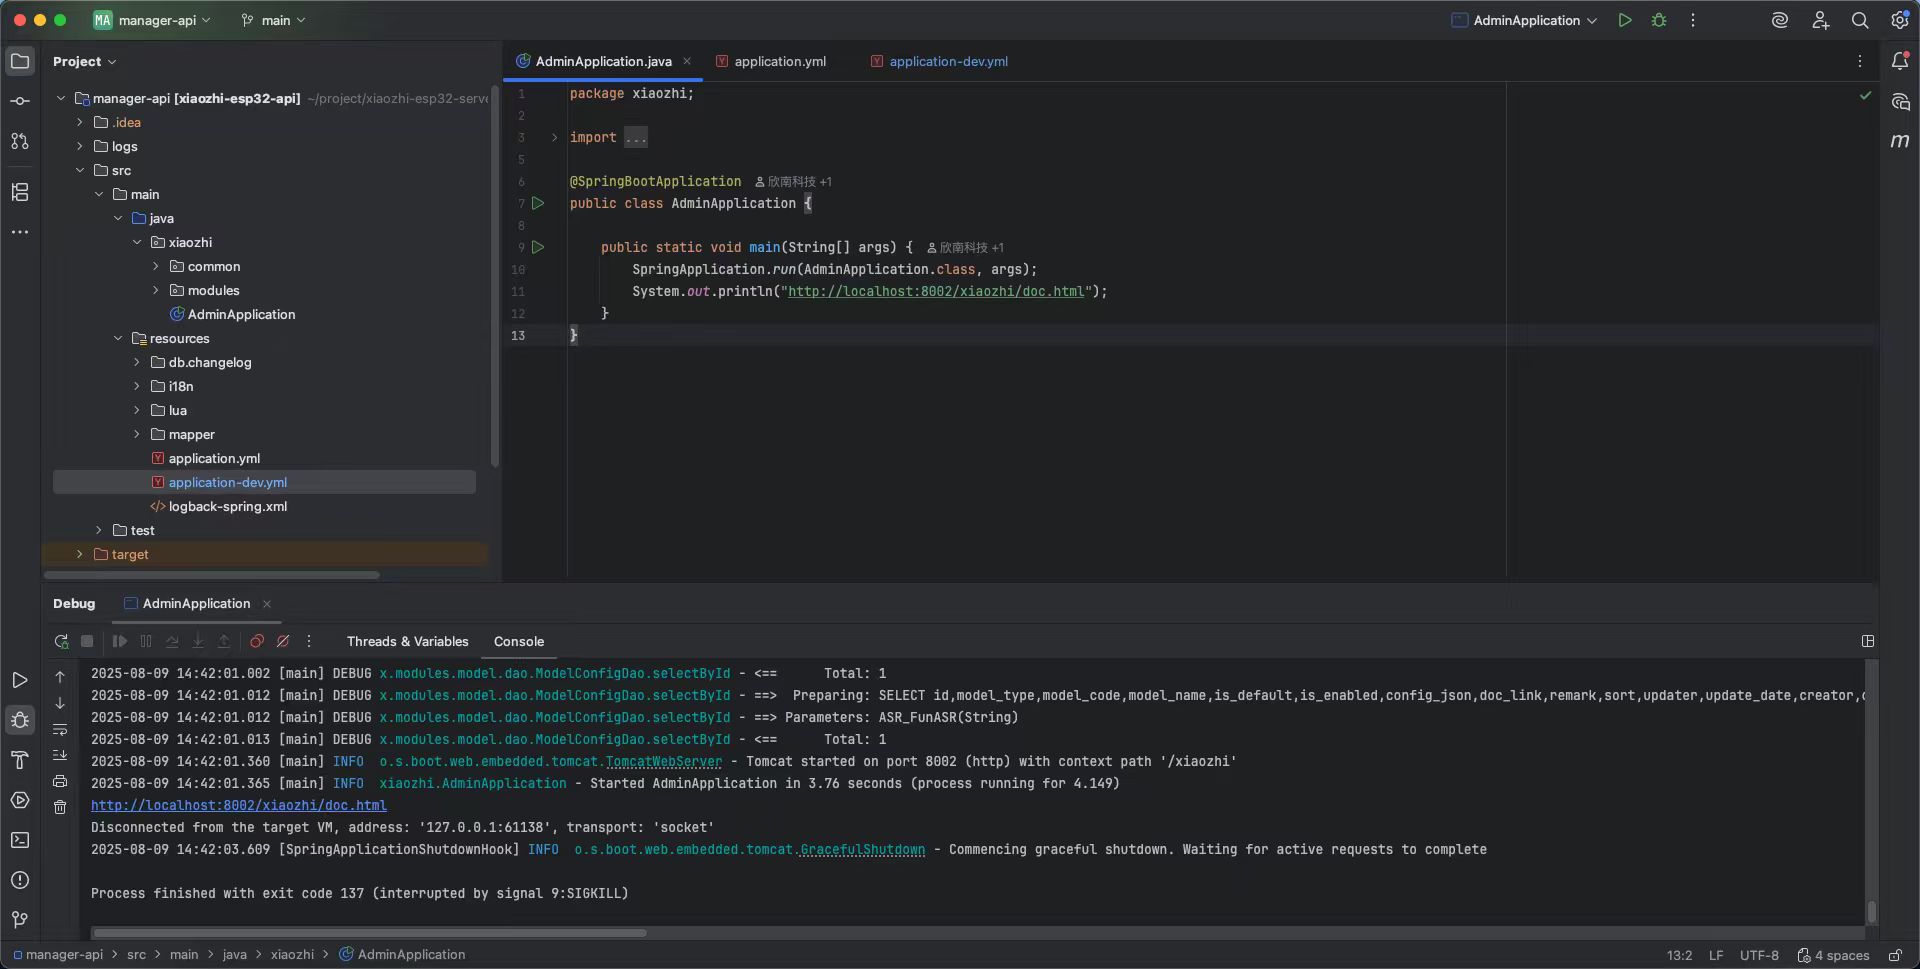
图6)Python 环境
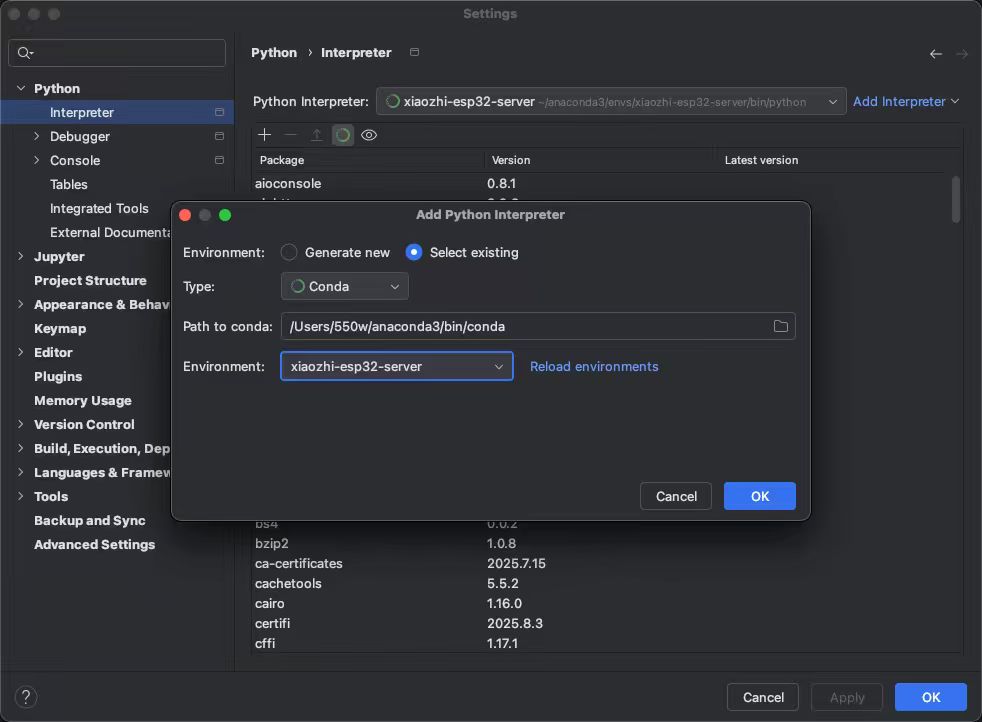
图7)nvm
下载安装脚本:在终端中执行以下命令来下载并运行 nvm 的安装脚本,安装脚本已经自动把环境变量写入了 ~/.zshrc,不需要我们再手动添加。
|
|
重新加载 .zshrc
|
|
验证 nvm 是否可用
|
|
常用命令
|
|
xiaozhi-esp32-server
下载项目
|
|