安装HomeAssistant
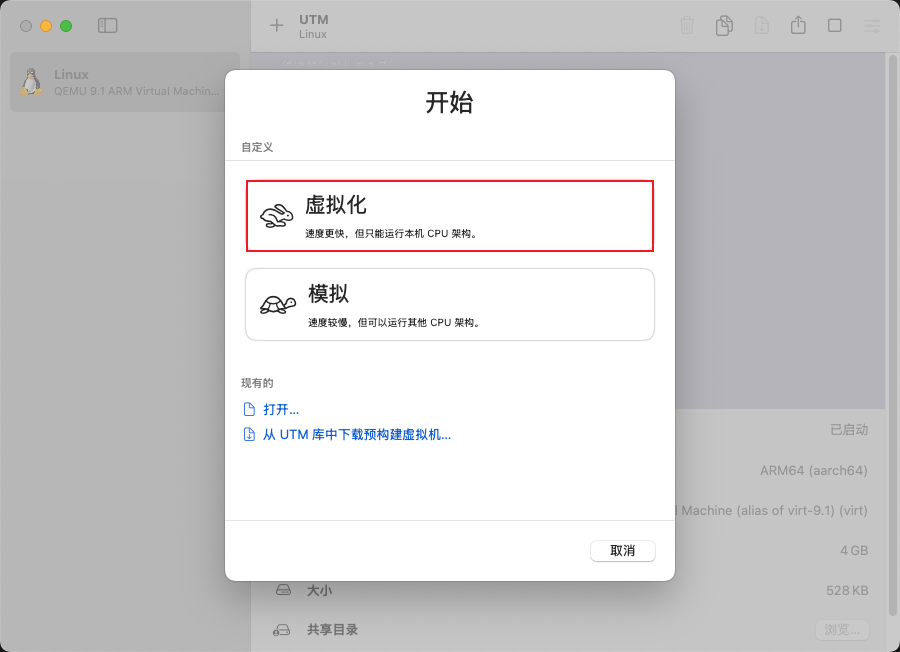
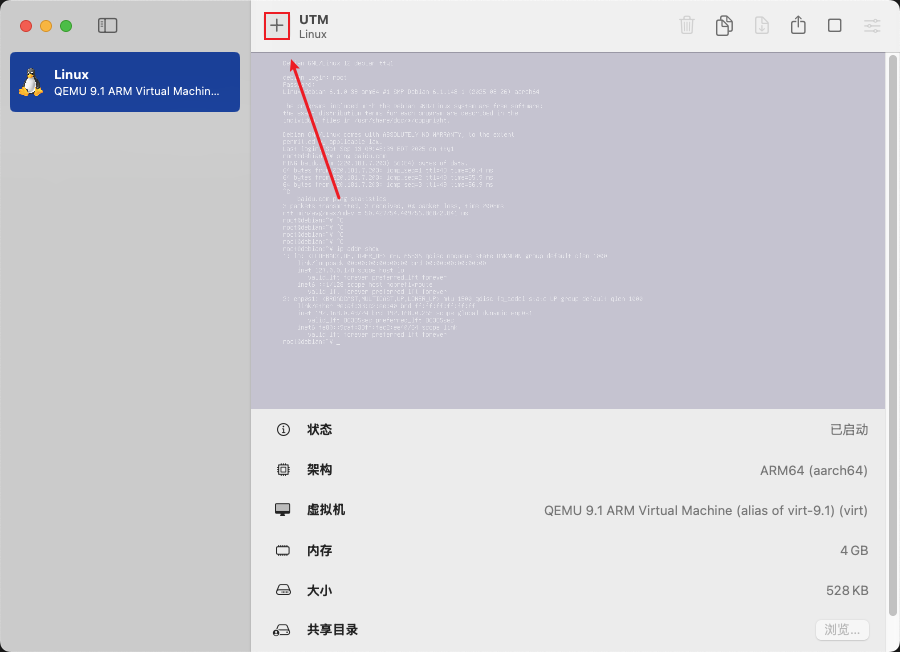
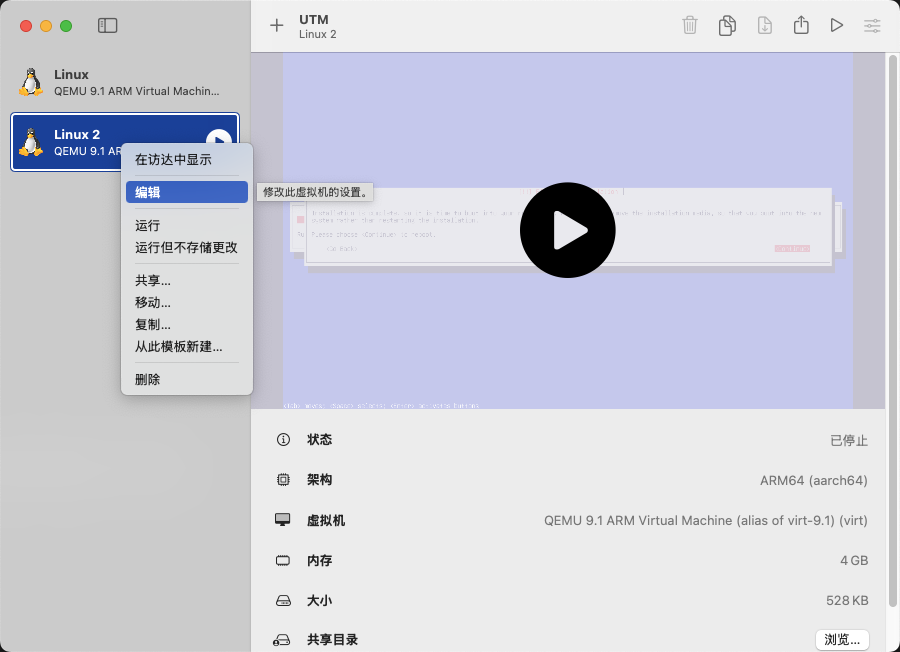
1.安装UTM虚拟机
下载:https://mac.getutm.app/
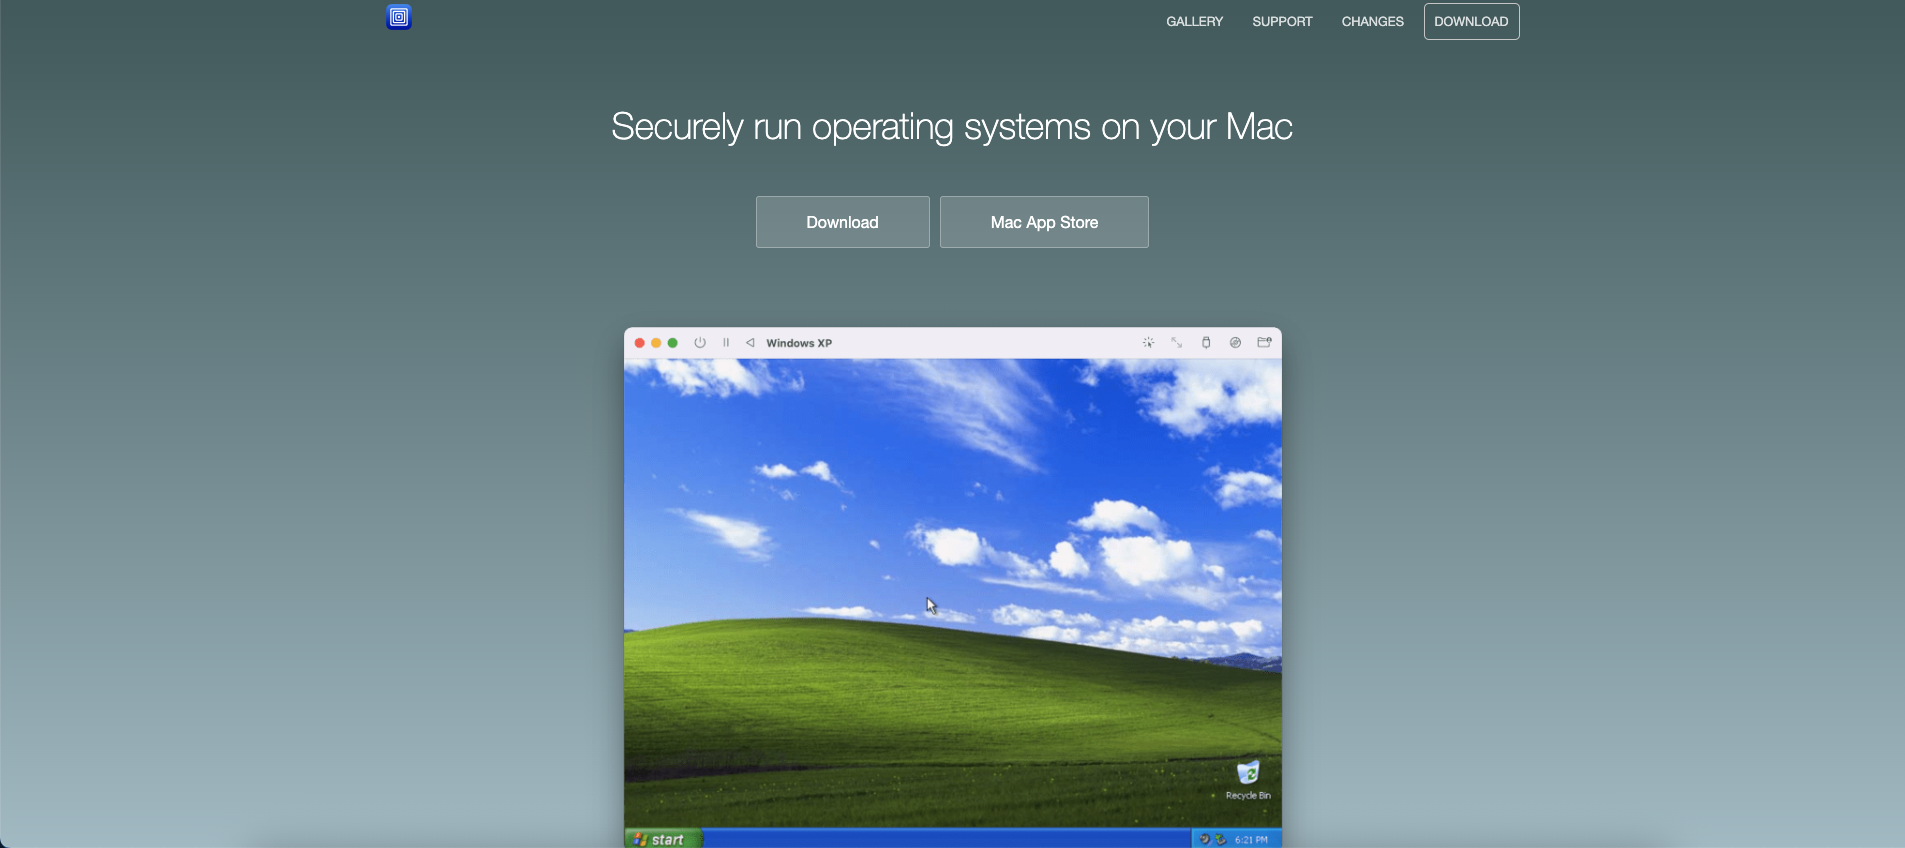 (
(图1)
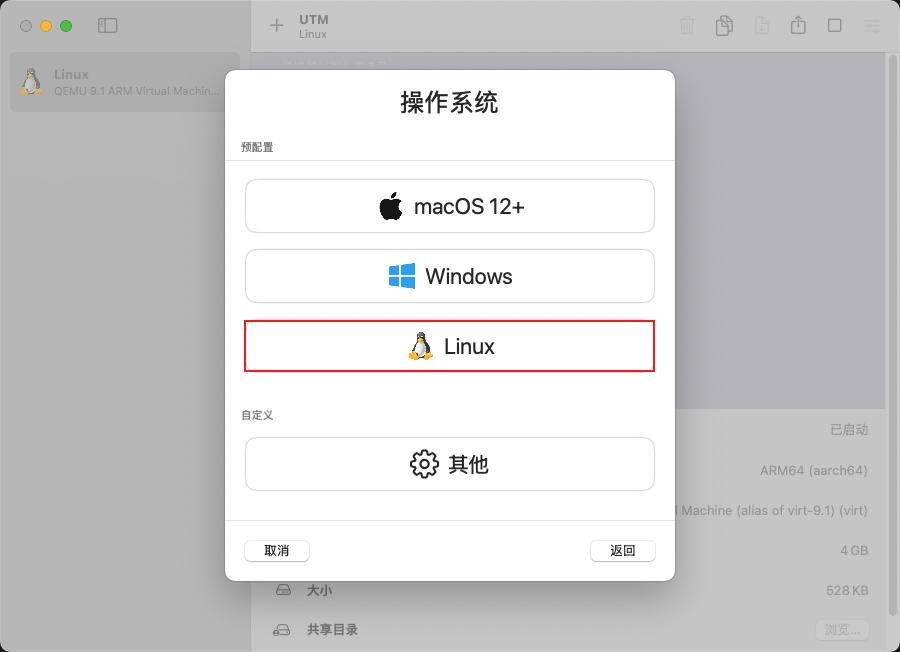
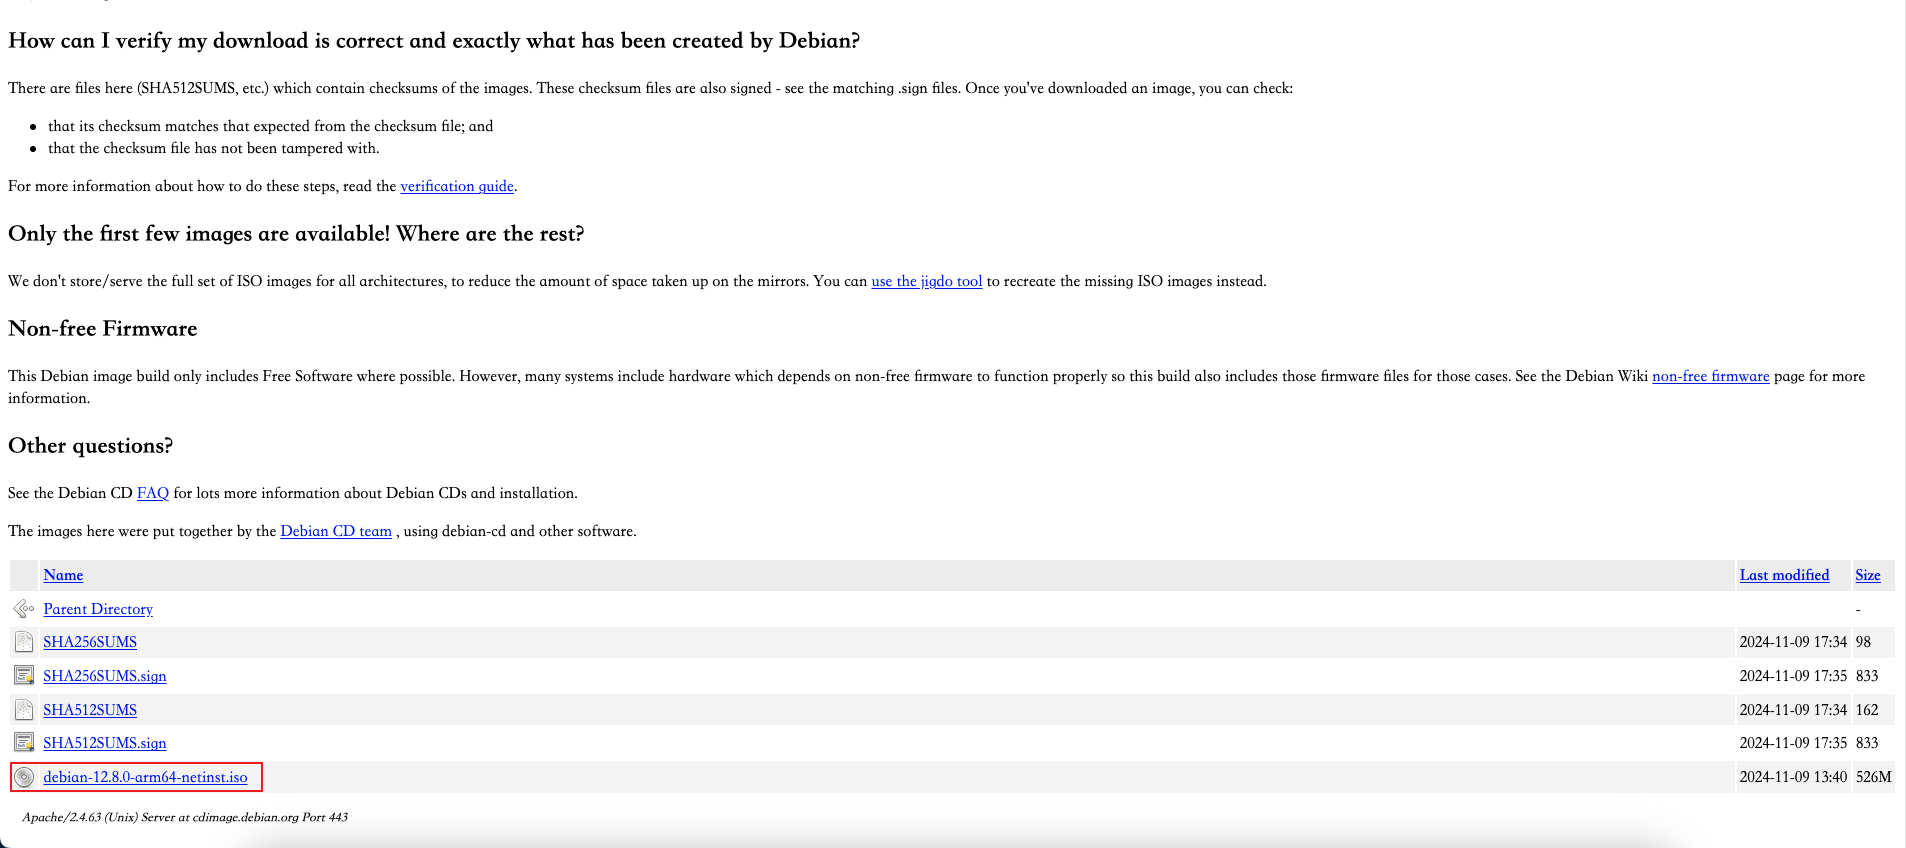
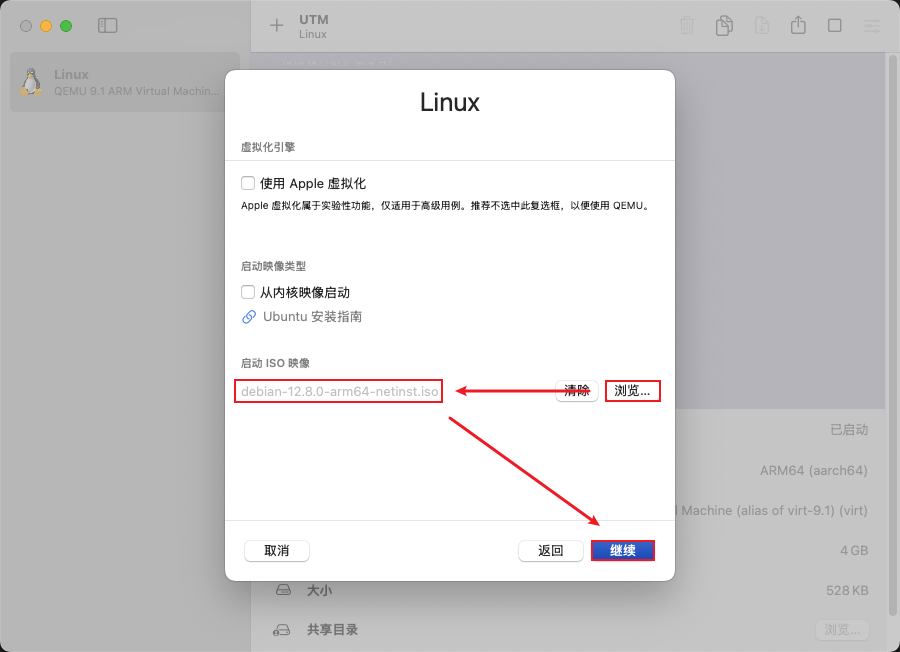
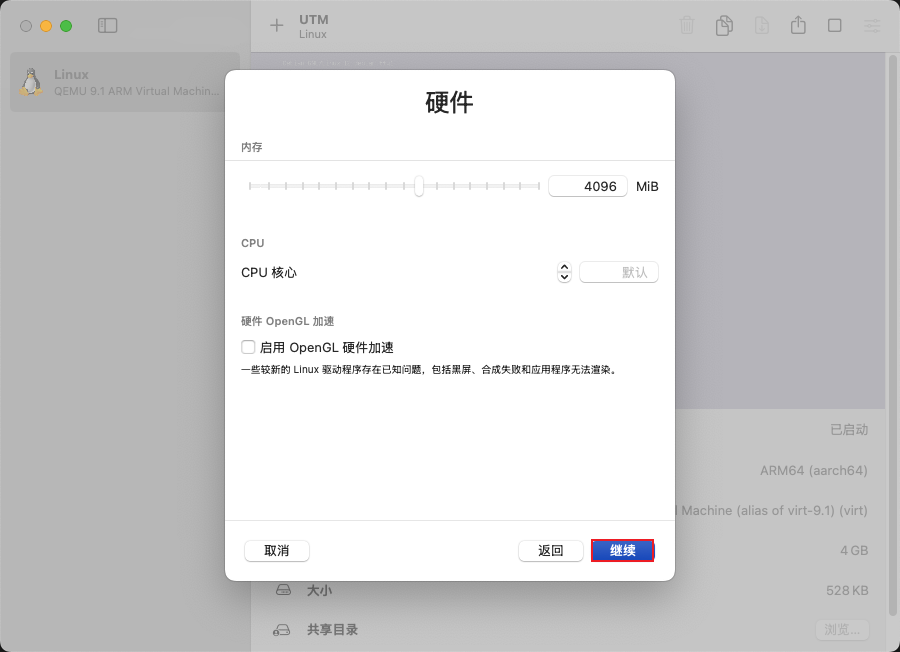
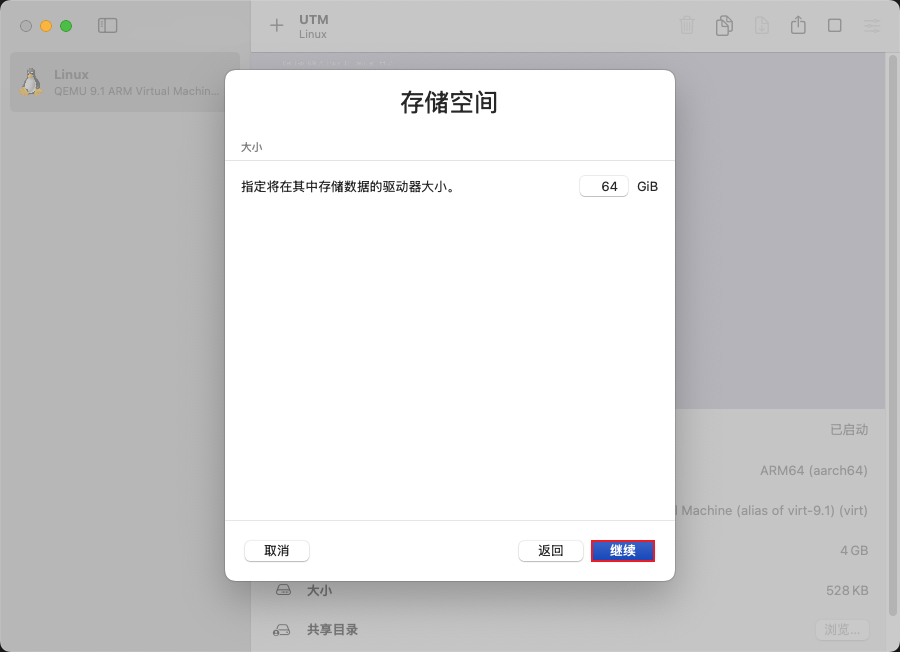
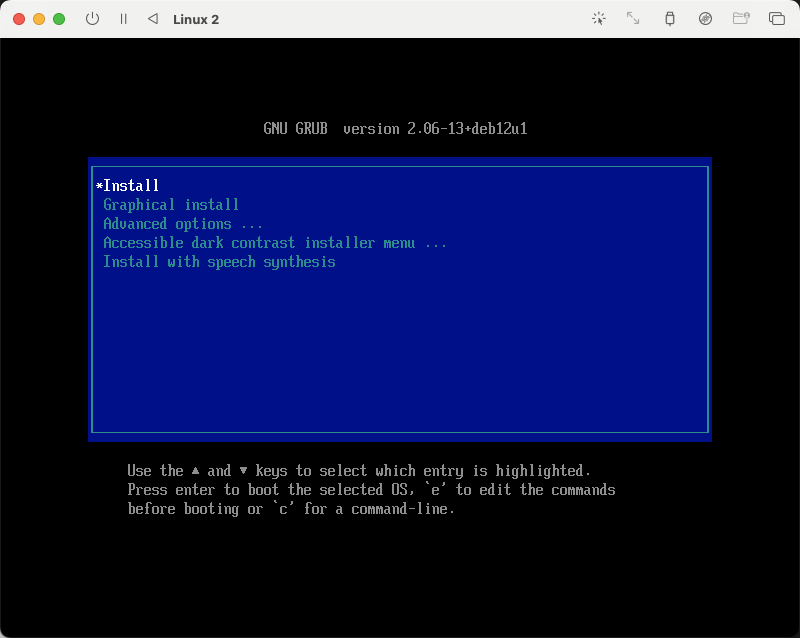
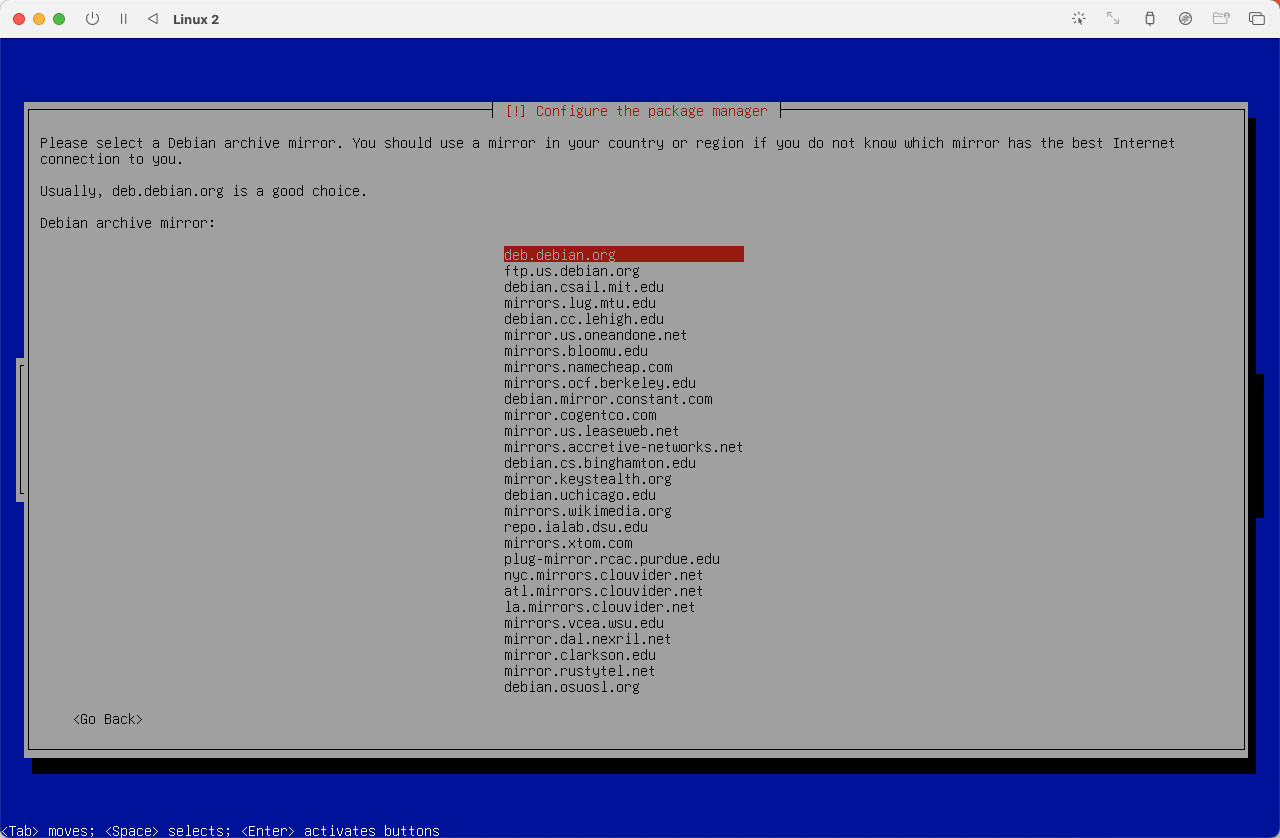
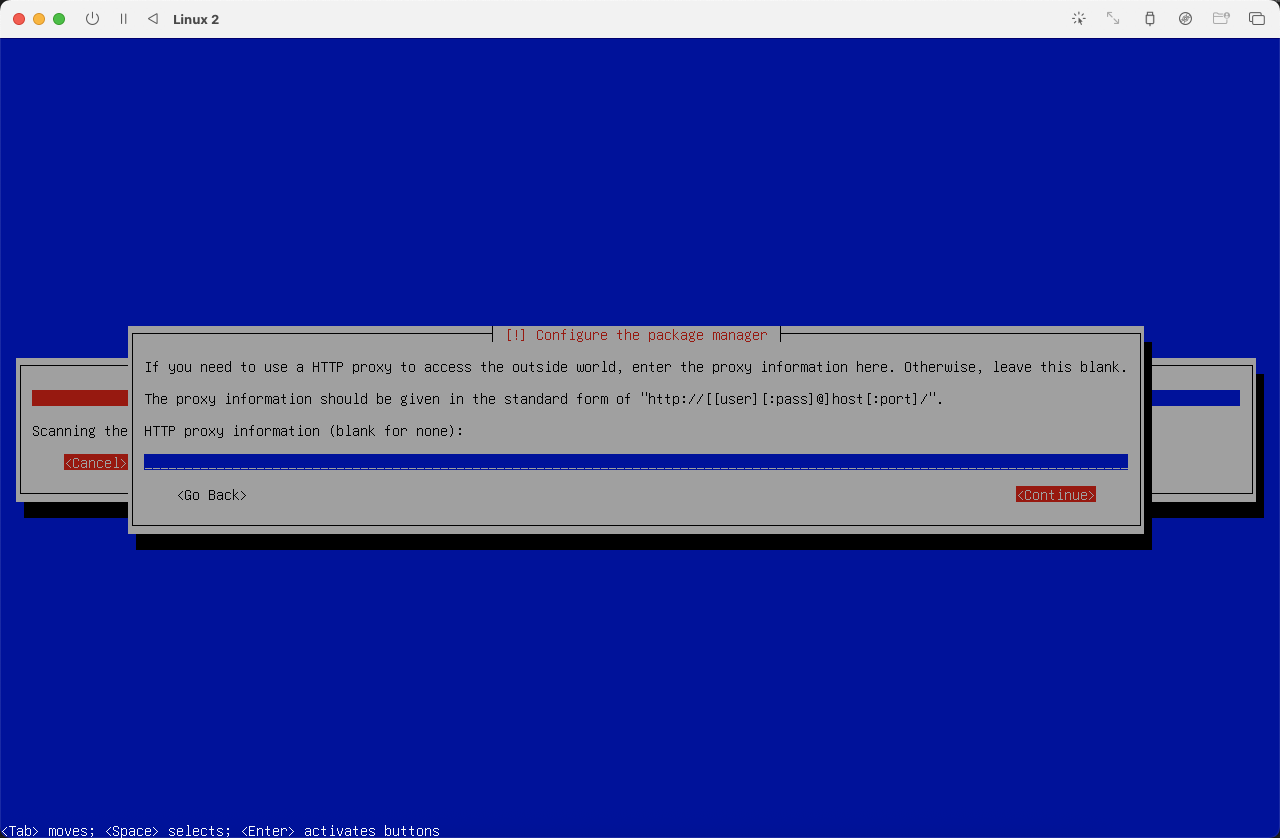
2.部署Debain镜像
下载:https://cdimage.debian.org/cdimage/archive/12.8.0/arm64/iso-cd/
 (
(图2)
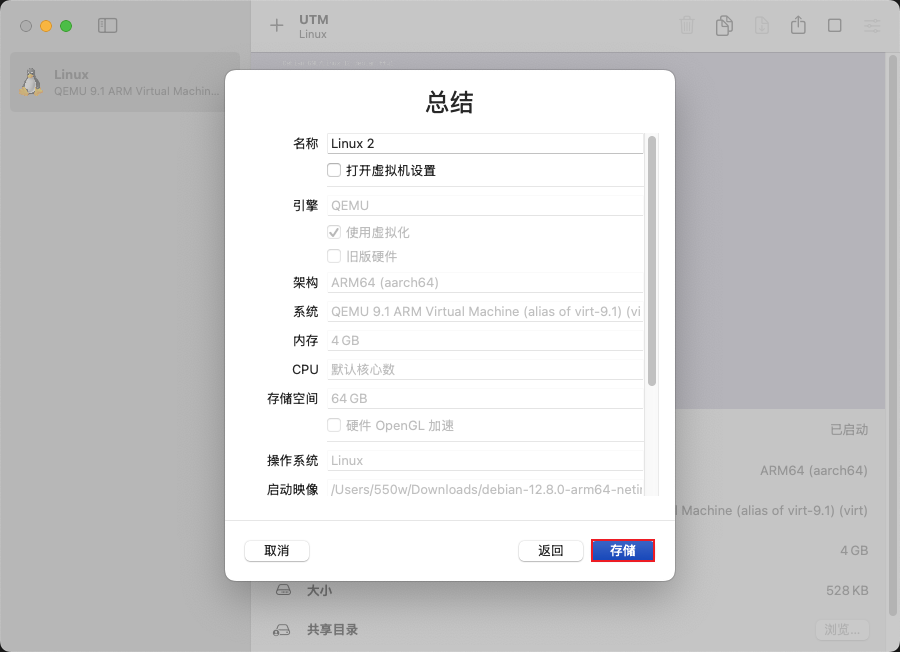
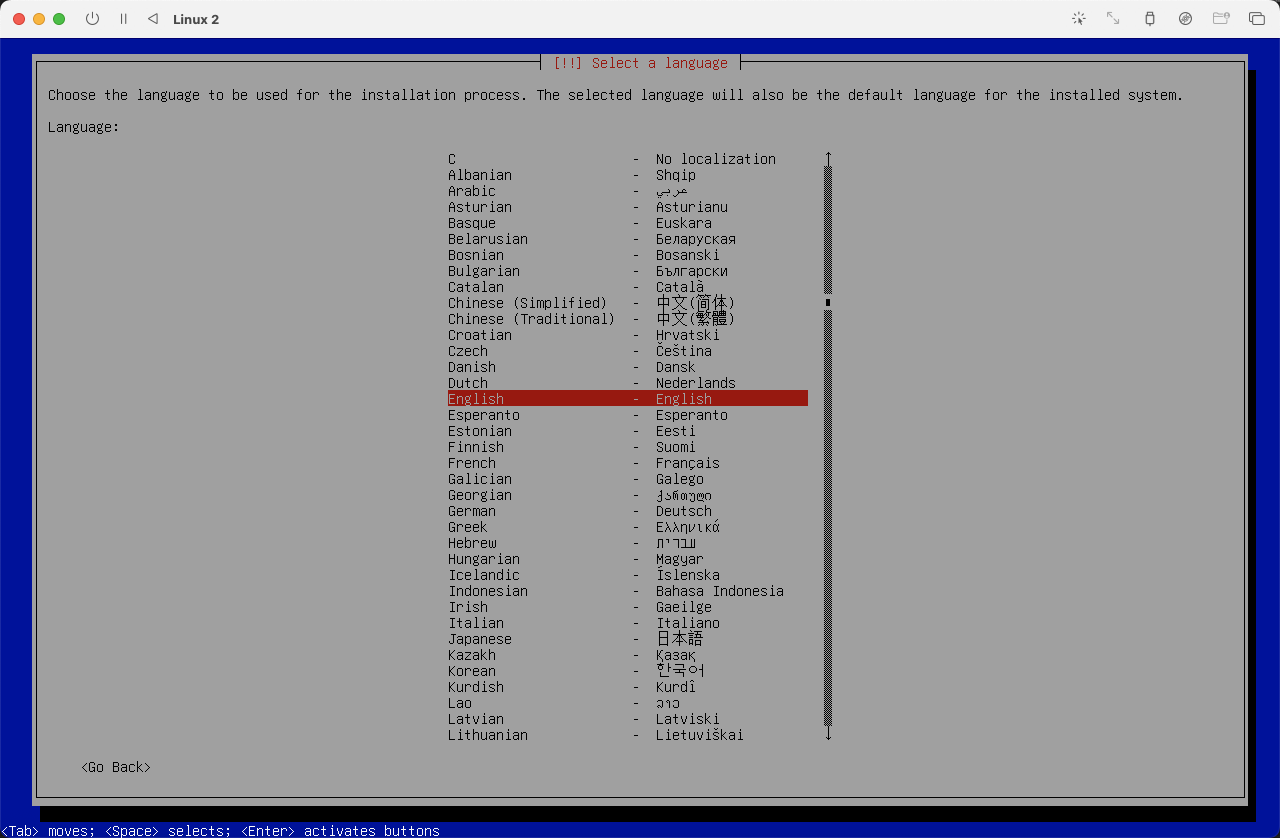
安装过程中所做的任何设置均可在安装完成后根据需要自行修改,因此请勿将安装阶段的配置视为最终的永久设置。
 (
(图3)
 (
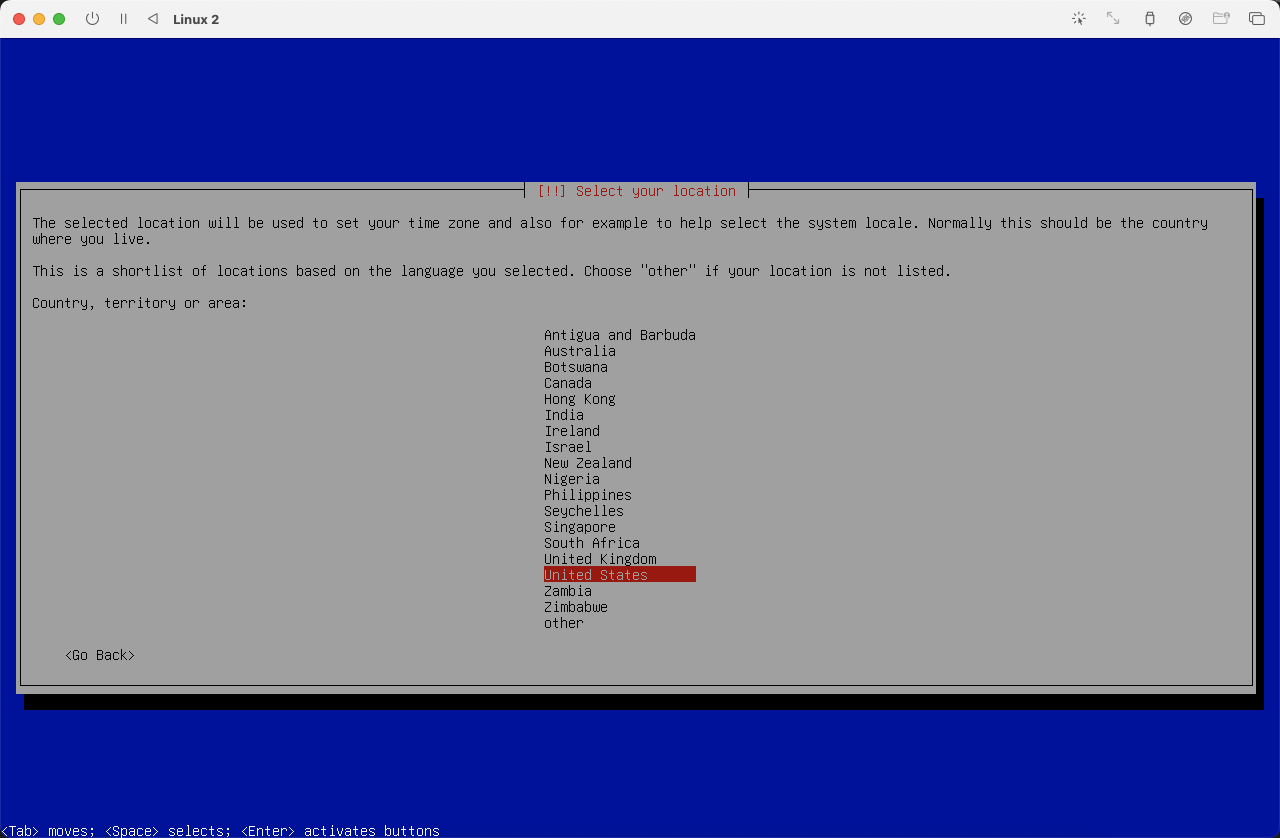
(图4)
 (
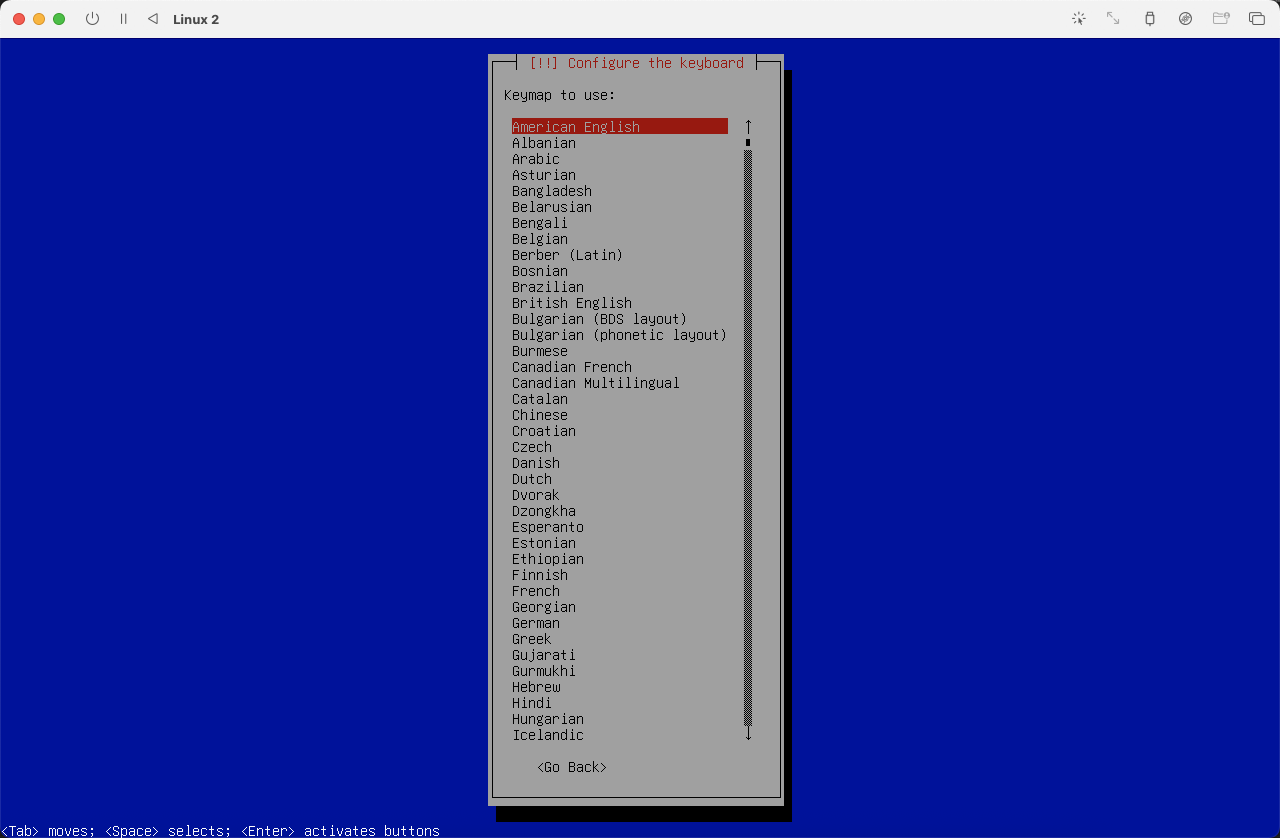
(图5)
 (
(图6)
 (
(图7)
 (
(图8)
 (
(图9)
 (
(图10)
 (
(图11)
 (
(图12)
 (
(图13)
 (
(图14)
 (
(图15)
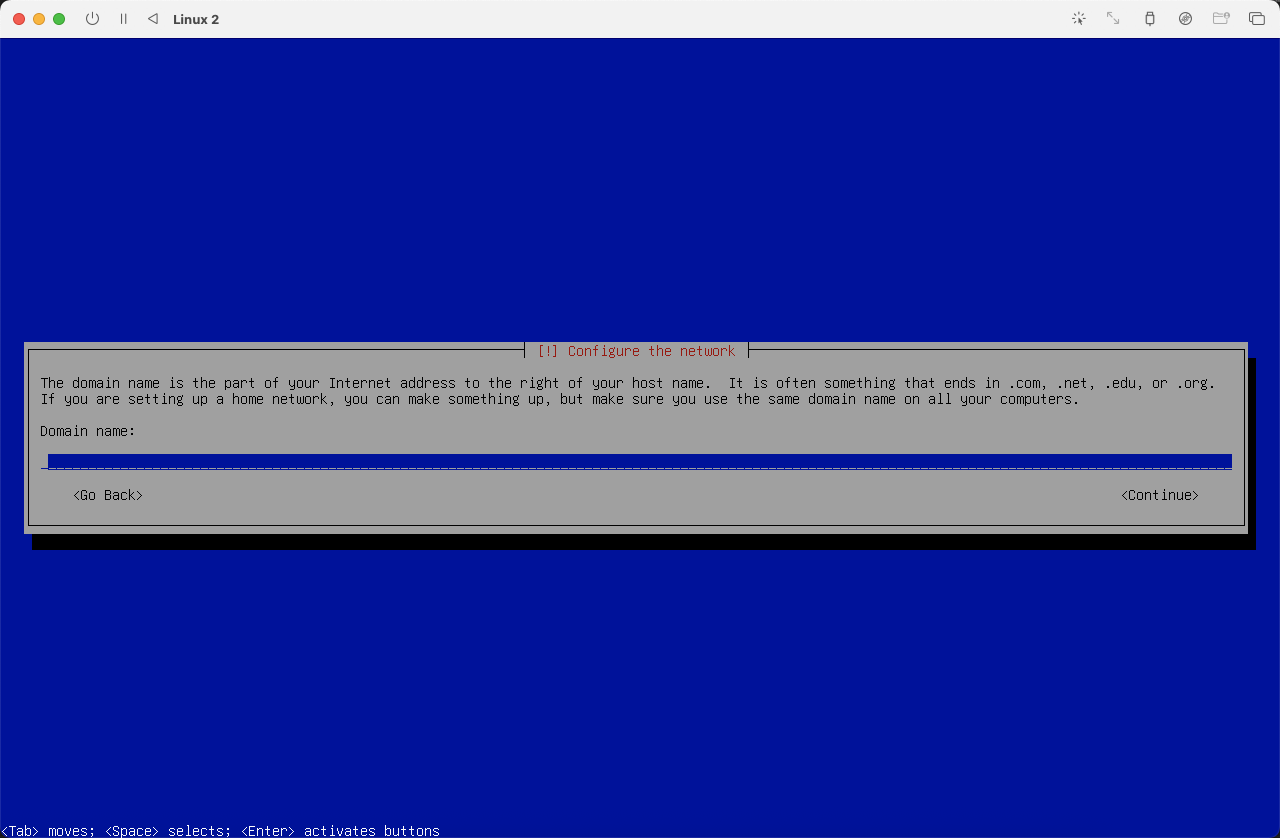
设置主机 hostname,本文设置为 debian,可根据自身习惯或喜好进行设置。
 (
(图16)
可以跳过 domain 设置
 (
(图17)
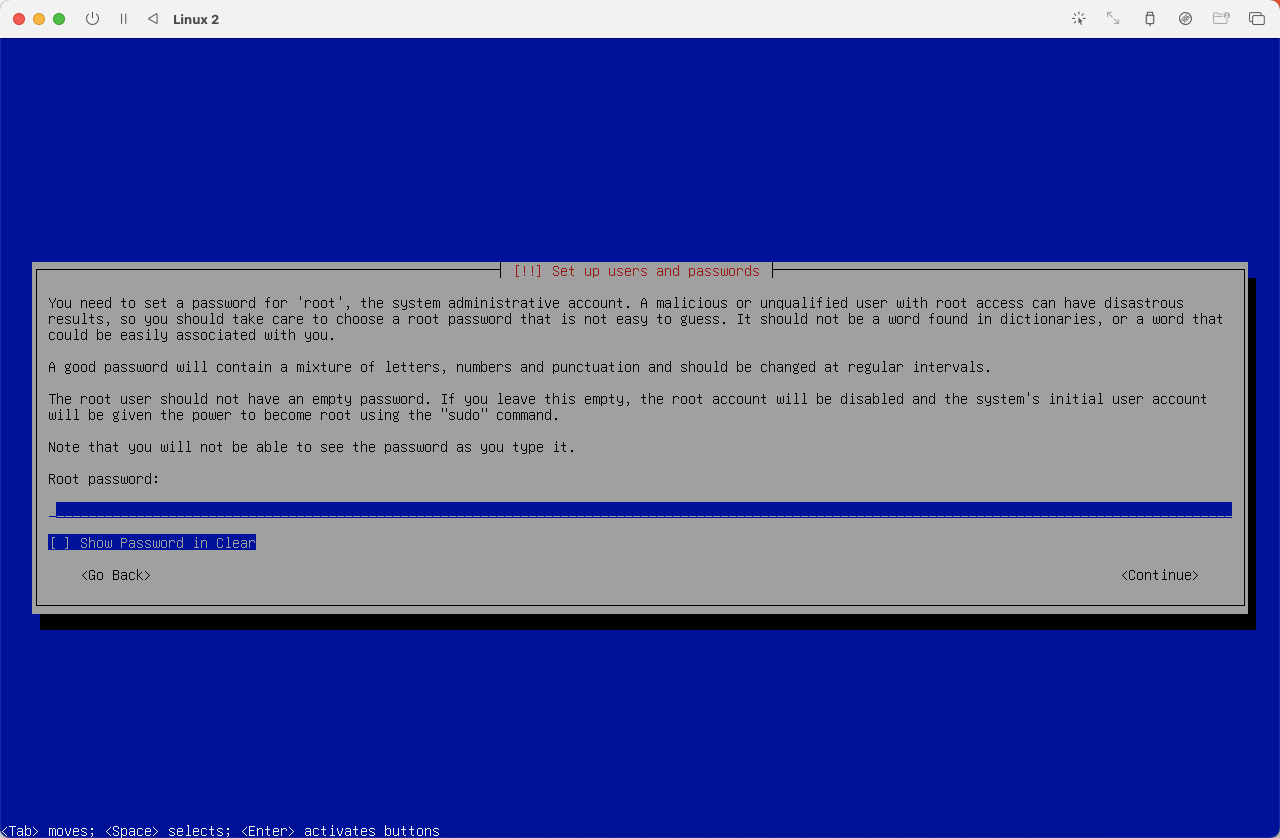
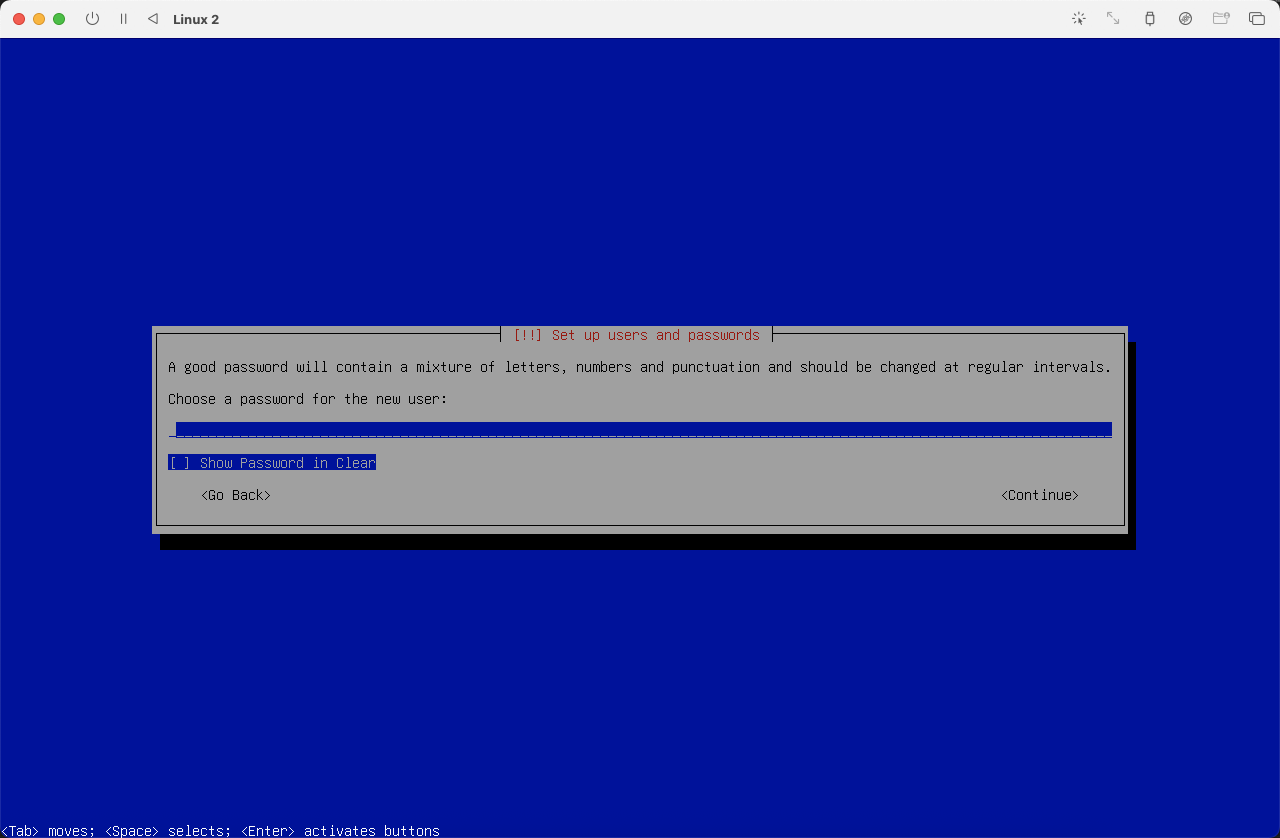
设置 root 用户密码
 (
(图18)
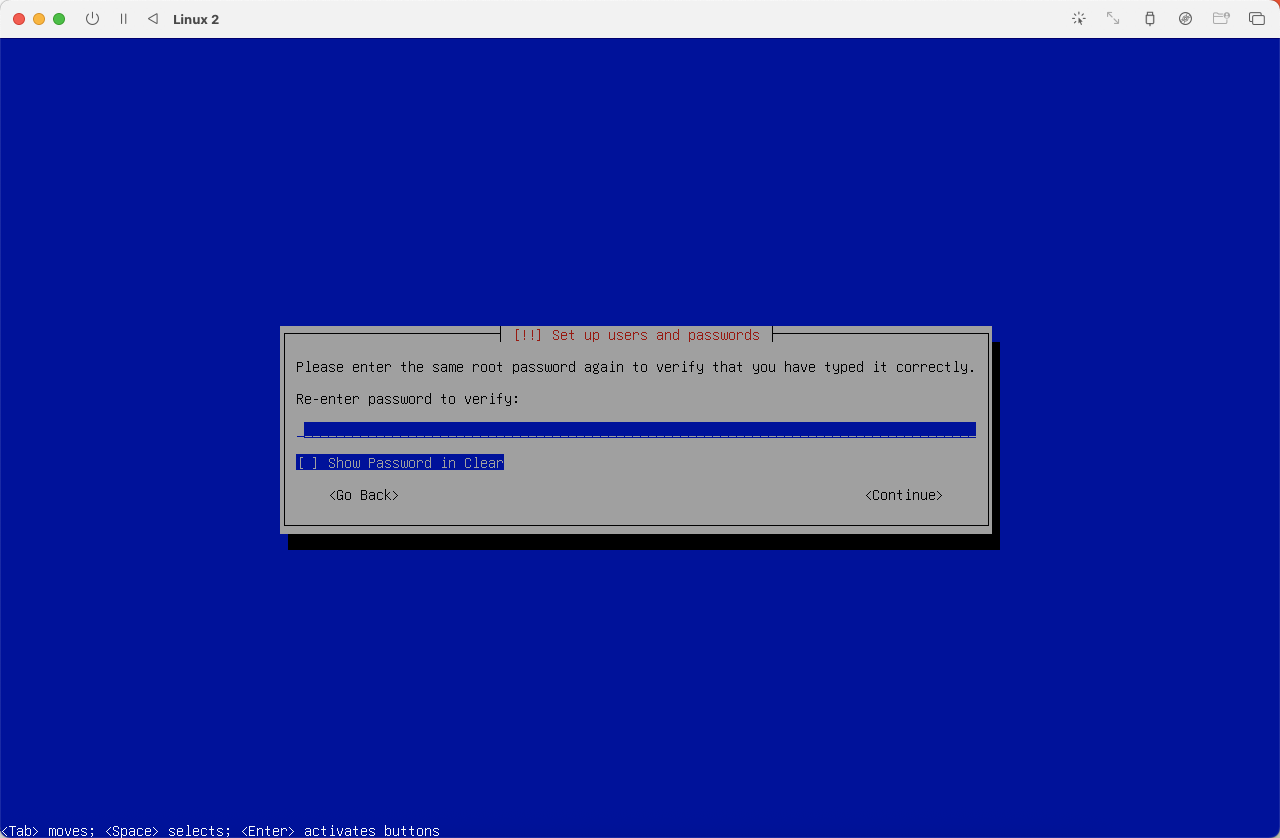
再次输入确认密码
 (
(图19)
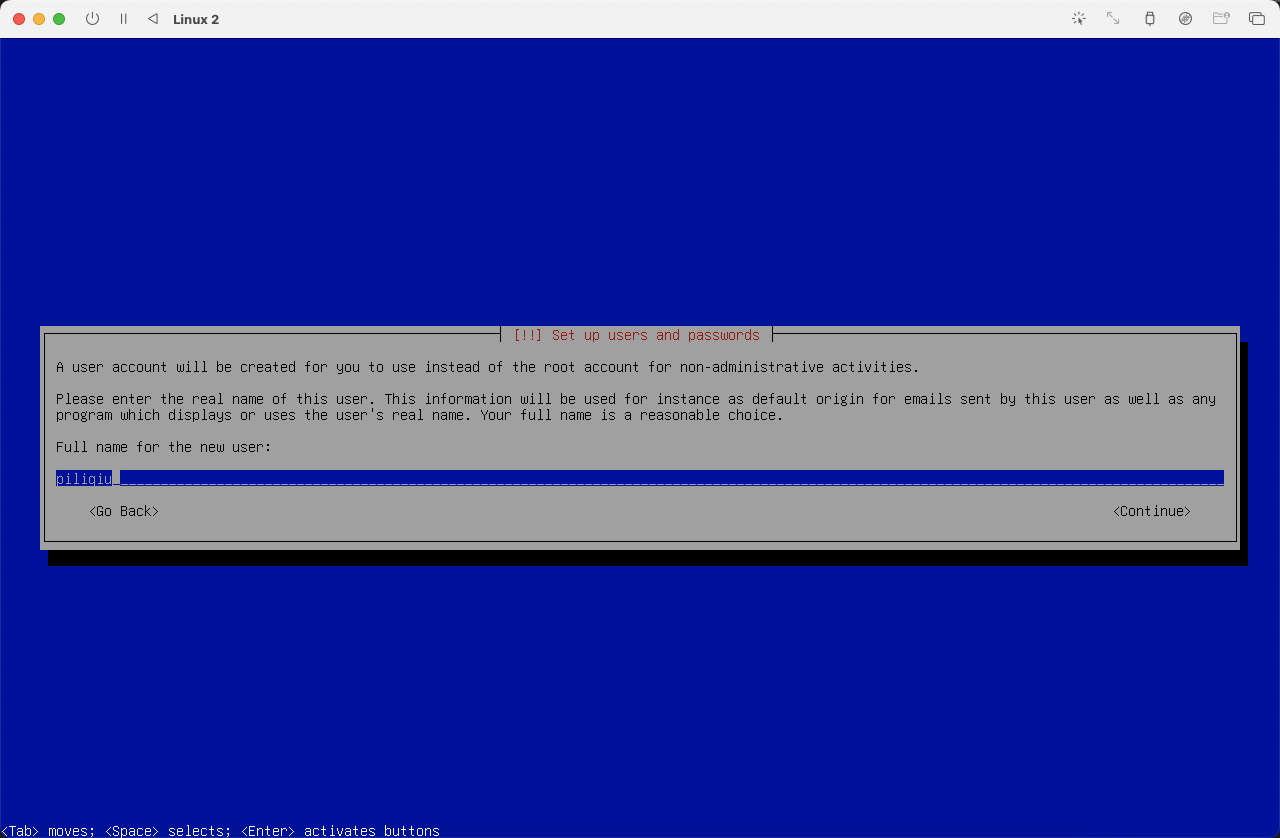
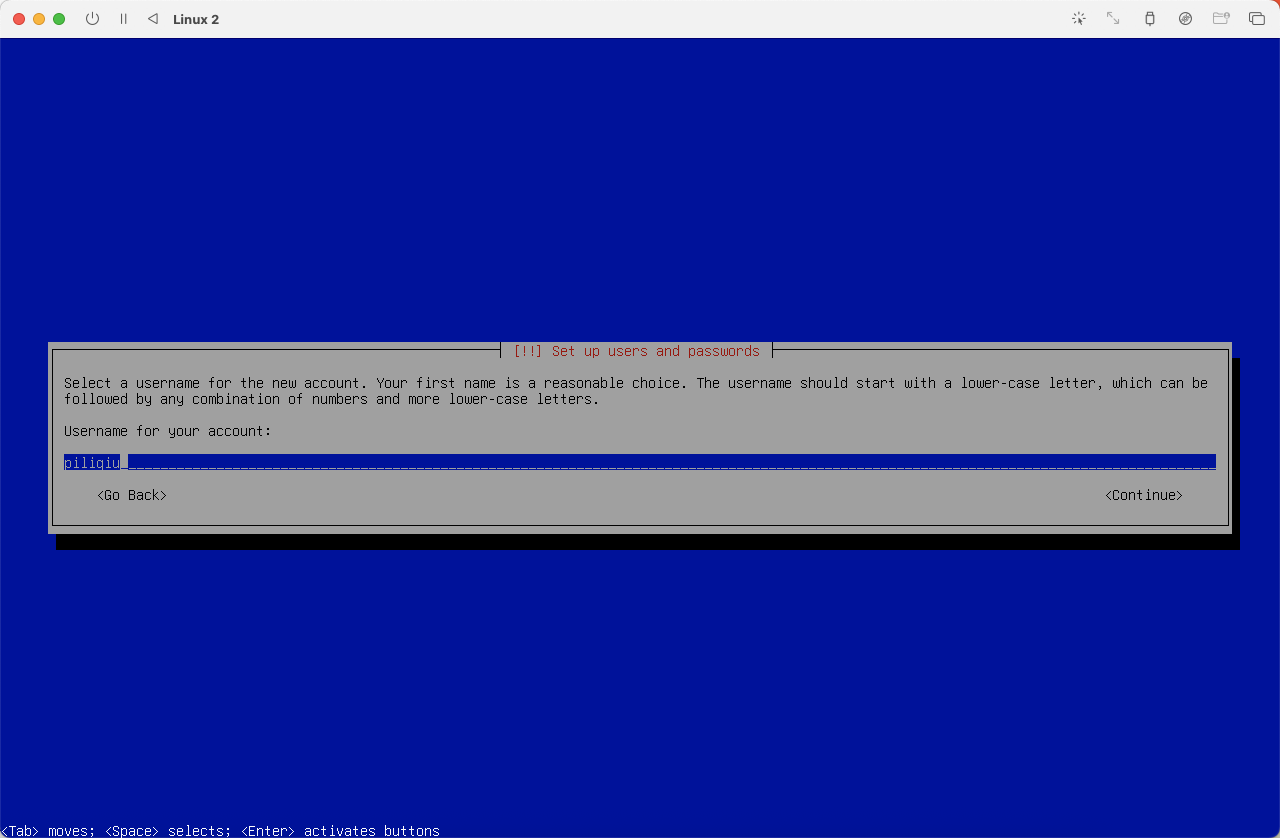
创建普通用户,本文设置为 piliqiu
 (
(图20)
 (
(图21)
设置普通用户密码
 (
(图22)
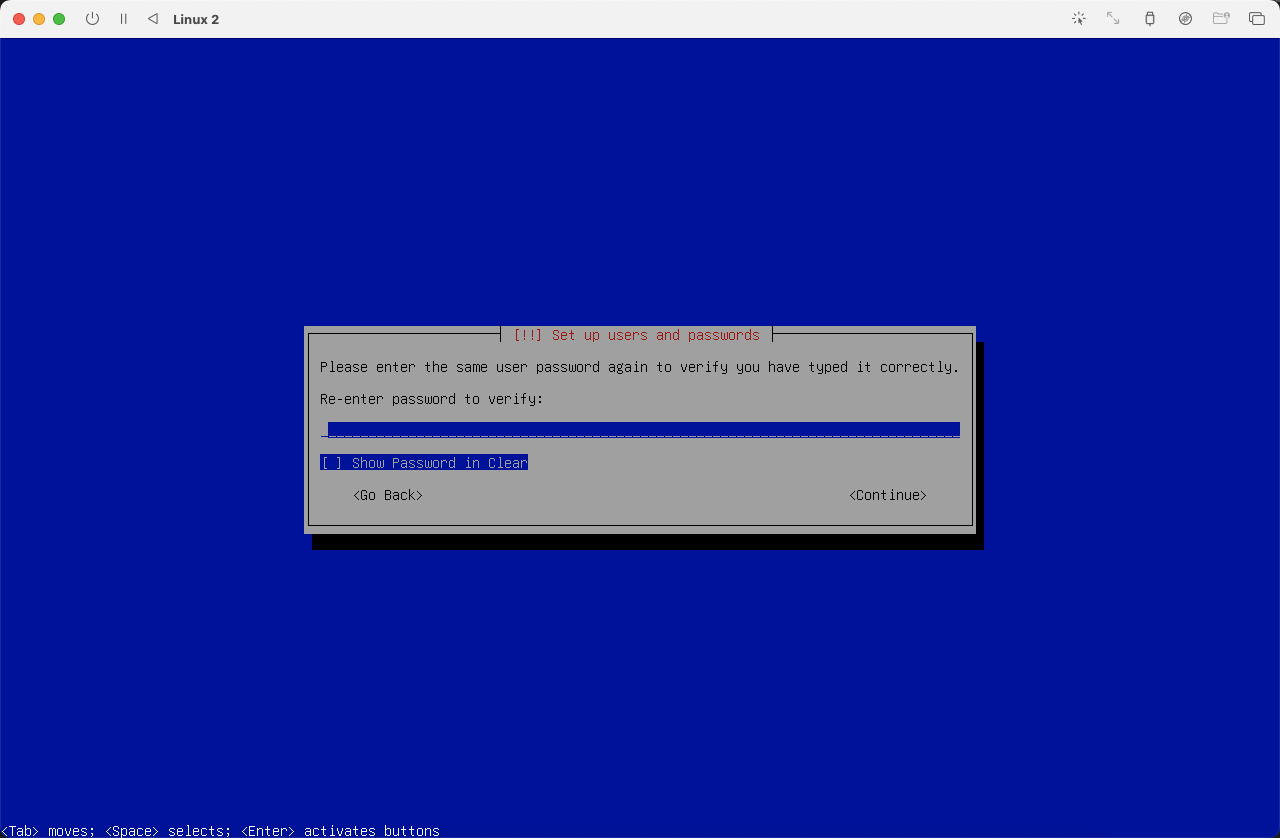
确认普通用户密码
 (
(图23)
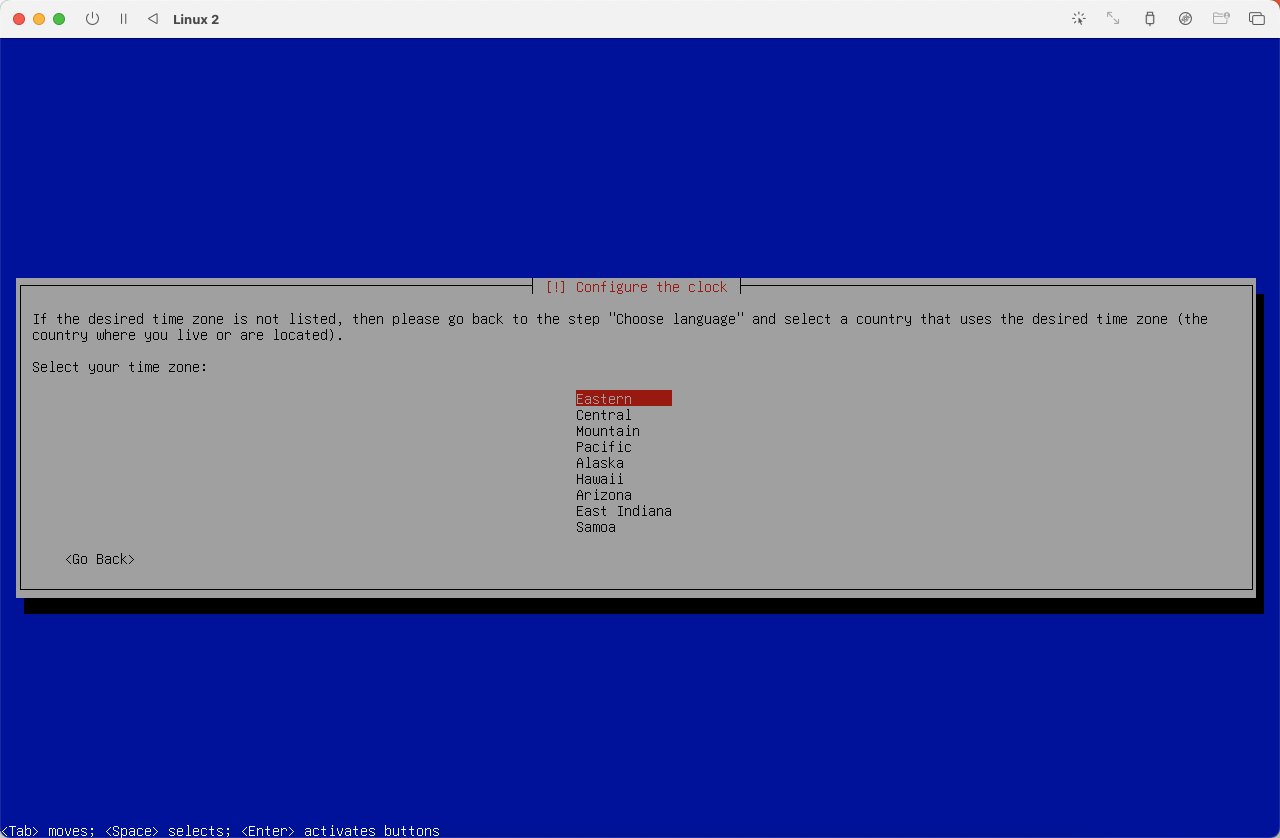
选择时区,选择 Eastern,系统时区和时间可以在系统安装完毕后自行设置。
 (
(图24)
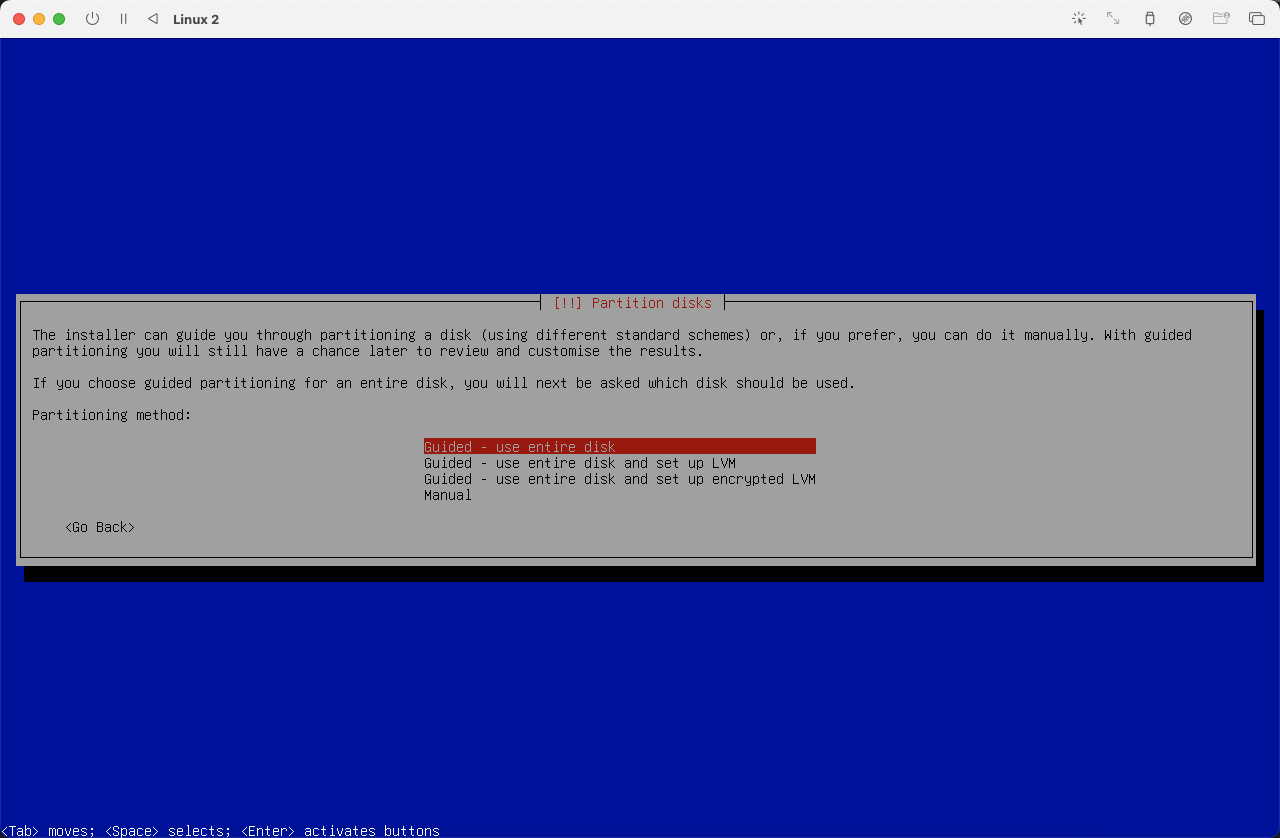
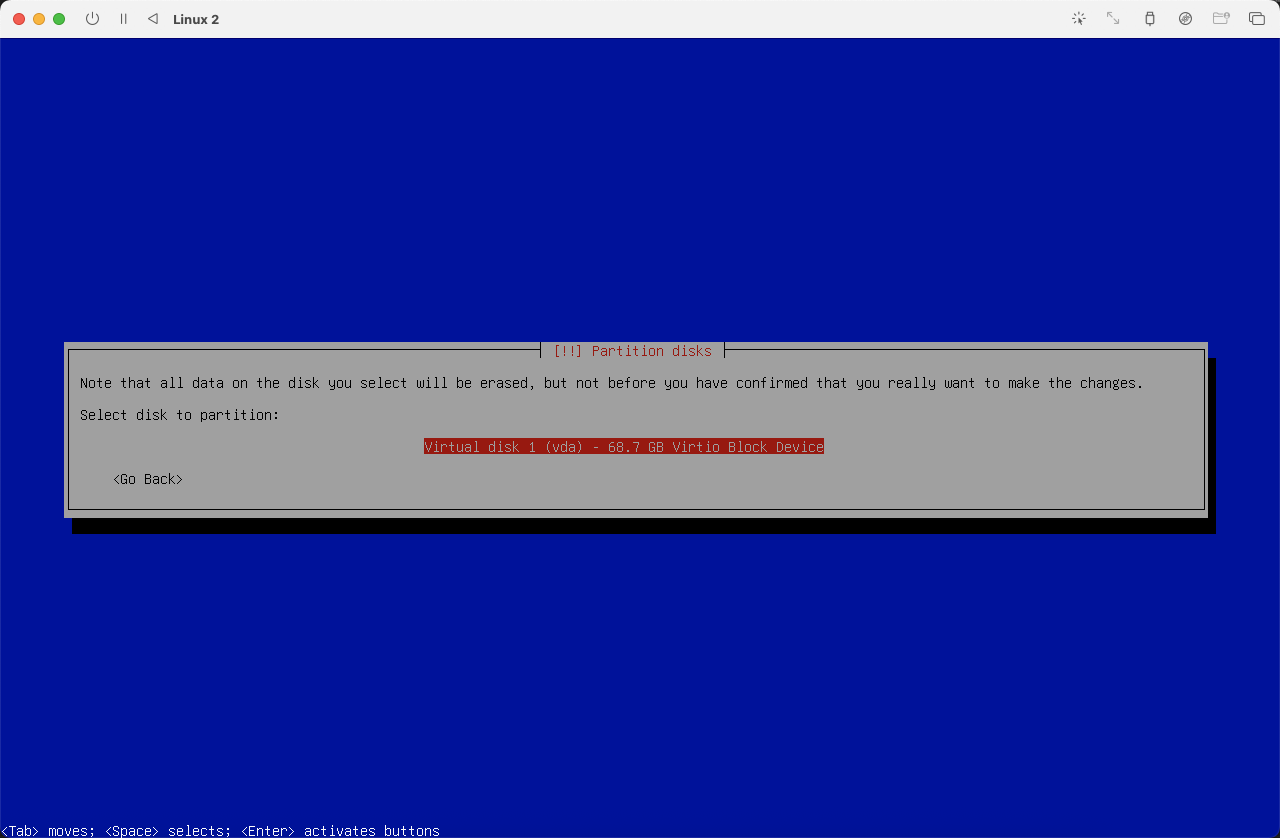
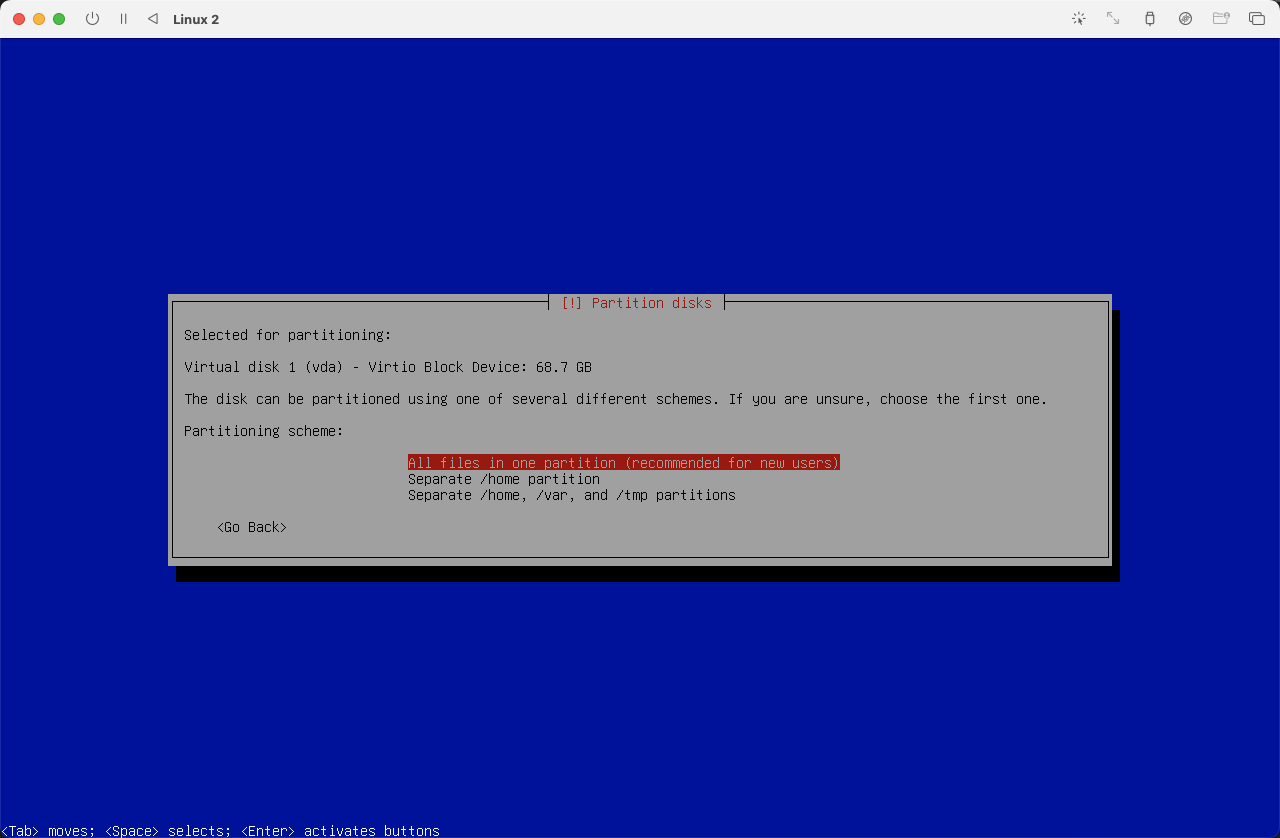
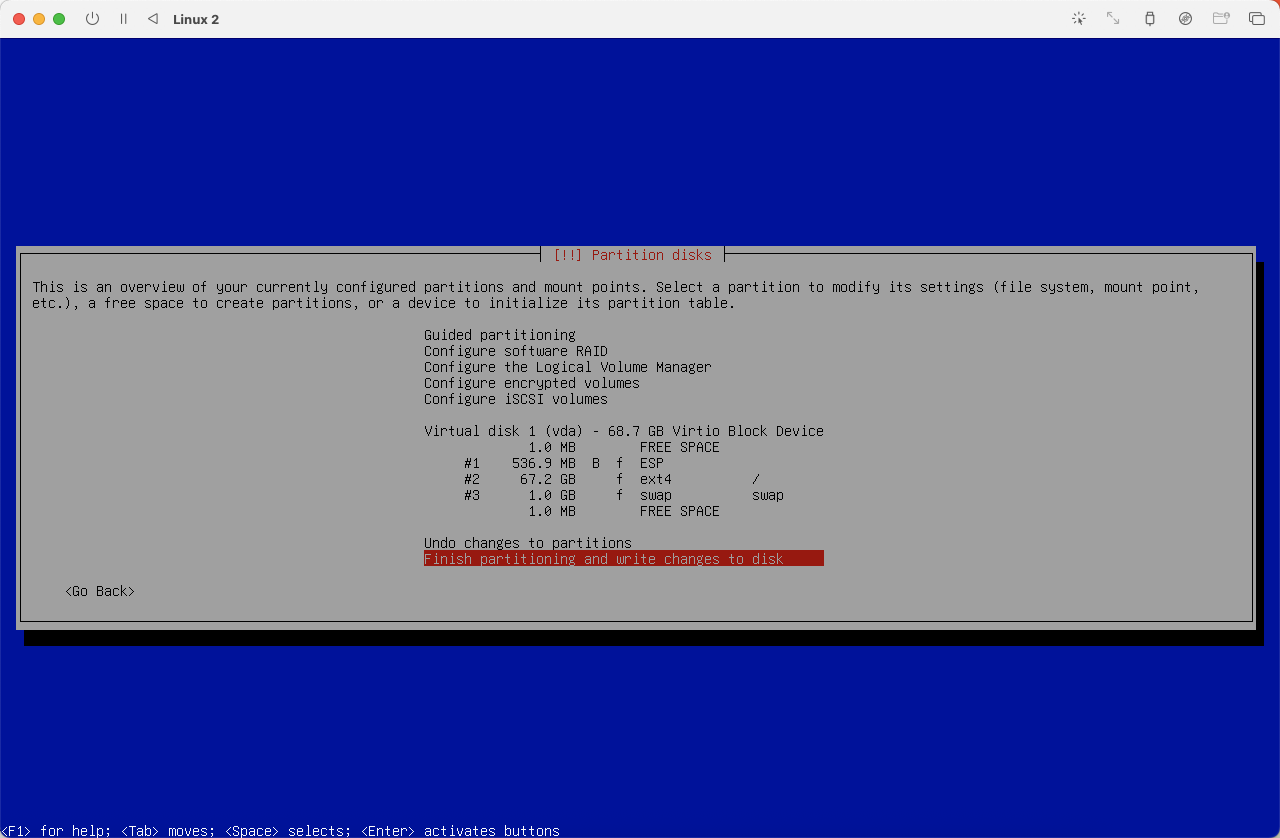
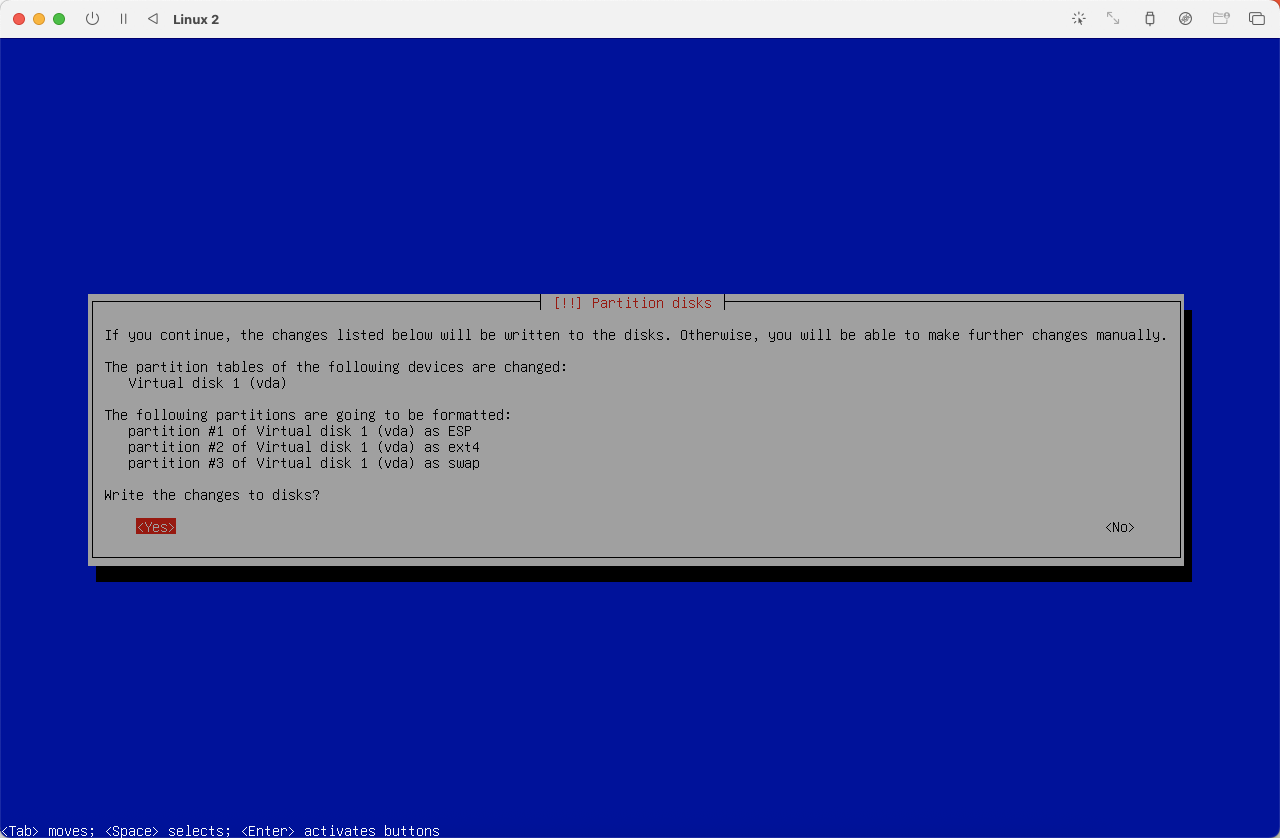
进行硬盘分区,如果自身没有特殊需求默认即可。
 (
(图25)
 (
(图26)
 (
(图27)
 (
(图28)
 (
(图29)
 (
(图30)
 (
(图31)
 (
(图32)
 (
(图33)
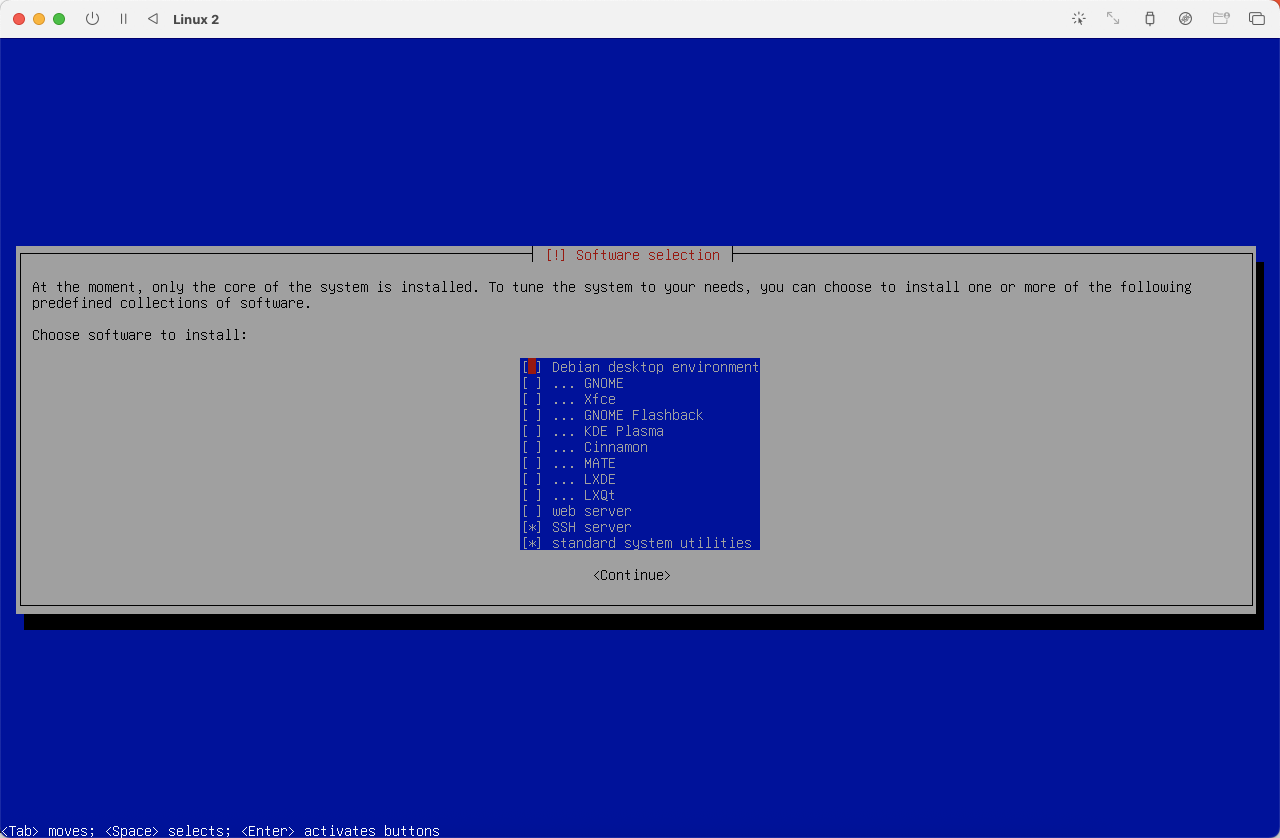
不打算安装图形界面,选择最后一项即可,为了远程方便同时选择了 SSH 组件
 (
(图34)
安装完成重启
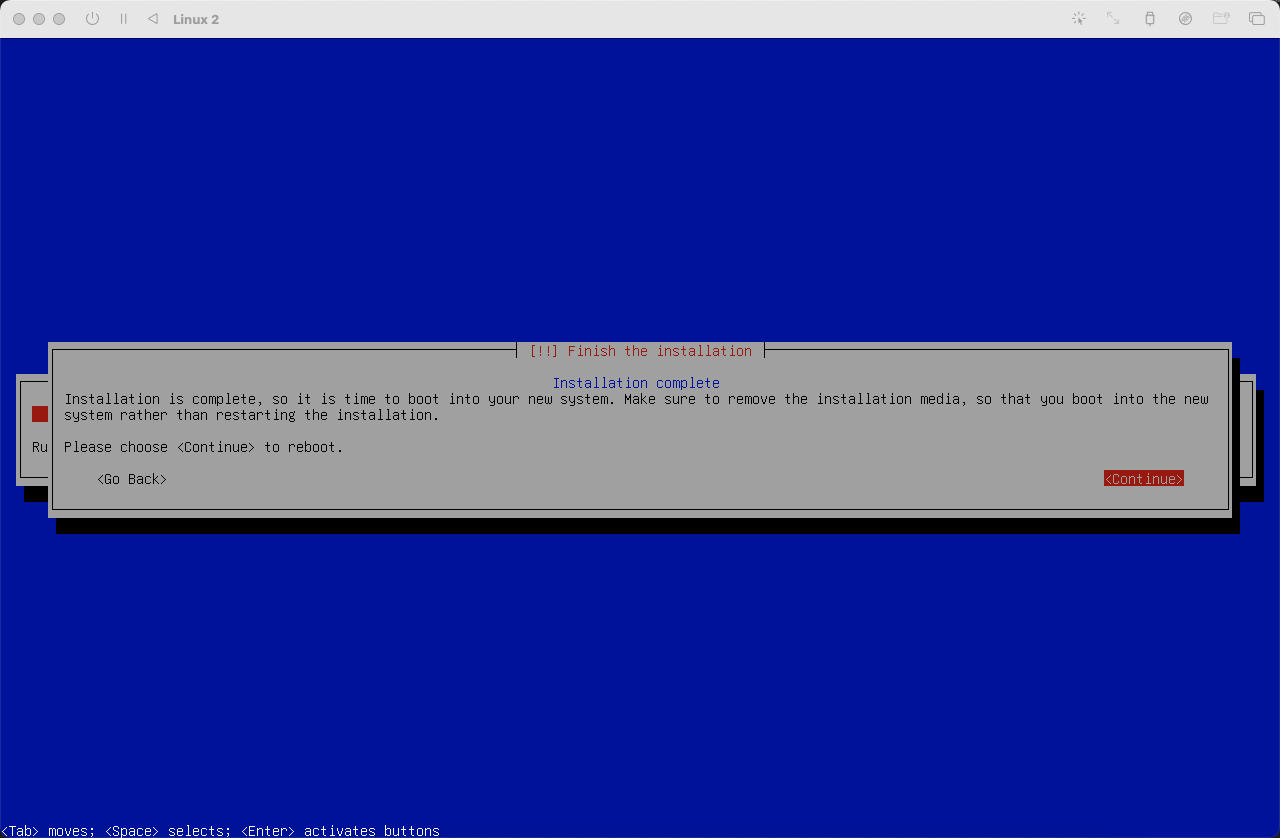 (
(图35)
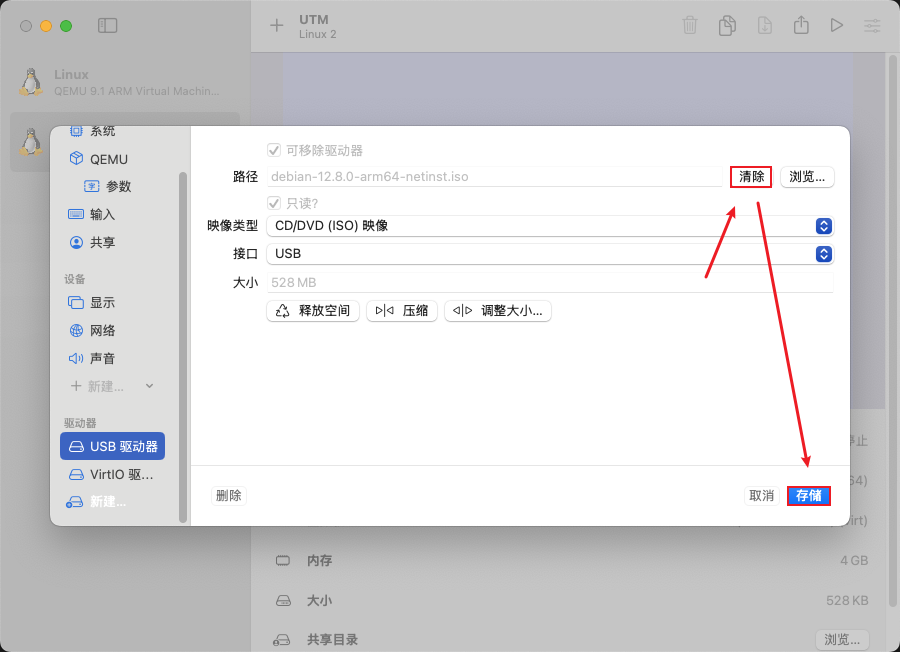
清除 usb 驱动器,不再使用 usb 中的系统启动,使用已经安装好的系统启动。
 (
(图36)
 (
(图37)
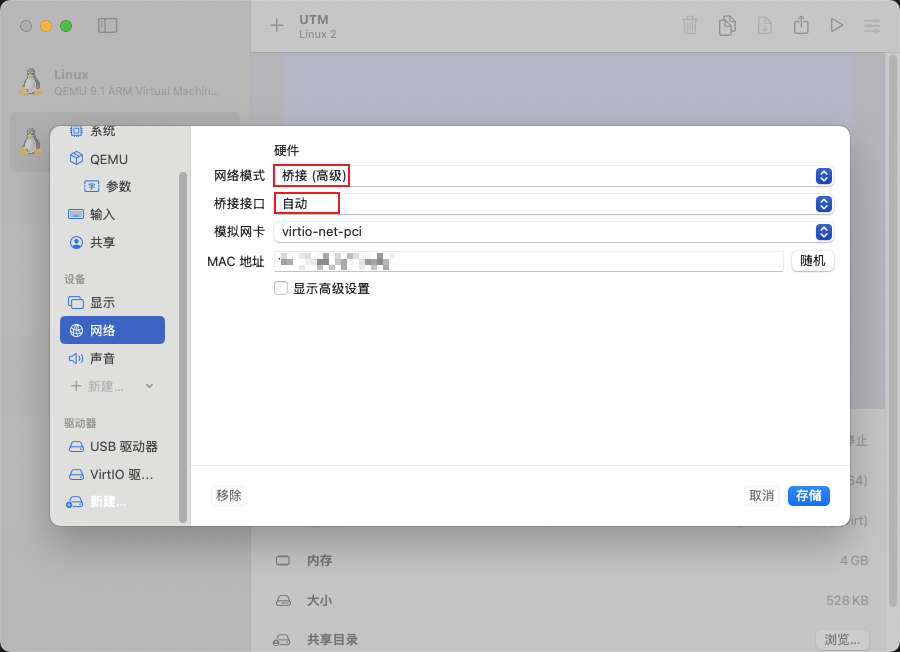
网络改为桥接,接口每个都试一下,那个可以上网,就用那个接口。
 (
(图38)
在 MacOS 系统中,无法将复制的内容粘贴到通过 UTM 虚拟机运行的 Debian 系统内。目前使用 WindTerm 通过 SSH 连接至 Debian 系统。
通过在 Debian 中执行 ip addr show 命令获取其 IPv4 地址,再使用 SSH 工具进行远程连接。
3.安装Docker环境
通过 Docker 的 APT 仓库安装
在开始前,先设置代理
1
2
3
|
# 只在本次会话生效
export http_proxy=http://IP:端口
export https_proxy=http://IP:端口
|
3.1 查看 Codename
1
2
3
4
5
6
7
8
|
# 查看你的 Debian 版本代号
lsb_release -a

# 输出示例
Distributor ID: Debian
Description:    Debian GNU/Linux 12 (bookworm)
Release:        12
Codename:       bookworm
|
📌 关键点:你需要记住 Codename(如 bookworm, bullseye),这是添加 Docker 软件源时要用到的。
常见 Debian 版本代号对照表
| Debian 版本 |
代号(Codename) |
| Debian 12 |
bookworm |
| Debian 11 |
bullseye |
| Debian 10 |
buster |
3.2 安装必要依赖工具
1
|
sudo apt install -y ca-certificates curl gnupg lsb-release
|
解释:
- ca-certificates: 用于 HTTPS 证书验证
- curl: 下载文件
- gnupg: 导入 GPG 密钥
- lsb-release: 获取发行版信息
3.3 Docker官方GPG公钥
创建密钥环目录并导入密钥:
1
2
|
sudo mkdir -p /etc/apt/keyrings
curl -fsSL https://download.docker.com/linux/debian/gpg | sudo gpg --dearmor -o /etc/apt/keyrings/docker.gpg
|
3.4 添加Docker的APT软件源
使用前面查到的 Codename(比如 bookworm)来构建源地址。
执行以下命令(自动获取 codename):
1
2
|
echo "deb [arch=$(dpkg --print-architecture) signed-by=/etc/apt/keyrings/docker.gpg] https://download.docker.com/linux/debian $(lsb_release -cs) stable" | \
sudo tee /etc/apt/sources.list.d/docker.list > /dev/null
|
如果你是 Debian 12 (bookworm),这条命令就会写入:
1
|
deb [arch=amd64 signed-by=/etc/apt/keyrings/docker.gpg] https://download.docker.com/linux/debian bookworm stable
|
3.5 再次更新APT包索引
因为我们刚刚添加了新的软件源,必须重新加载。
3.6 安装Docker引擎及相关组件
1
|
sudo apt install -y docker-ce docker-ce-cli containerd.io docker-buildx-plugin docker-compose-plugin
|
各组件说明:
| 组件 |
作用 |
| docker-ce |
Docker 社区版主程序 |
| docker-ce-cli |
Docker 命令行工具 |
| containerd.io |
容器运行时 |
| docker-buildx-plugin |
支持多平台构建 |
| docker-compose-plugin |
提供 docker compose 命令(v2) |
3.7 验证Docker是否安装成功
1
2
3
4
5
|
# 检查版本
sudo docker --version

# 正常输出类似
Docker version 25.0.5, build xxxxxxx
|
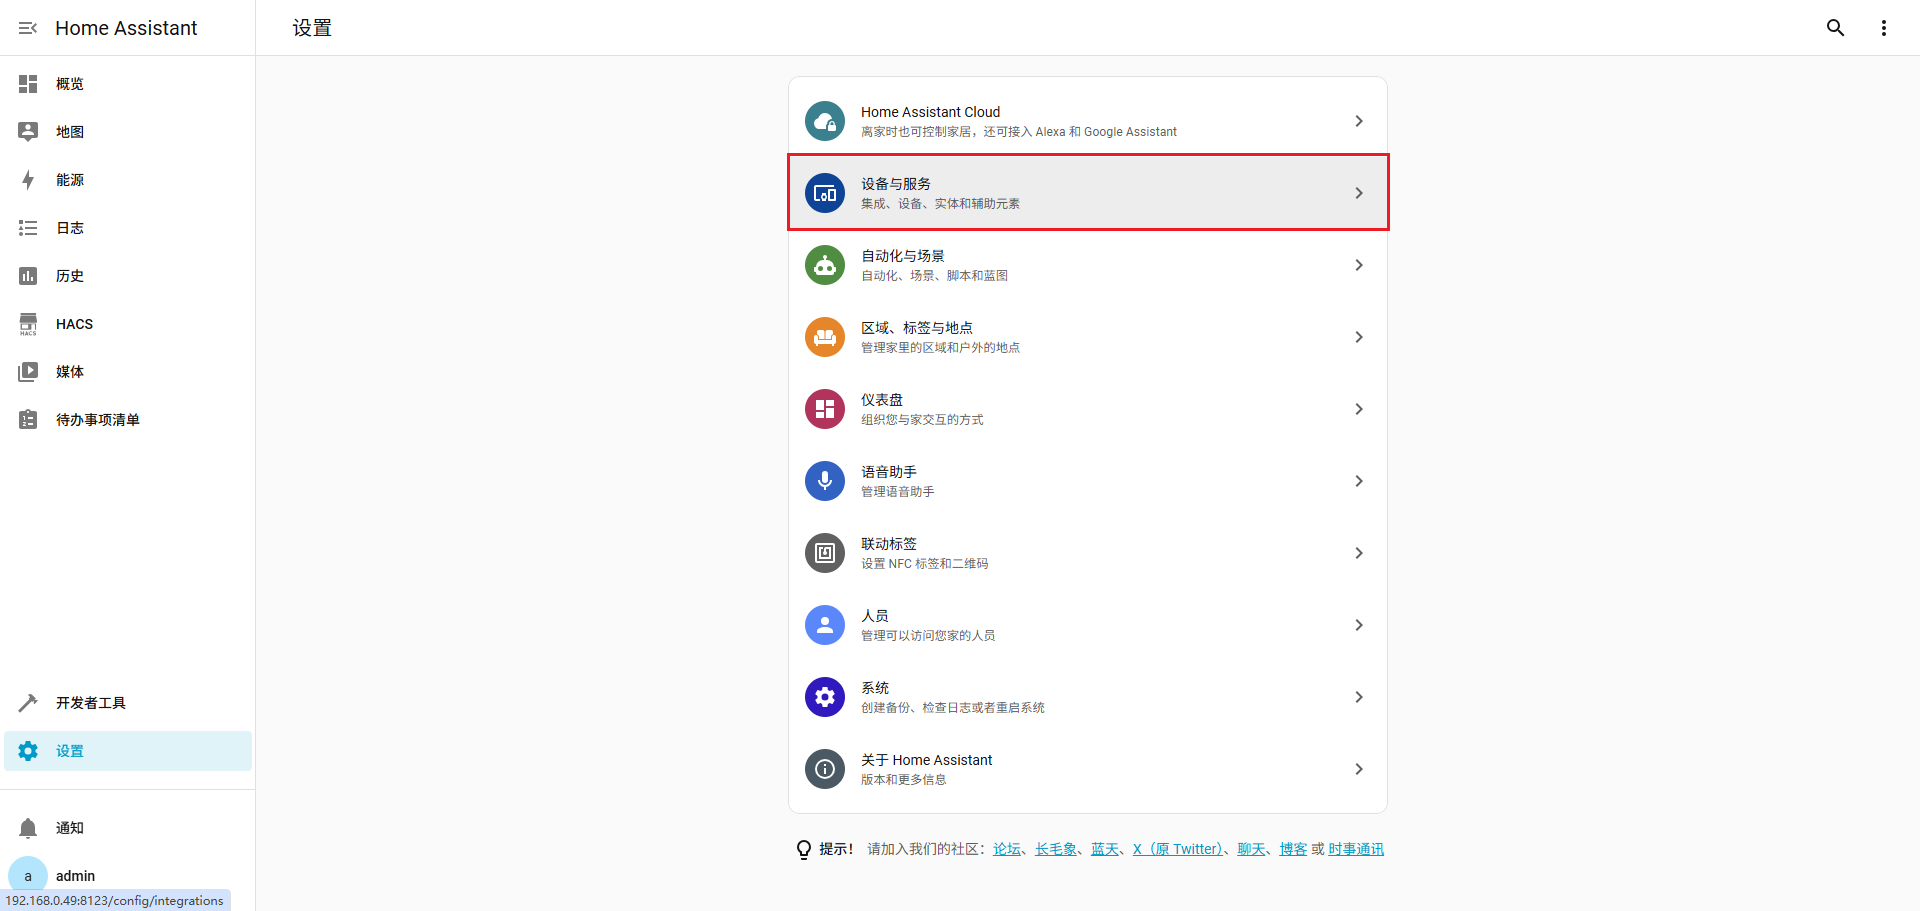
4.安装Homeassistant
1
2
3
4
5
6
7
8
9
|
docker run -d \
  --name homeassistant \
  --privileged \
  --restart=unless-stopped \
  -e TZ=Asia/Shanghai \
  -v /PATH_TO_YOUR_CONFIG:/config \
  -v /run/dbus:/run/dbus:ro \
  --network=host \
  ghcr.io/home-assistant/home-assistant:stable
|
📌 记得替换 /PATH_TO_YOUR_CONFIG 为你的实际配置路径,例如:
1
|
-v /home/piliqiu/homeassistant/config:/config
|
安装后,访问 http://ip:8123 打开 HomeAssistant 初始化页面
如果用 Chrome 浏览器打不开,换成 Safari 浏览器就可以
解决:设置 -> 隐私与安全性 -> 本地网络 -> Google Chrome
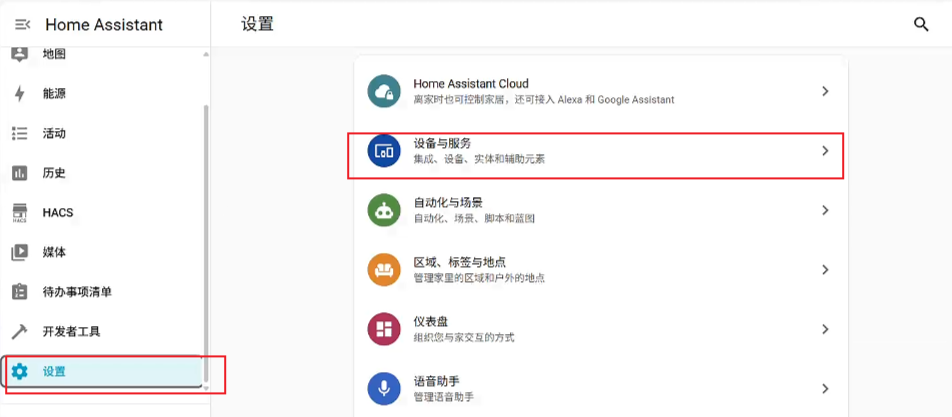
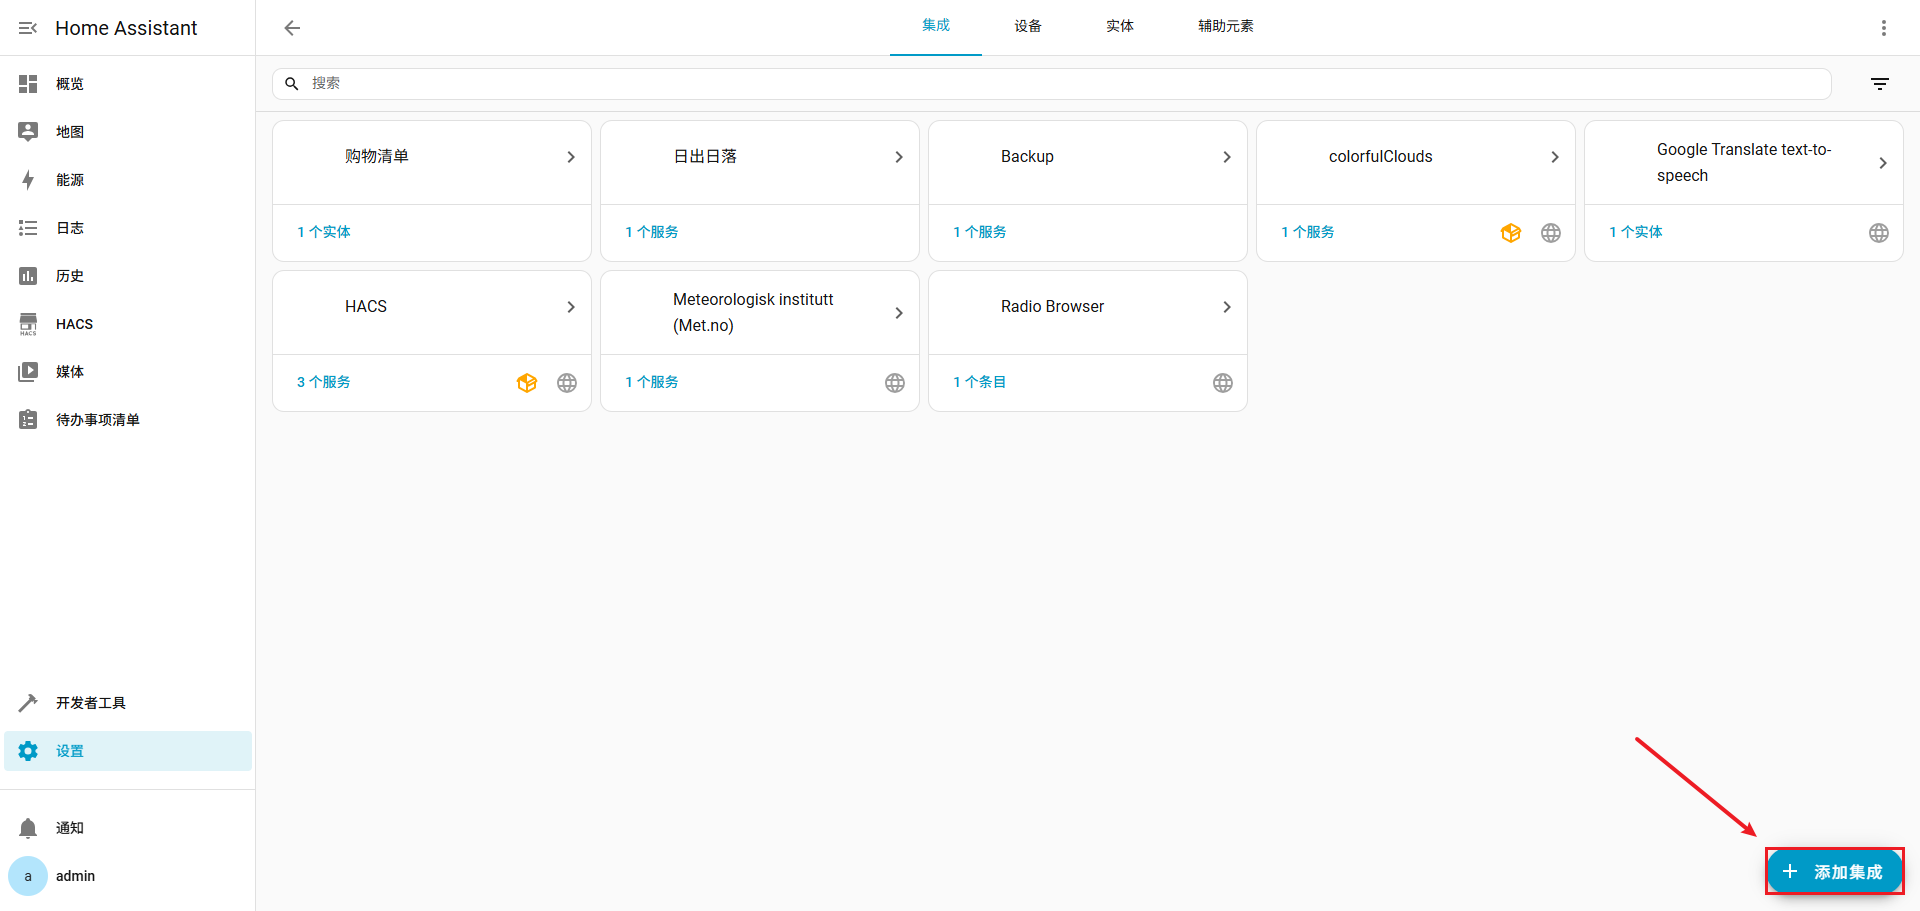
HomeAssistant插件
国区应用商店(了解)
 1
 2
 3
 4
 5
 6
 7
 8
 9
10
11
12
13
14
15
16
|
# 下载地址
https://get.hassbox.cn/hassbox_store.zip

# 进到 custom_components 目录下
cd homeassistant/config/custom_components/

# 创建文件夹
mkdir hassbox_store

# 进入目录
cd hassbox_store

# 上传压缩包解压
unzip hassbox_store.zip

# 重启 HA 服务生效
|
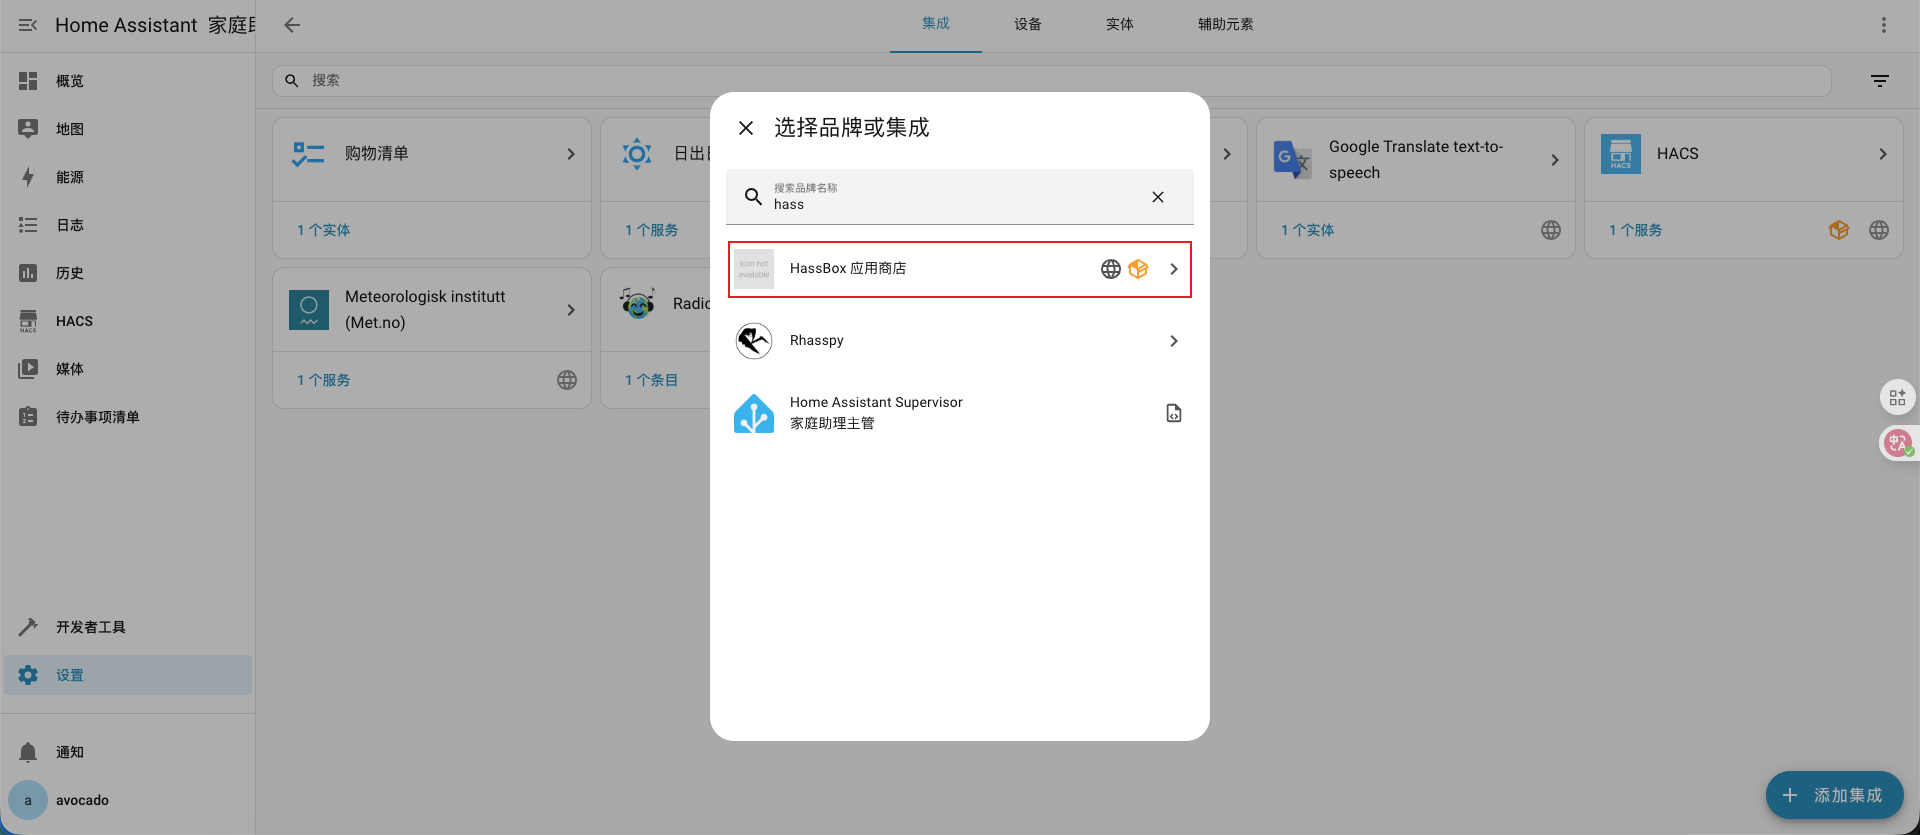
 (
(图39)
 (
(图40)
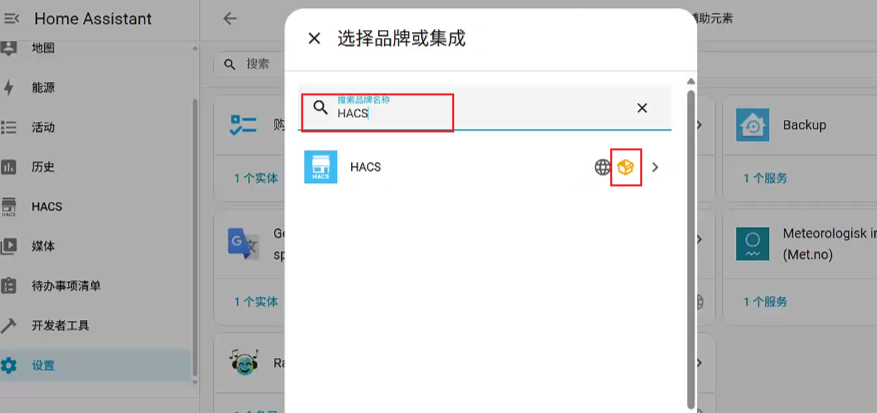
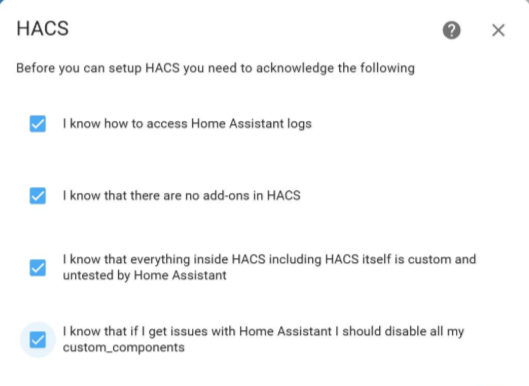
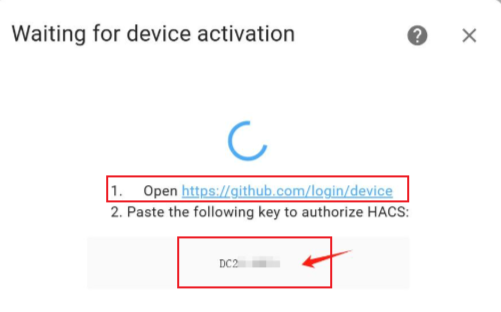
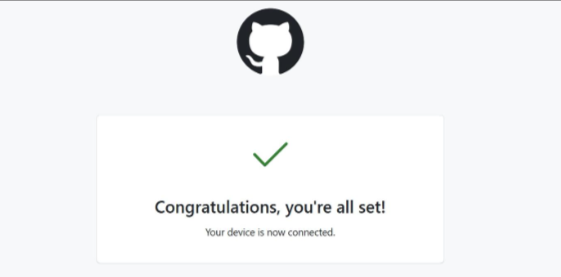
安装HACS
我映射的目录是 /home/piliqiu/homeassistant/config
 1
 2
 3
 4
 5
 6
 7
 8
 9
10
11
12
13
14
15
16
17
18
19
20
21
22
23
|
# 1. 进入 config 目录
cd /home/piliqiu/homeassistant/config

# 2. 创建 custom_components(如果还没有)
mkdir -p custom_components/hacs

# 3. 进入 hacs 目录
cd custom_components/hacs

# 4. 下载 HACS 最新版本
curl -sL https://github.com/hacs/integration/releases/latest/download/hacs.zip -o hacs.zip

# 5. 安装 unzip(如果未安装)
sudo apt update && sudo apt install unzip -y

# 6. 解压并清理
unzip hacs.zip
rm hacs.zip

# 7. 修复权限,确保容器能读取
chmod -R 777 /home/piliqiu/homeassistant/config/*

# 8. 安装后需要重启容器
|
 (
(图41)
 (
(图42)
 (
(图43)
 (
(图44)
 (
(图45)
 (
(图46)
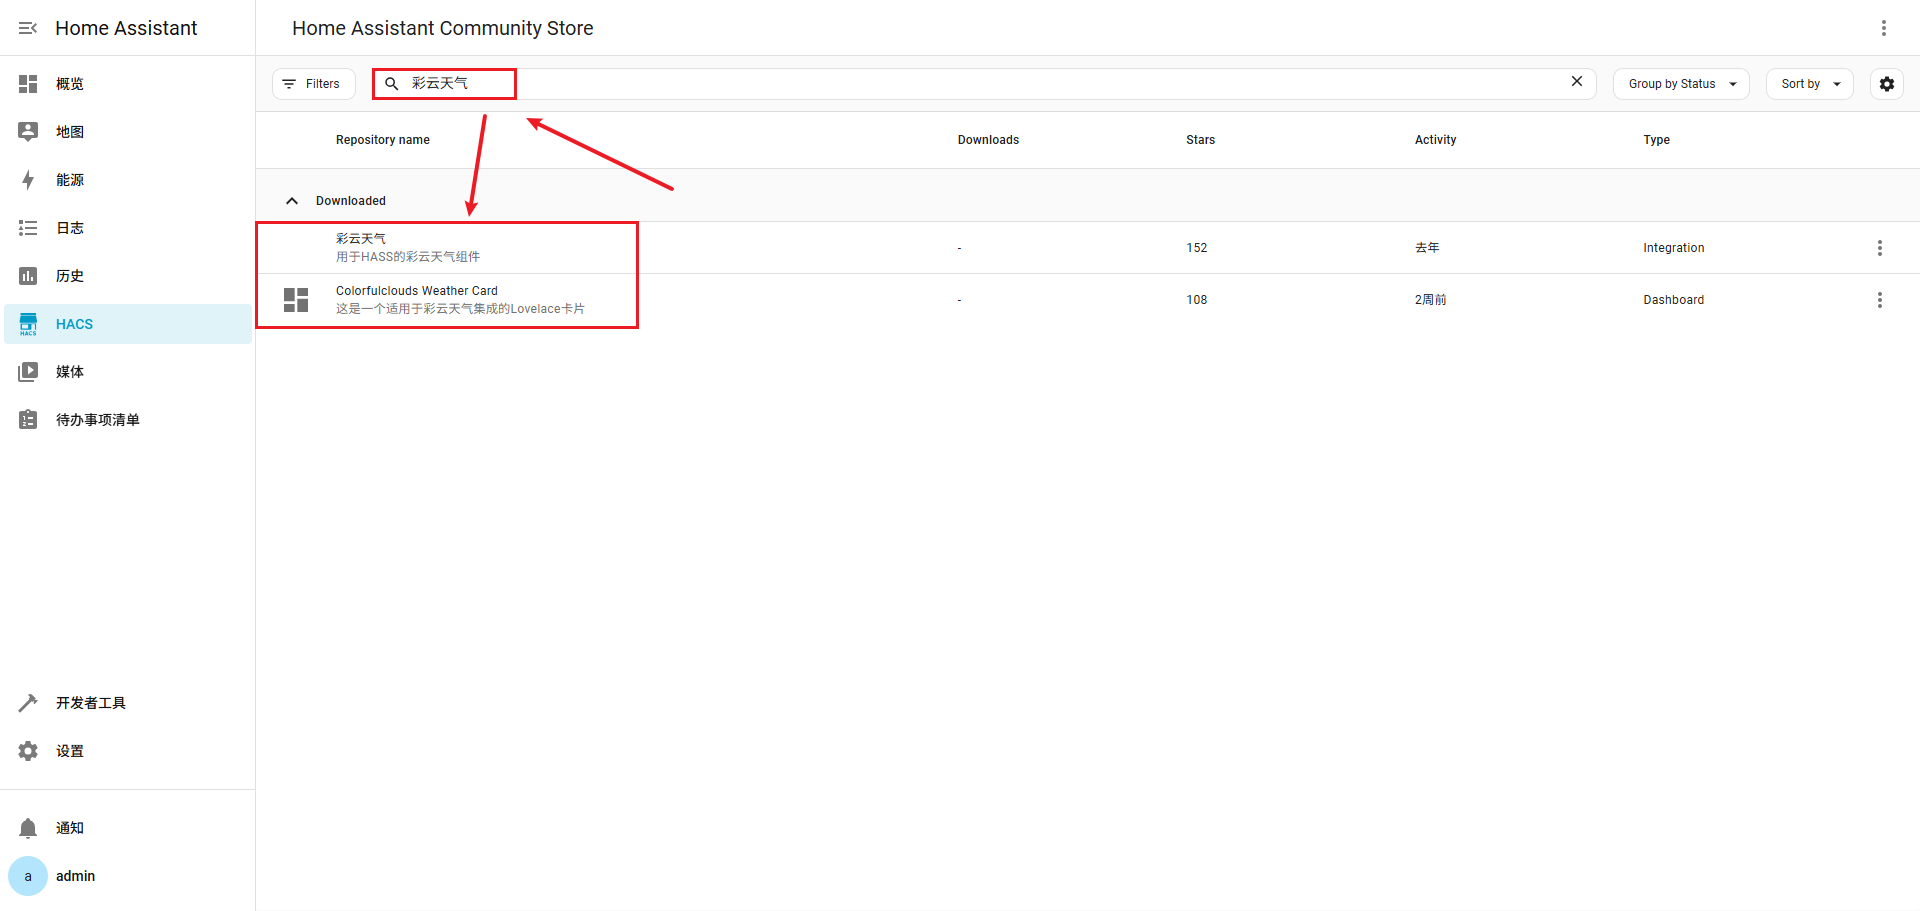
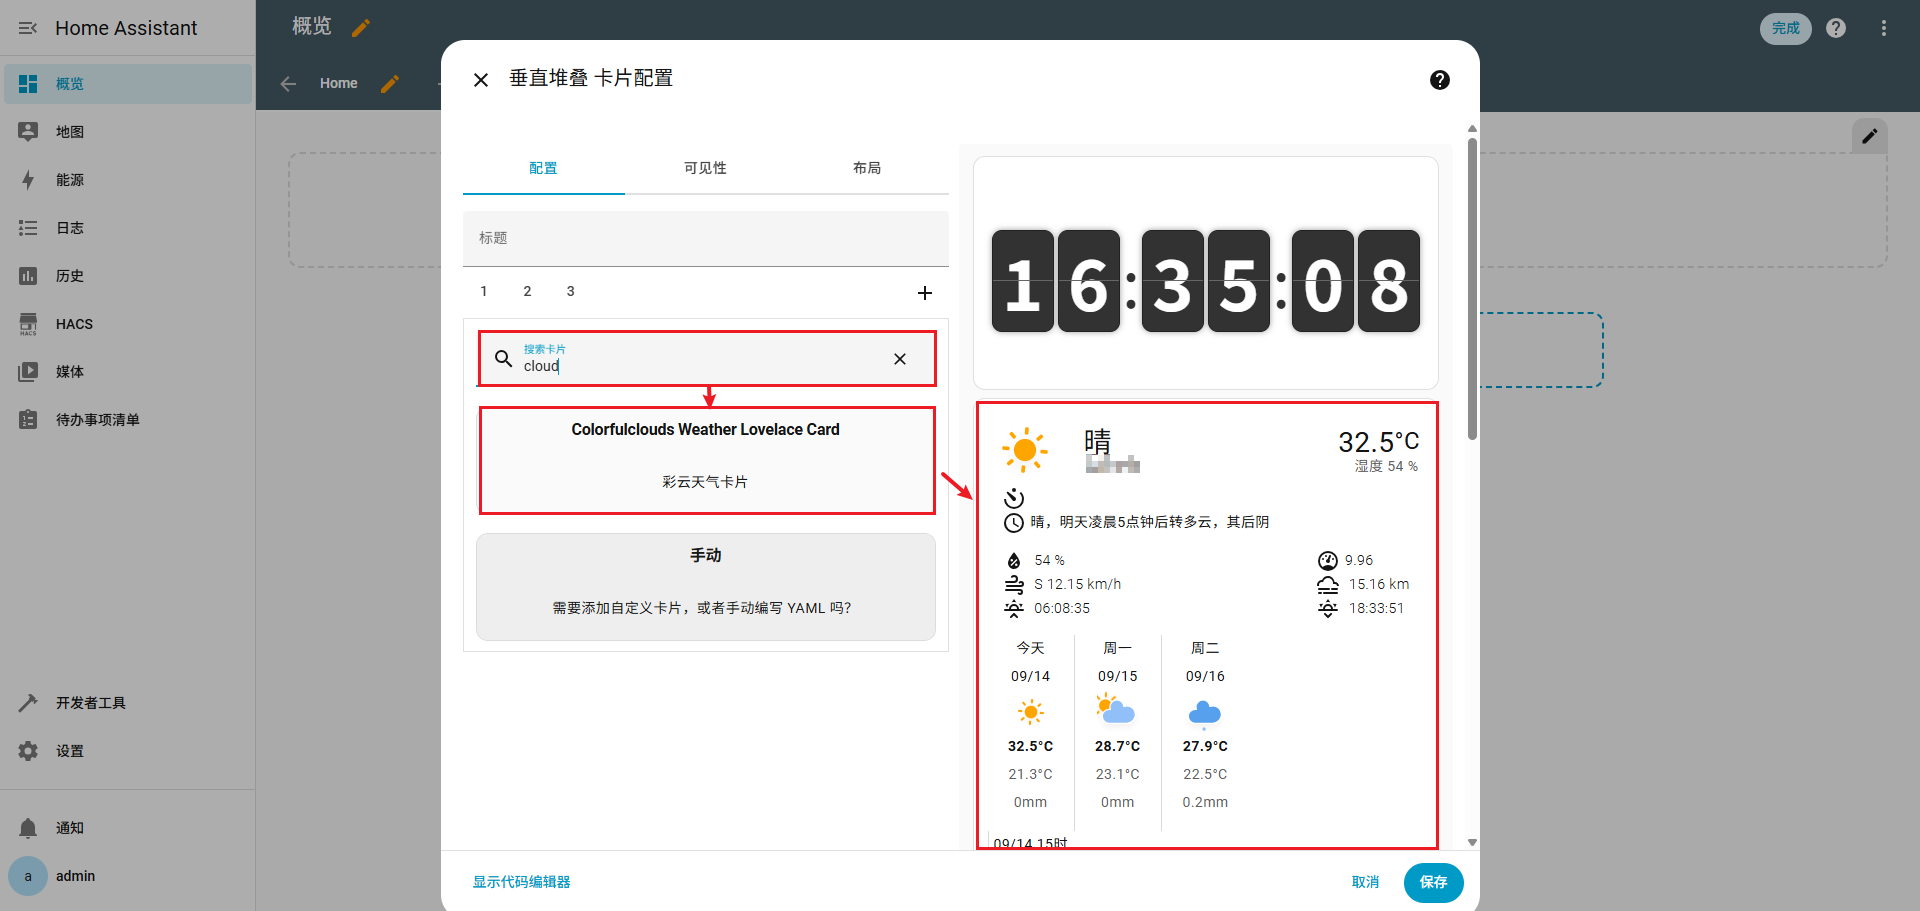
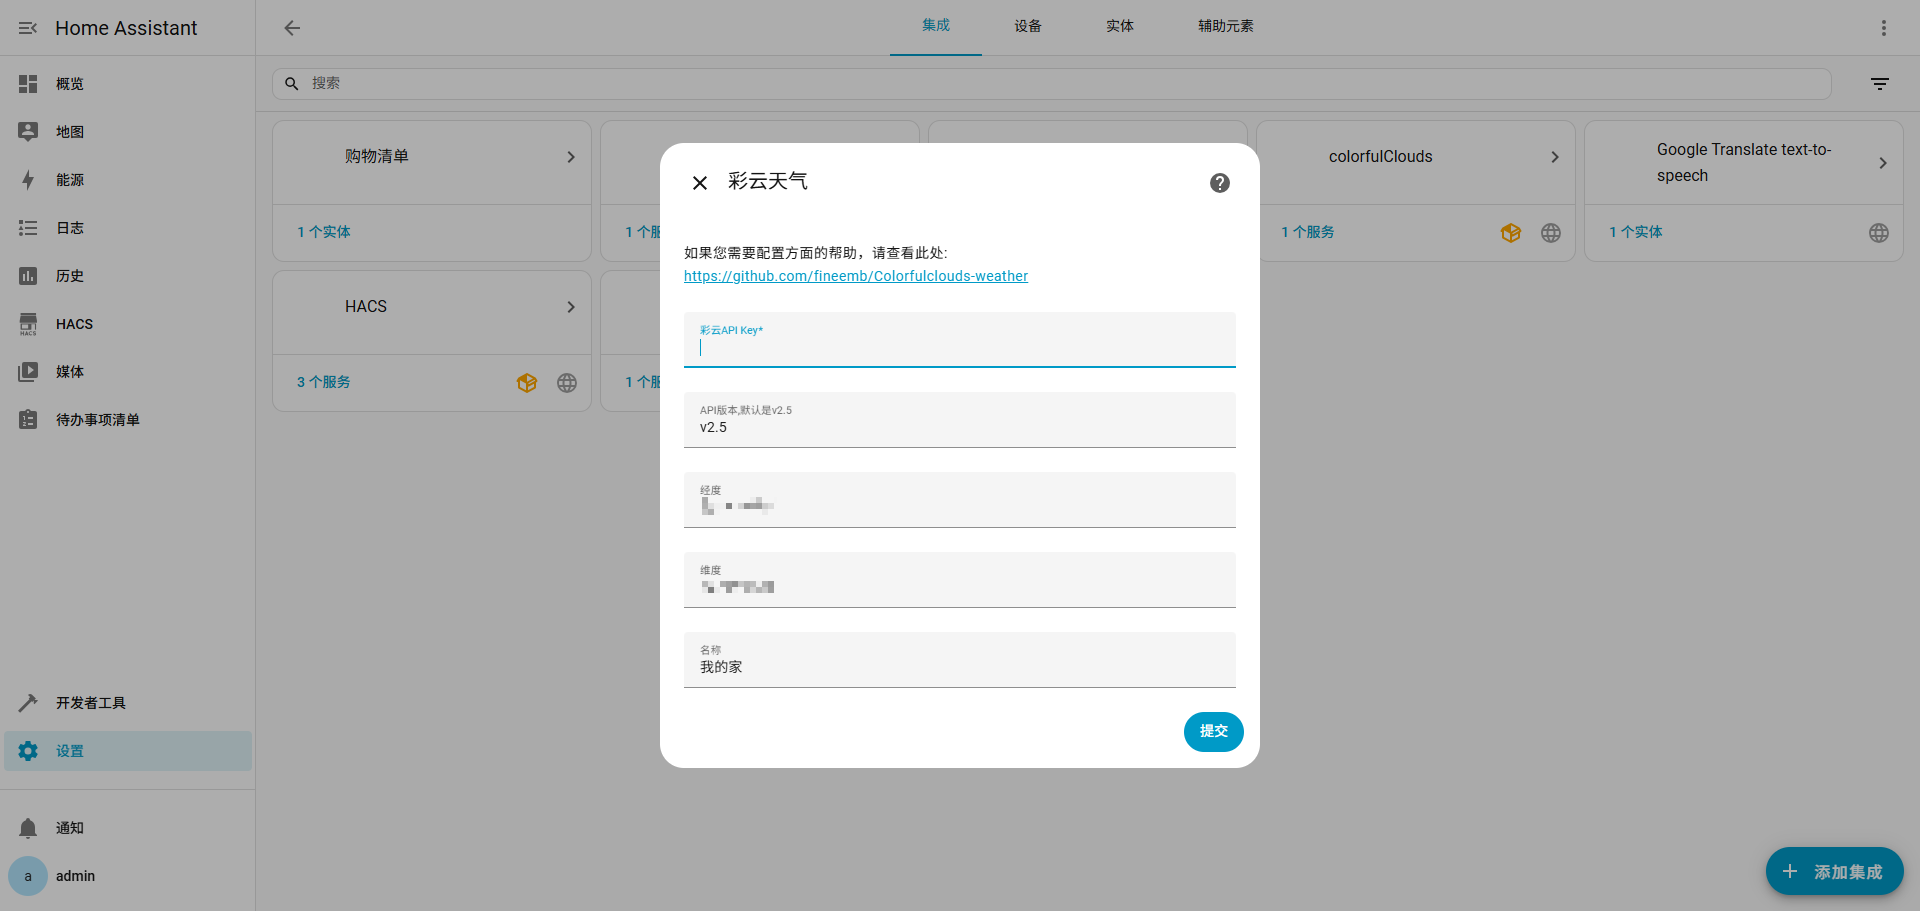
彩云天气
在 HACS 中搜索 彩云天气,安装 彩云天气 和 Colorfulclouds Weather Card
 (
(图47)
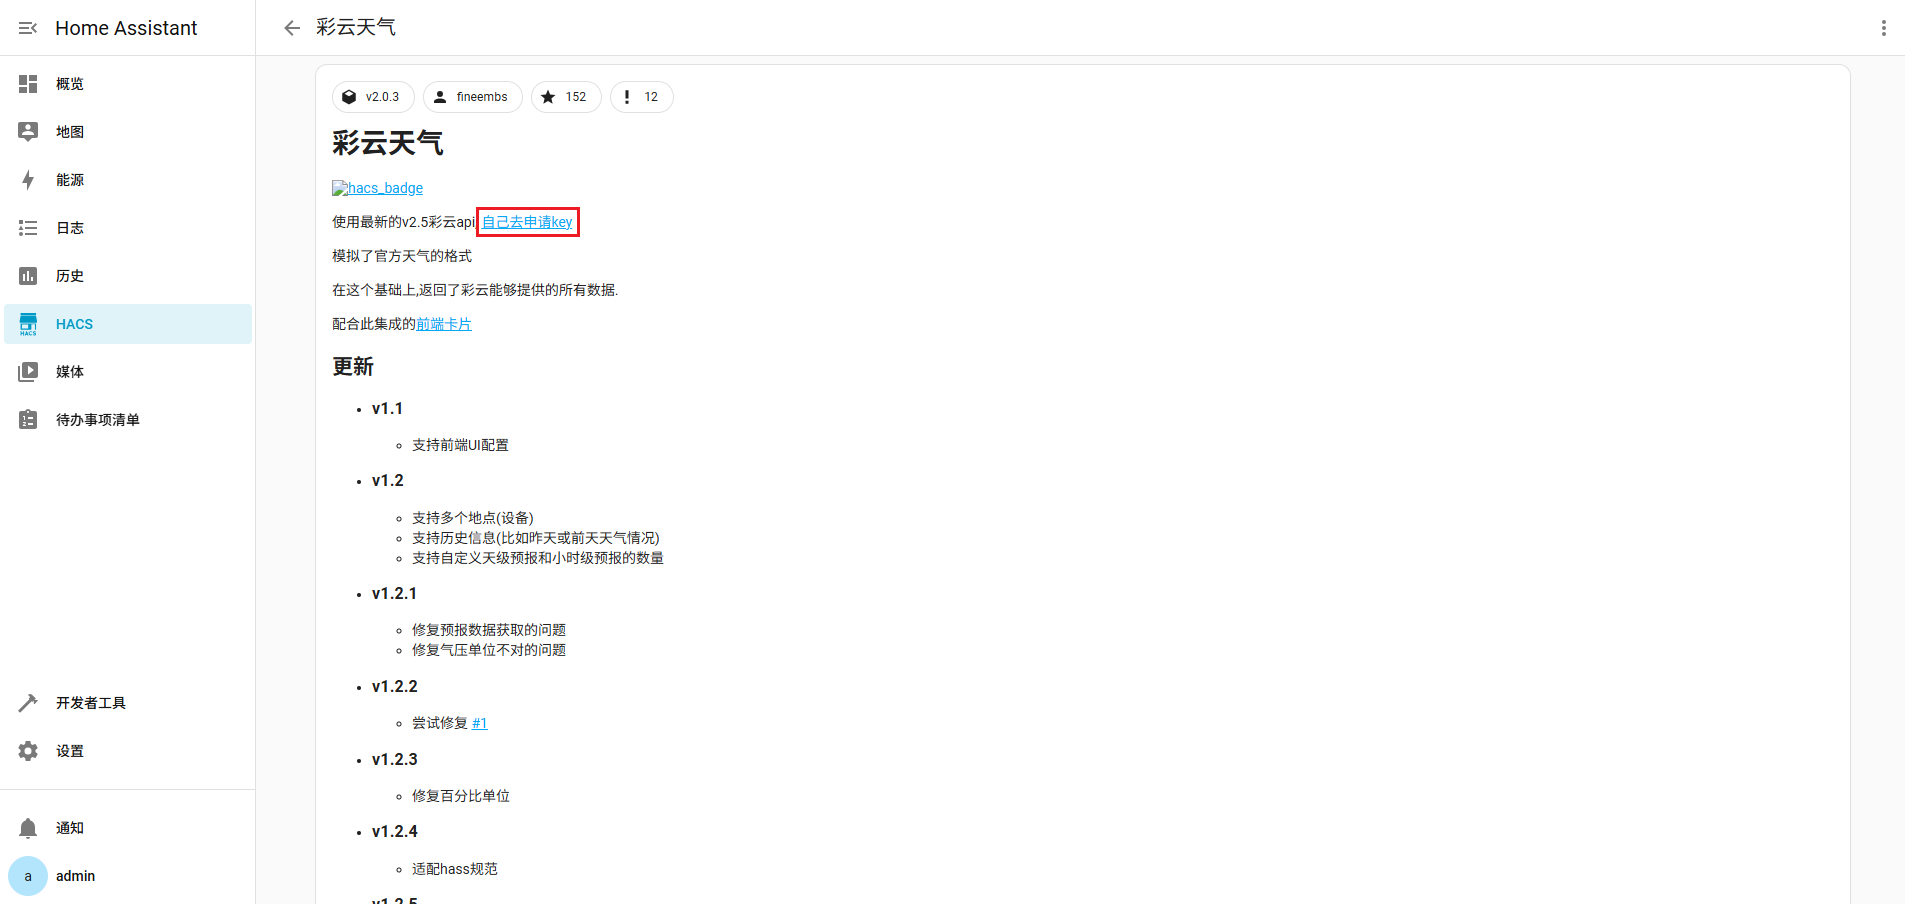
申请 彩云天气 的 key
 (
(图48)
 (
(图49)
 (
(图50)
 (
(图51)
 (
(图52)
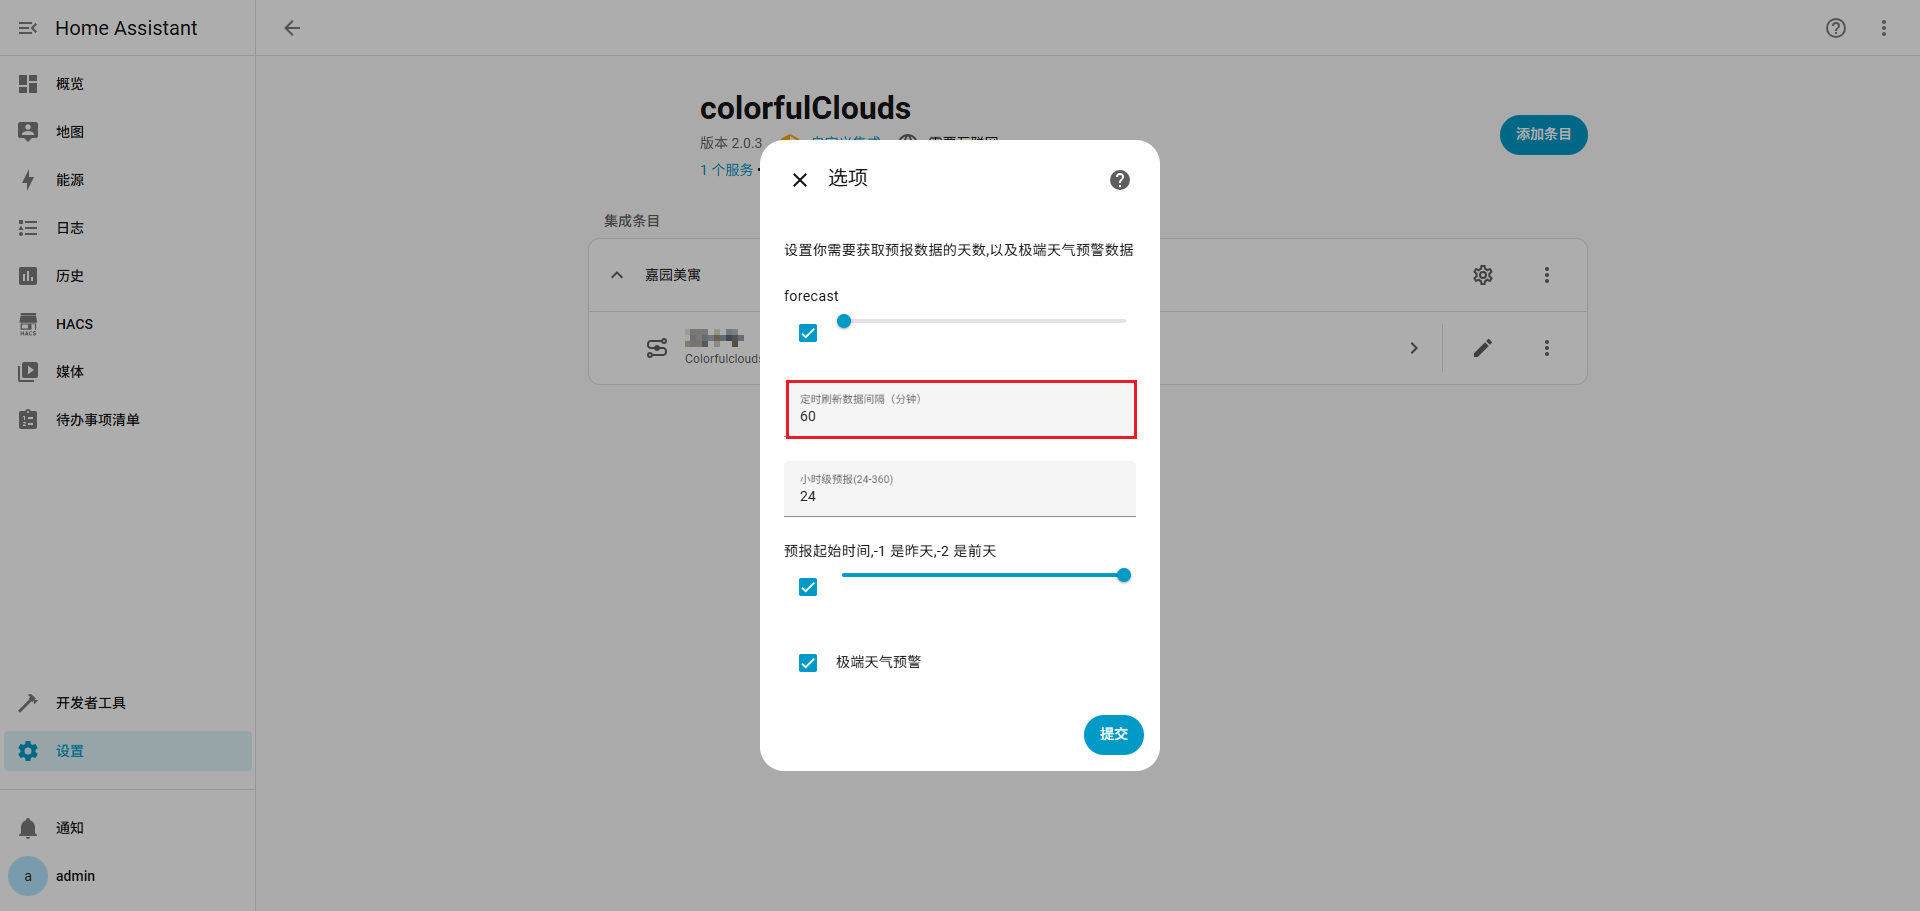
免费用户是 1000 次,修改数据刷新间隔,延长使用时间,全部配置后,重启 homeassistant
 (
(图53)
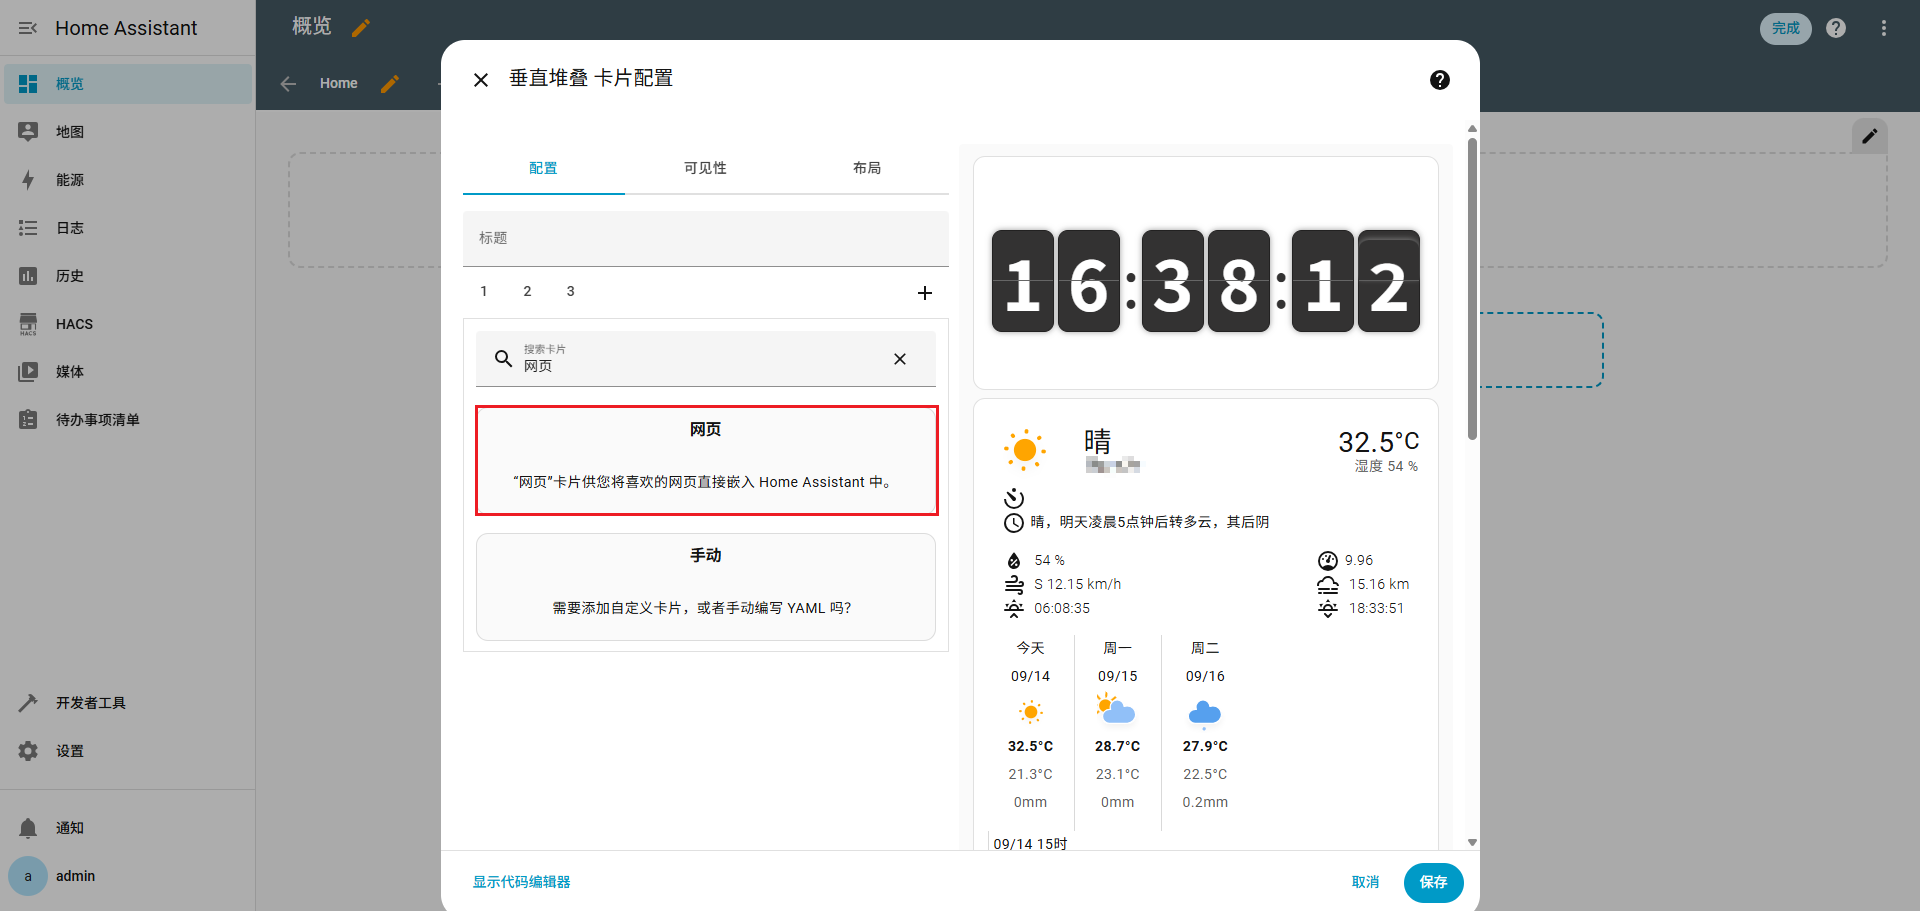
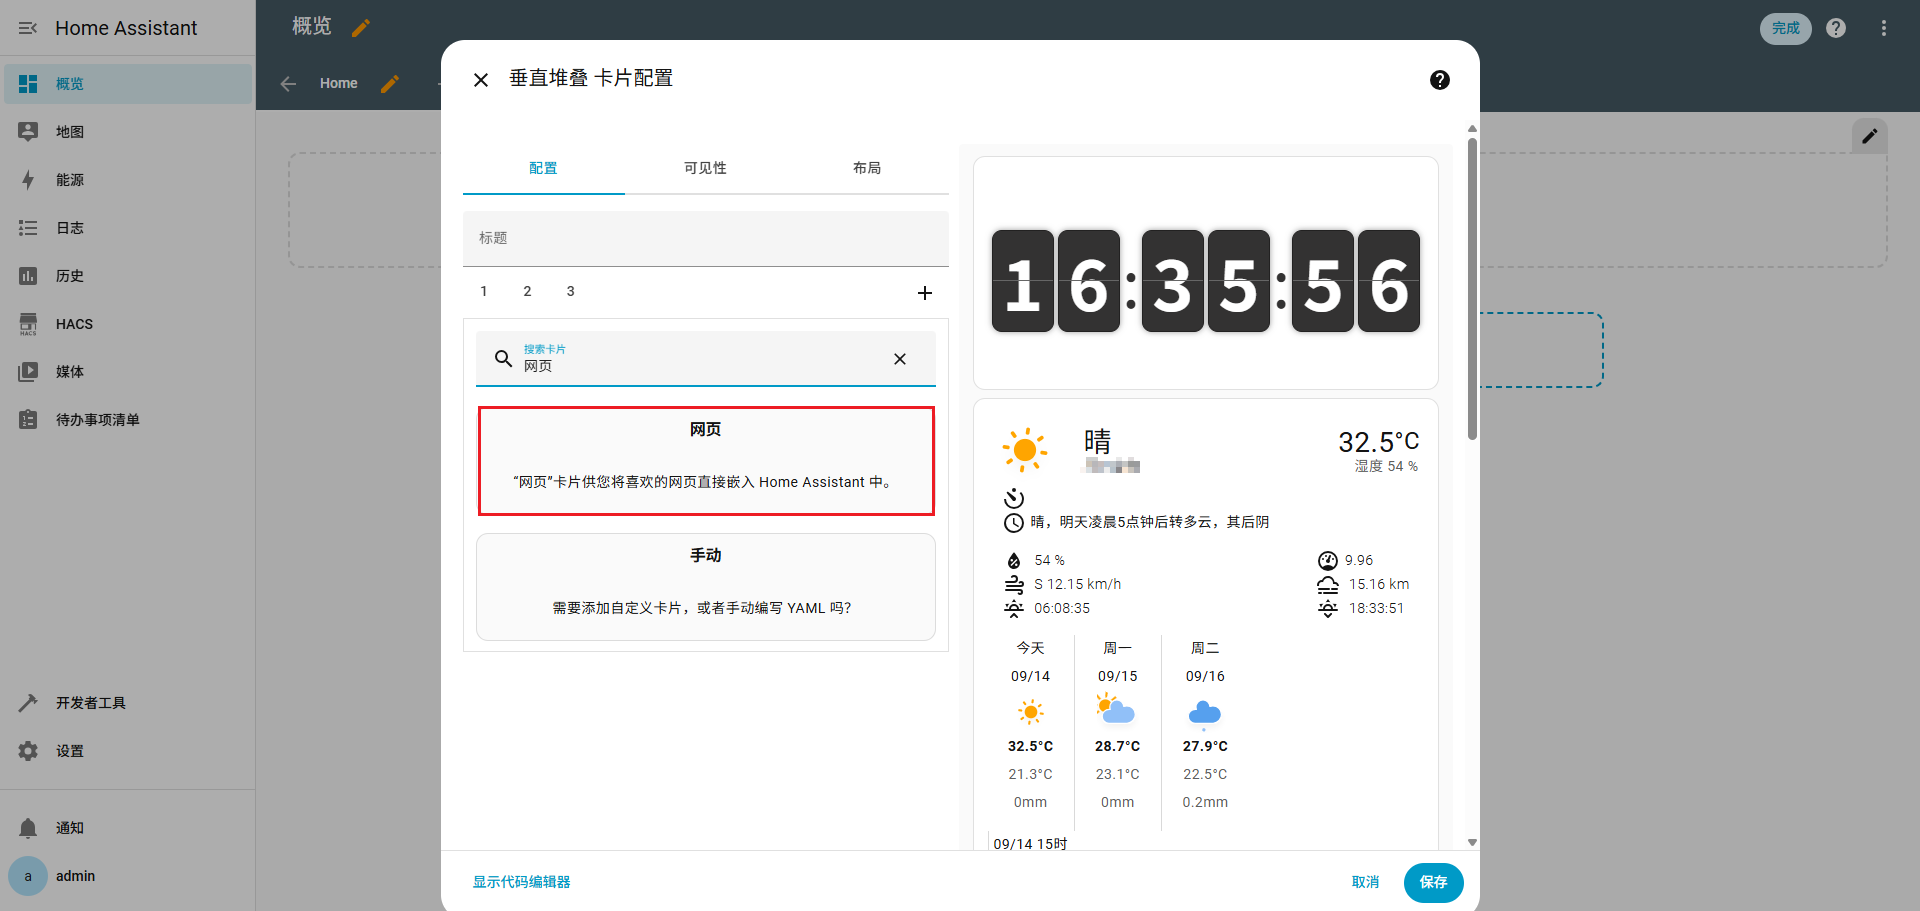
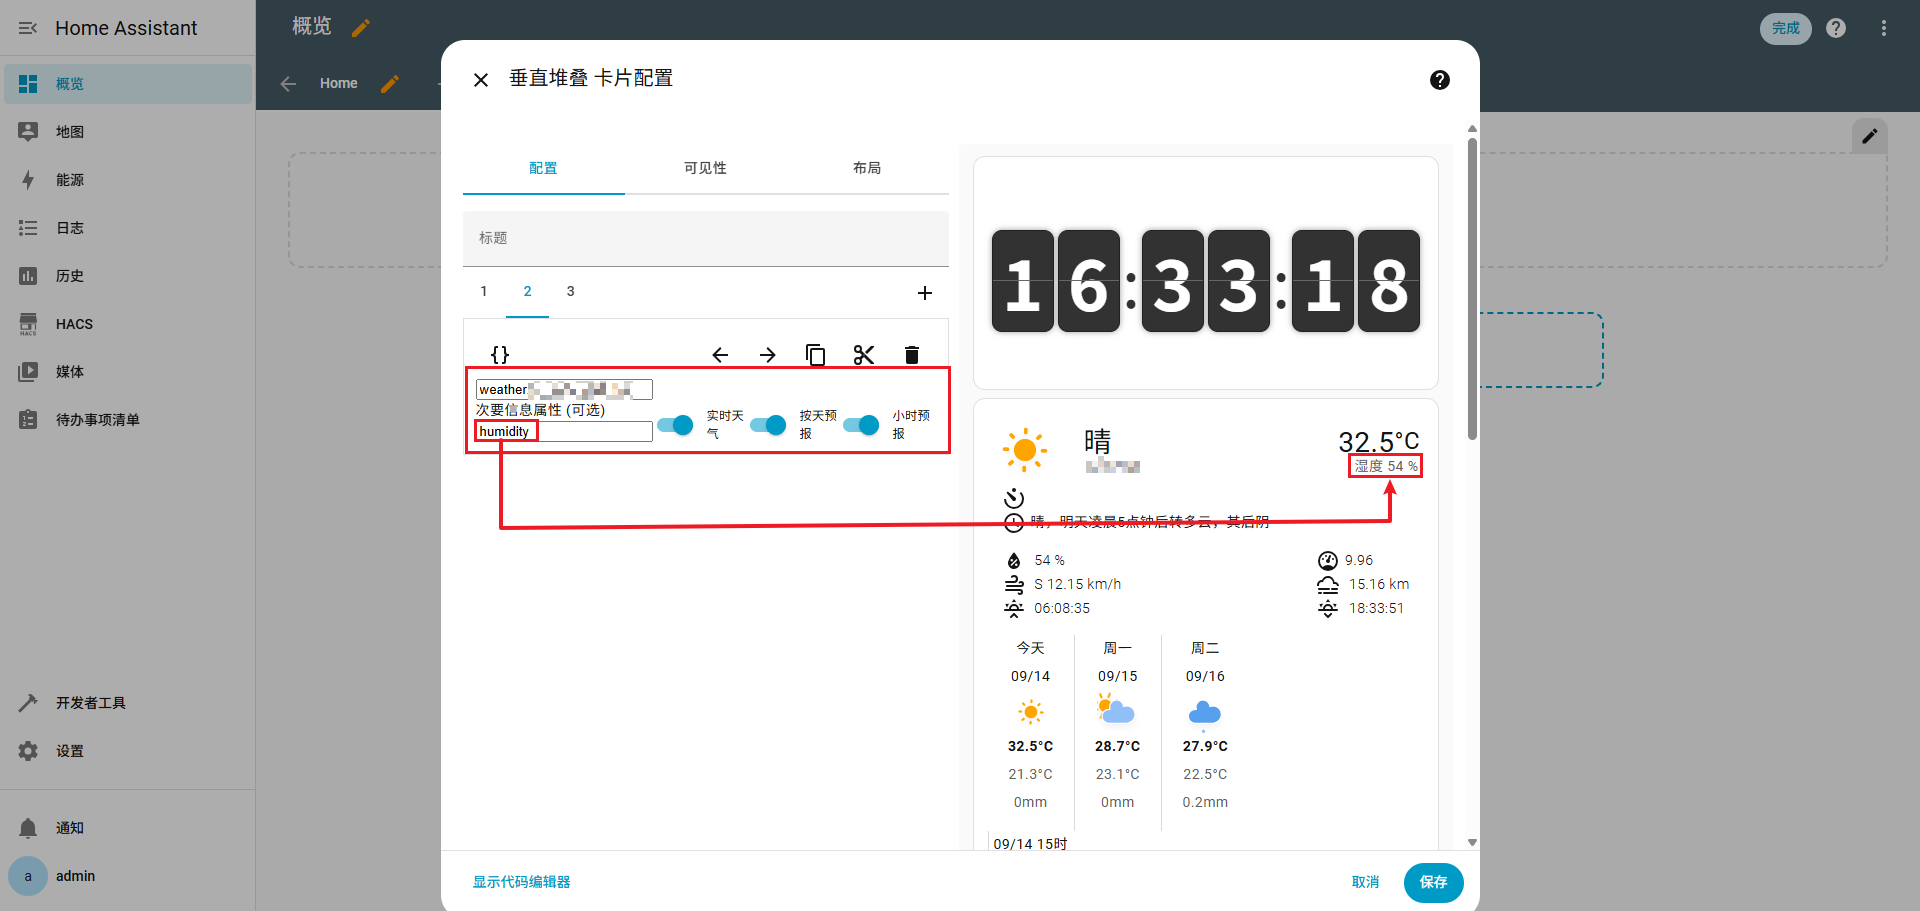
新增网页卡片
 (
(图54)
 (
(图55)
 (
(图56)
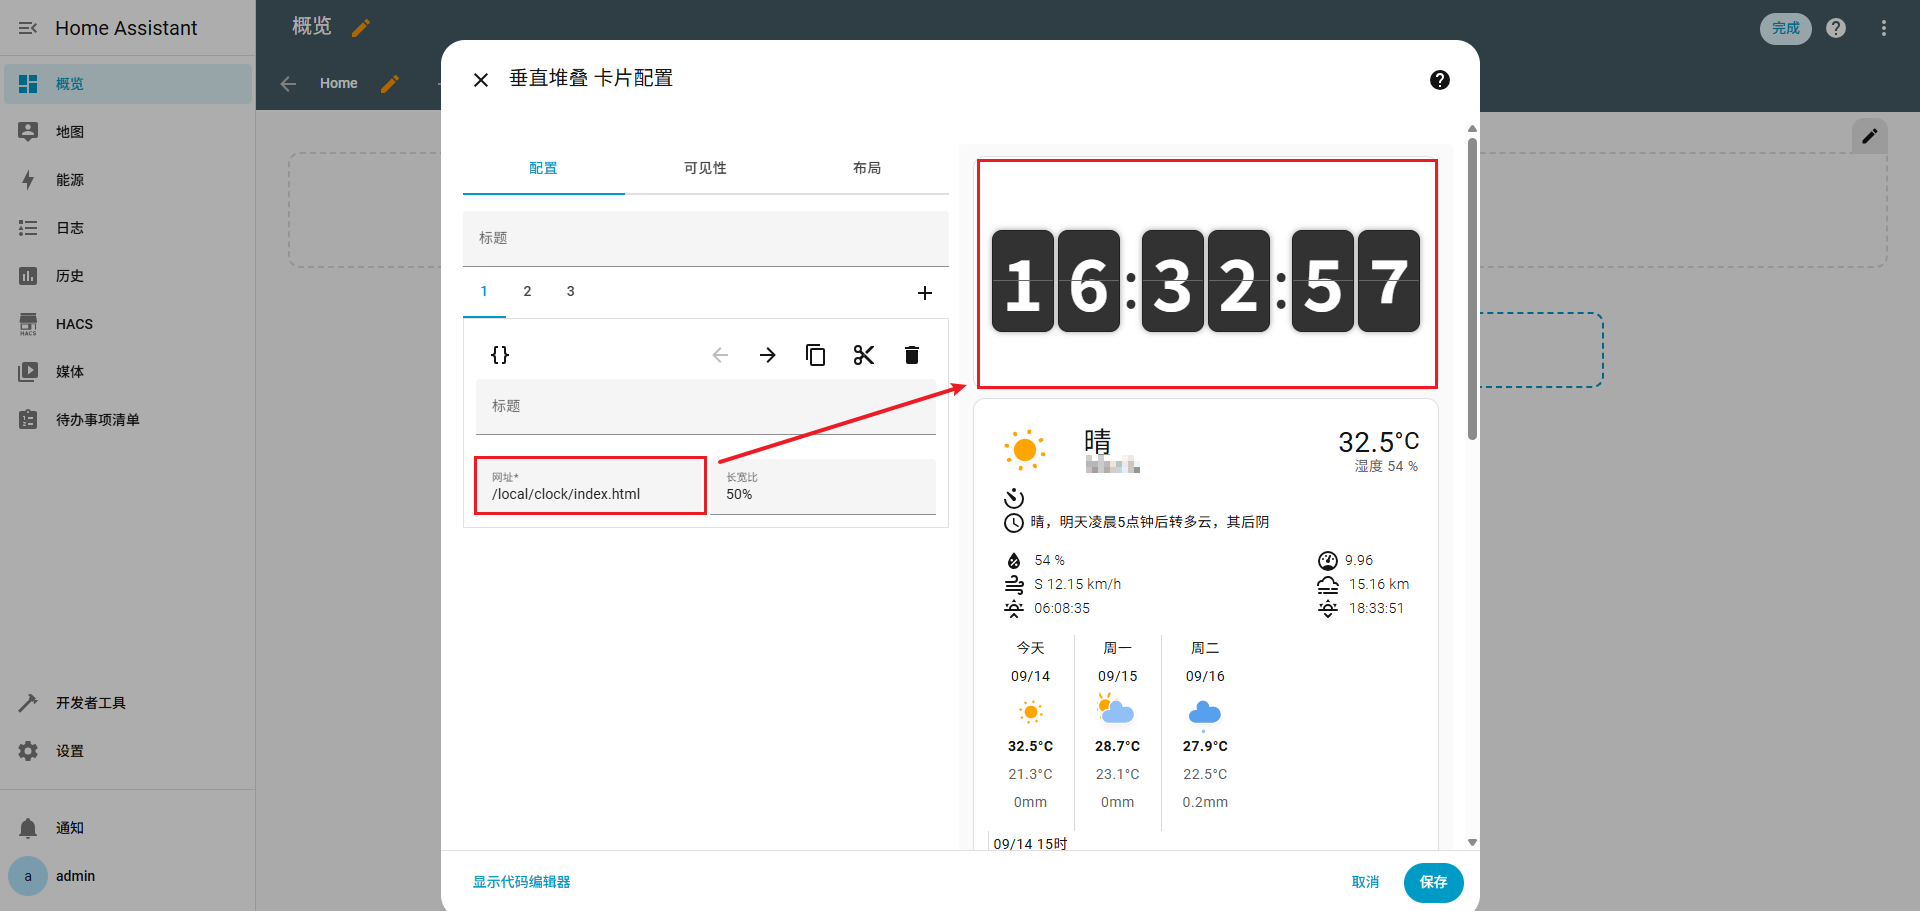
翻页时钟
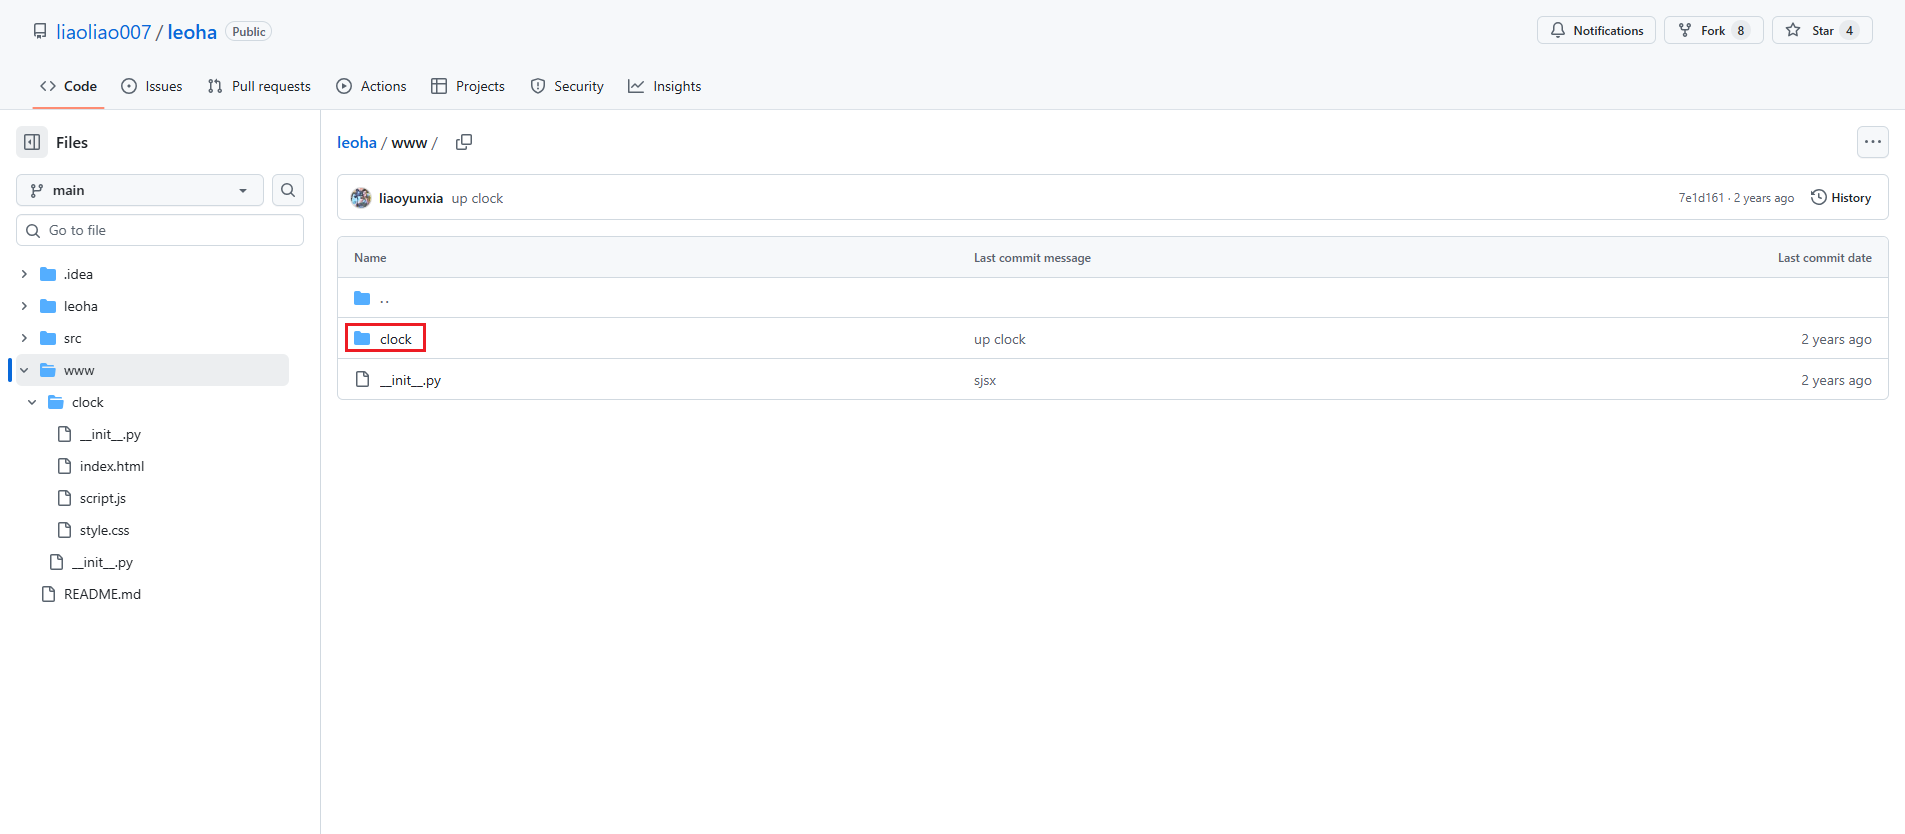
下载:https://github.com/liaoliao007/leoha/
之前 homeassistant 映射的目录是 /home/piliqiu/homeassistant/config
将仓库中 www 目录下的 clock 文件夹放到 /home/piliqiu/homeassistant/config/www 目录下
 (
(图57)
1
2
3
4
5
6
7
8
|
/home/piliqiu/homeassistant/config/
├── ...(其他文件)
└── www/
    └── clock/
        ├── __init__.py
        ├── index.html
        ├── script.js
        └── style.css
|
/local/clock/index.html 中的 local 表示 www
 (
(图58)
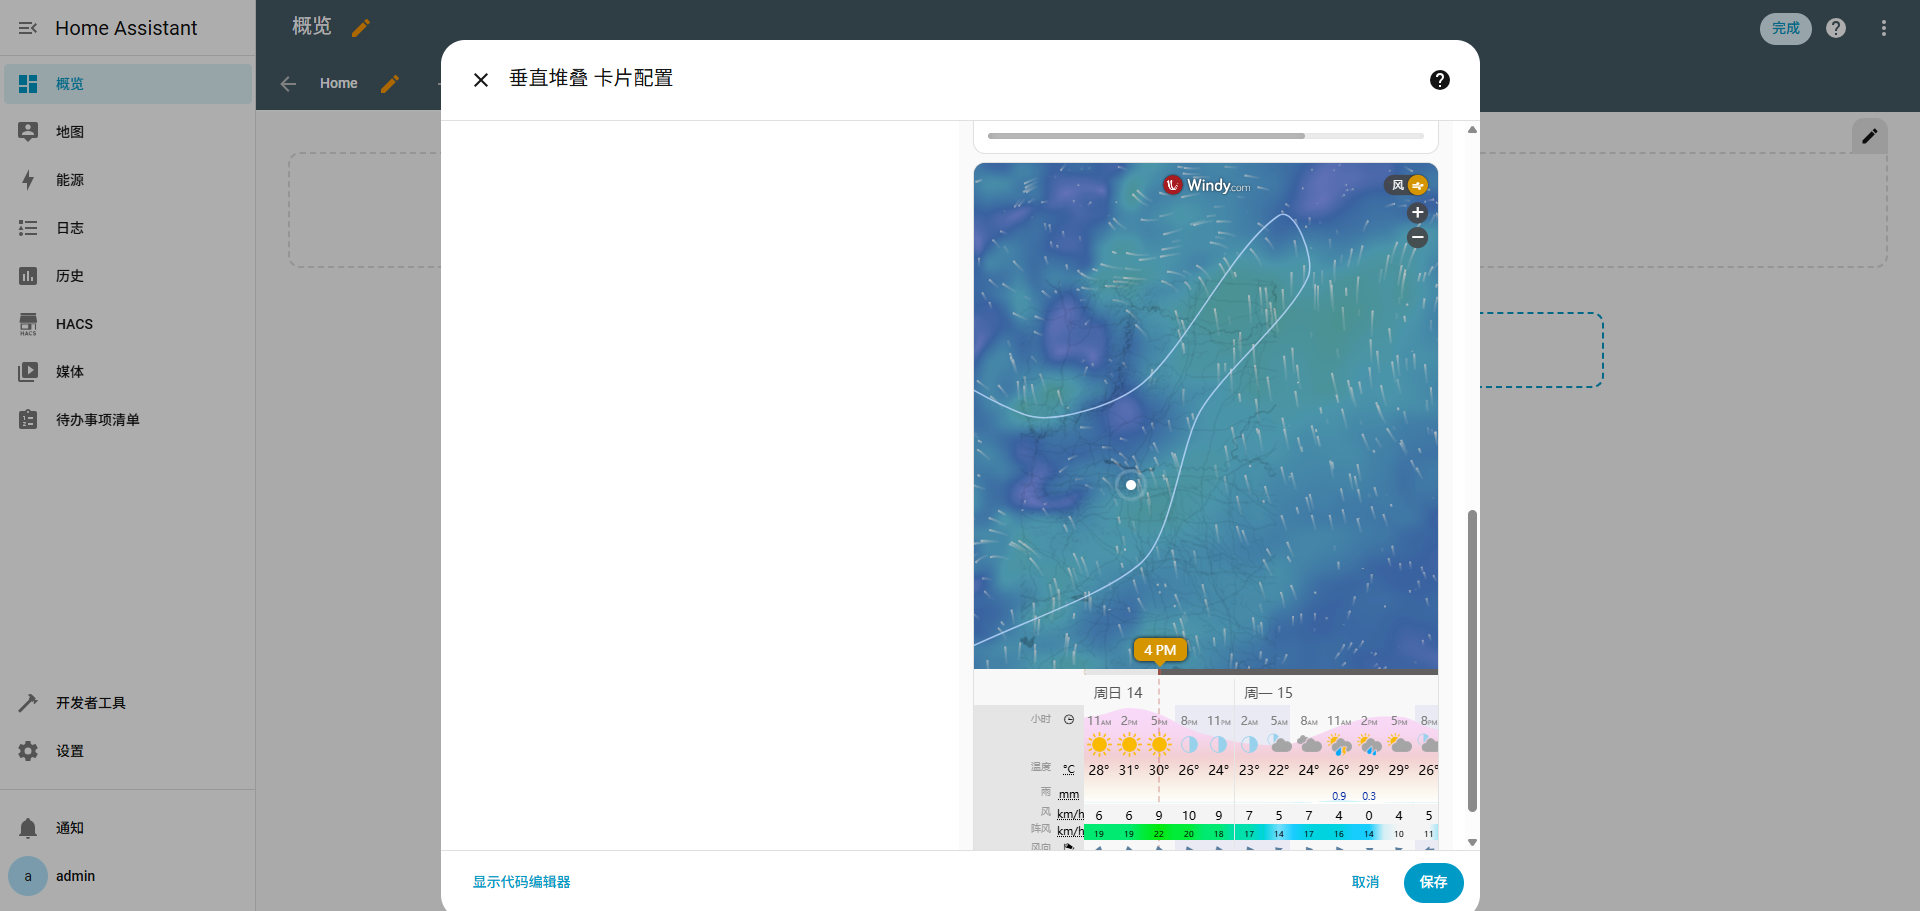
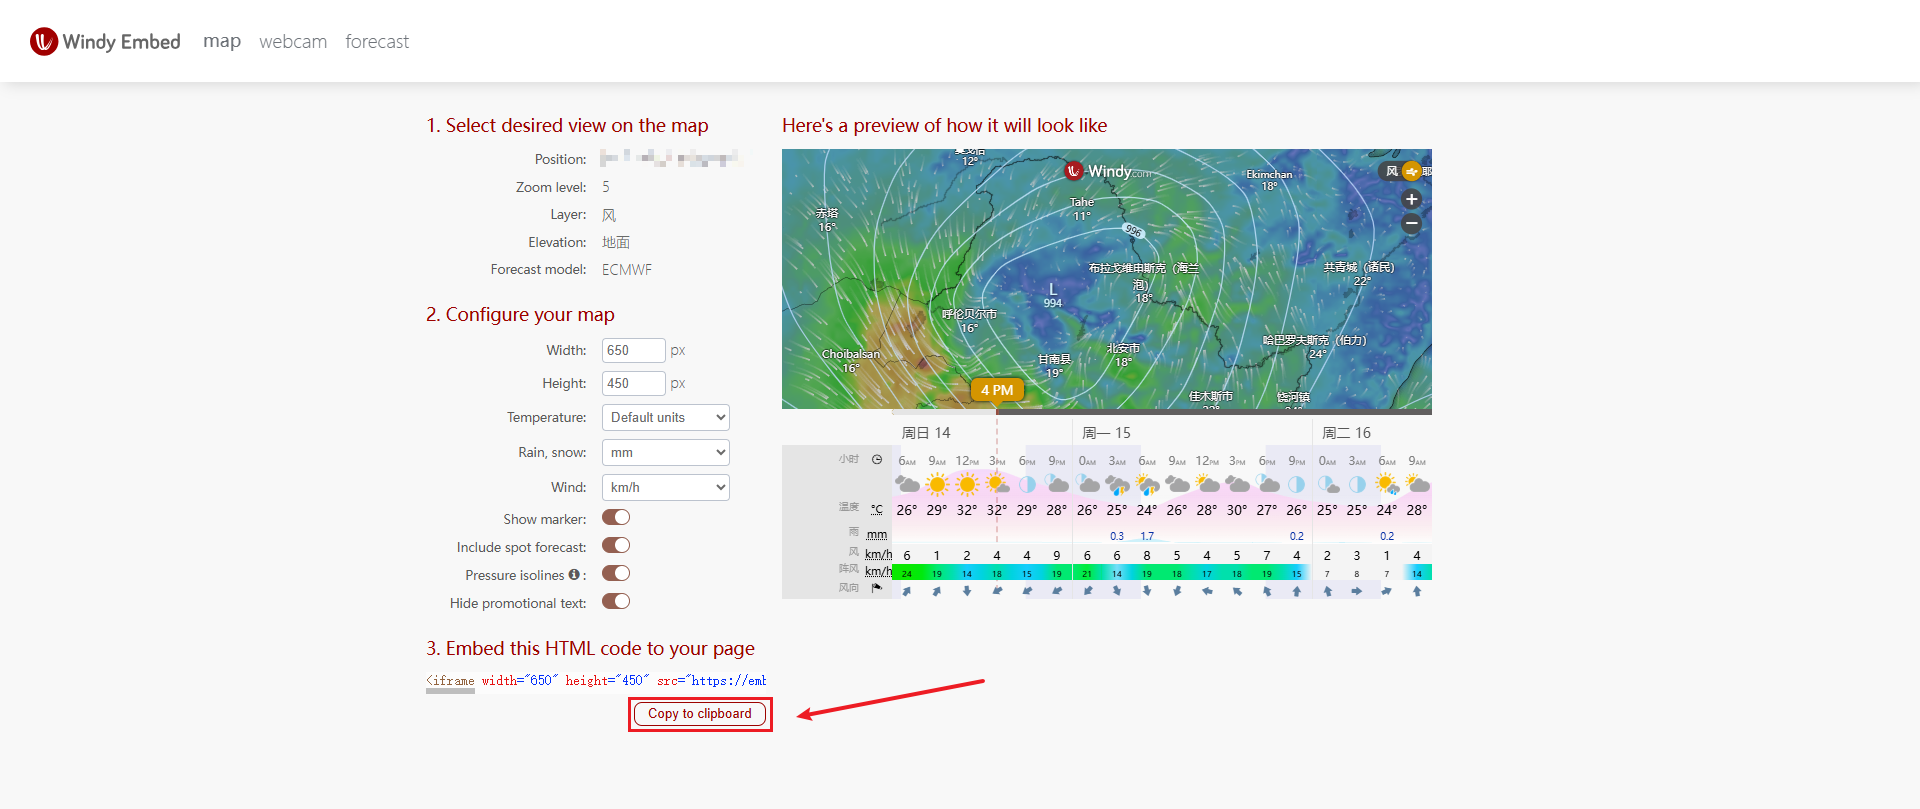
Windy天气
 (
(图59)
 (
(图60)
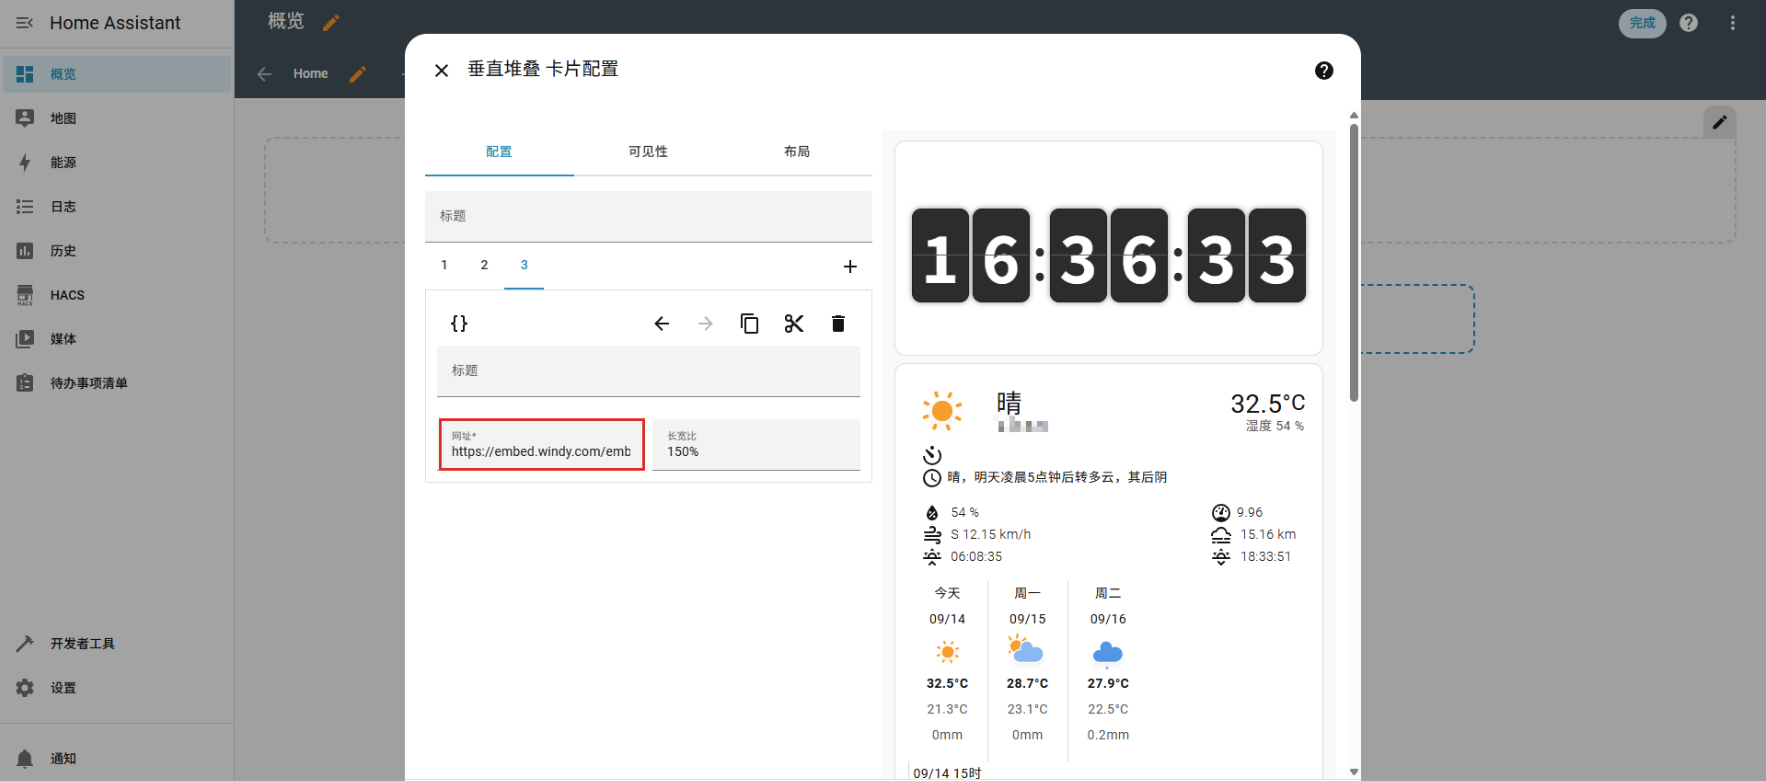
复制网页嵌入代码
 (
(图61)
 (
(图62)
从之前的嵌入代码中复制 src 中的内容粘贴到这里
 (
(图63)
 (
(图64)
TP-Link摄像头接入Frigate
安装MQTT
1
2
3
4
5
|
mqtt-server/
├── docker-compose.yml
├── mosquitto/
│   ├── mosquitto.conf
│   └── passwd       # 用户密码文件(可选)
|
 1
 2
 3
 4
 5
 6
 7
 8
 9
10
11
12
13
14
15
16
17
18
19
20
21
22
23
24
25
26
|
version: '3.8'

services:
  mosquitto:
    image: eclipse-mosquitto:2.0
    container_name: mosquitto
    restart: unless-stopped
    ports:
      - "1883:1883"    # MQTT 协议
      - "9001:9001"    # WebSocket 支持
      # - "8883:8883"  # TLS(可选,需配置证书)
    volumes:
      - ./mosquitto/mosquitto.conf:/mosquitto/config/mosquitto.conf
      # - ./mosquitto/passwd:/mosquitto/config/passwd  # 认证文件
      - mosquitto_data:/mosquitto/data
      - mosquitto_log:/mosquitto/log

    # 可选:设置时区
    environment:
      - TZ=Asia/Shanghai
    # 网络模式(可选)
    # network_mode: host

volumes:
  mosquitto_data:
  mosquitto_log:
|
 1
 2
 3
 4
 5
 6
 7
 8
 9
10
11
12
13
14
15
16
17
18
19
20
21
22
23
24
25
26
27
28
29
30
31
32
33
|
# 监听端口
listener 1883
protocol mqtt

# WebSocket 支持
listener 9001
protocol websockets

# 持久化设置
persistence true
persistence_location /mosquitto/data/

# 日志
log_dest file /mosquitto/log/mosquitto.log
log_type all
# 关闭时间戳(Docker 日志已有)
log_timestamp false

# ==================================================
# 🔐 认证配置(可选:开启用户名密码)
# ==================================================
allow_anonymous true    # 允许匿名访问
# password_file /mosquitto/config/passwd

# ==================================================
# 🔐 TLS 配置(可选:开启 HTTPS/WebSocket Secure)
# ==================================================
# listener 8883
# protocol mqtt
# cafile /mosquitto/config/certs/ca.crt
# certfile /mosquitto/config/certs/server.crt
# keyfile /mosquitto/config/certs/server.key
# require_certificate false
|
MQTT 开启用户名密码认证(可选)
步骤 1:生成密码文件
1
2
3
4
5
6
7
8
9
|
# 进入 mosquitto 目录
cd mqtt-server/mosquitto

# 创建 passwd 文件(第一次用 -c)
mosquitto_passwd -c passwd your_username

# 输入密码
# 再添加其他用户用(去掉 -c)
# mosquitto_passwd passwd another_user
|
步骤 2:取消 mosquitto.conf 中的认证注释
1
2
|
allow_anonymous false
password_file /mosquitto/config/passwd
|
开启 TLS 加密(可选)
如果你有证书,放入 mosquitto/certs/ 目录,并取消 mosquitto.conf 中 TLS 部分注释。
端口映射加上:
部署Frigate
1
2
3
4
|
frigate/
├── docker-compose.yml
├── config/
│ └── config.yml
|
1
2
3
4
5
6
7
8
9
10
11
12
13
14
15
16
17
|
services:
frigate:
container_name: frigate
restart: unless-stopped
stop_grace_period: 30s
image: docker.cnb.cool/frigate-cn/frigate:stable
volumes:
- ./config:/config
- ./storage:/media/frigate
- type: tmpfs # 可选:1GB内存,减少SSD/SD卡损耗
target: /tmp/cache
tmpfs:
size: 1000000000
ports:
- "8971:8971"
- "8554:8554" # RTSP 视频流
- "5050:5000" # Web UI
|
 1
 2
 3
 4
 5
 6
 7
 8
 9
10
11
12
13
14
15
16
17
18
19
20
21
22
23
24
25
26
27
28
29
30
31
32
33
34
35
36
37
38
39
40
41
42
43
44
45
46
47
48
49
50
51
52
|
mqtt:
  enabled: true
  host: mosquitto
  port: 1883
  user: # 没有可以删除
  password: # 没有可以删除

# 录制配置,保留7天的陆续变动
record:
  enabled: true
  retain:
    days: 7
    mode: motion
  alerts:
    retain:
      days: 30
  detections:
    retain:
      days: 30
snapshots:
  enabled: true
  retain:
    default: 30


cameras:
  camera_name: # <--- 此处改为你摄像头的名称,仅支持英文数字下划线与连接符
    enabled: true
    ffmpeg:
      inputs:
        - path: rtsp://账号:密码@摄像头IP:554/stream1 # <--- 此处改为你摄像头的rtsp地址
          roles:
            - detect
            - record
    detect:
      enabled: true
      width: 3840 # <- 可选,默认Frigate会尝试自动检测分辨率
      height: 2160 # <- 可选,默认Frigate会尝试自动检测分辨率
    objects:
      filters:
        person:
          mask: 0.005,0.008,0.421,0.009,0.452,0.988,0.007,0.995
    motion:
      mask: 0.007,0.008,0.421,0.009,0.452,0.988,0.007,0.995

go2rtc:
  streams:
    tplink_dw: ## <- 这里的back为摄像头名称,根据你的实际情况进行调整
      - "ffmpeg:rtsp://账号:密码@摄像头IP:554/stream1/cam/realmonitor?channel=1&subtype=2#video=copy#audio=copy#audio=aac#hardware"


version: 0.16-0
|
rtsp://账号:密码@摄像头IP:554/stream1
账号:密码:在 Frigate 部署后,访问 UI 平台,账号默认是 admin,密码自己设置摄像头IP:TP-LINK物联 APP -> 摄像头 -> 更多设置 -> 关于此摄像机 -> IP地址
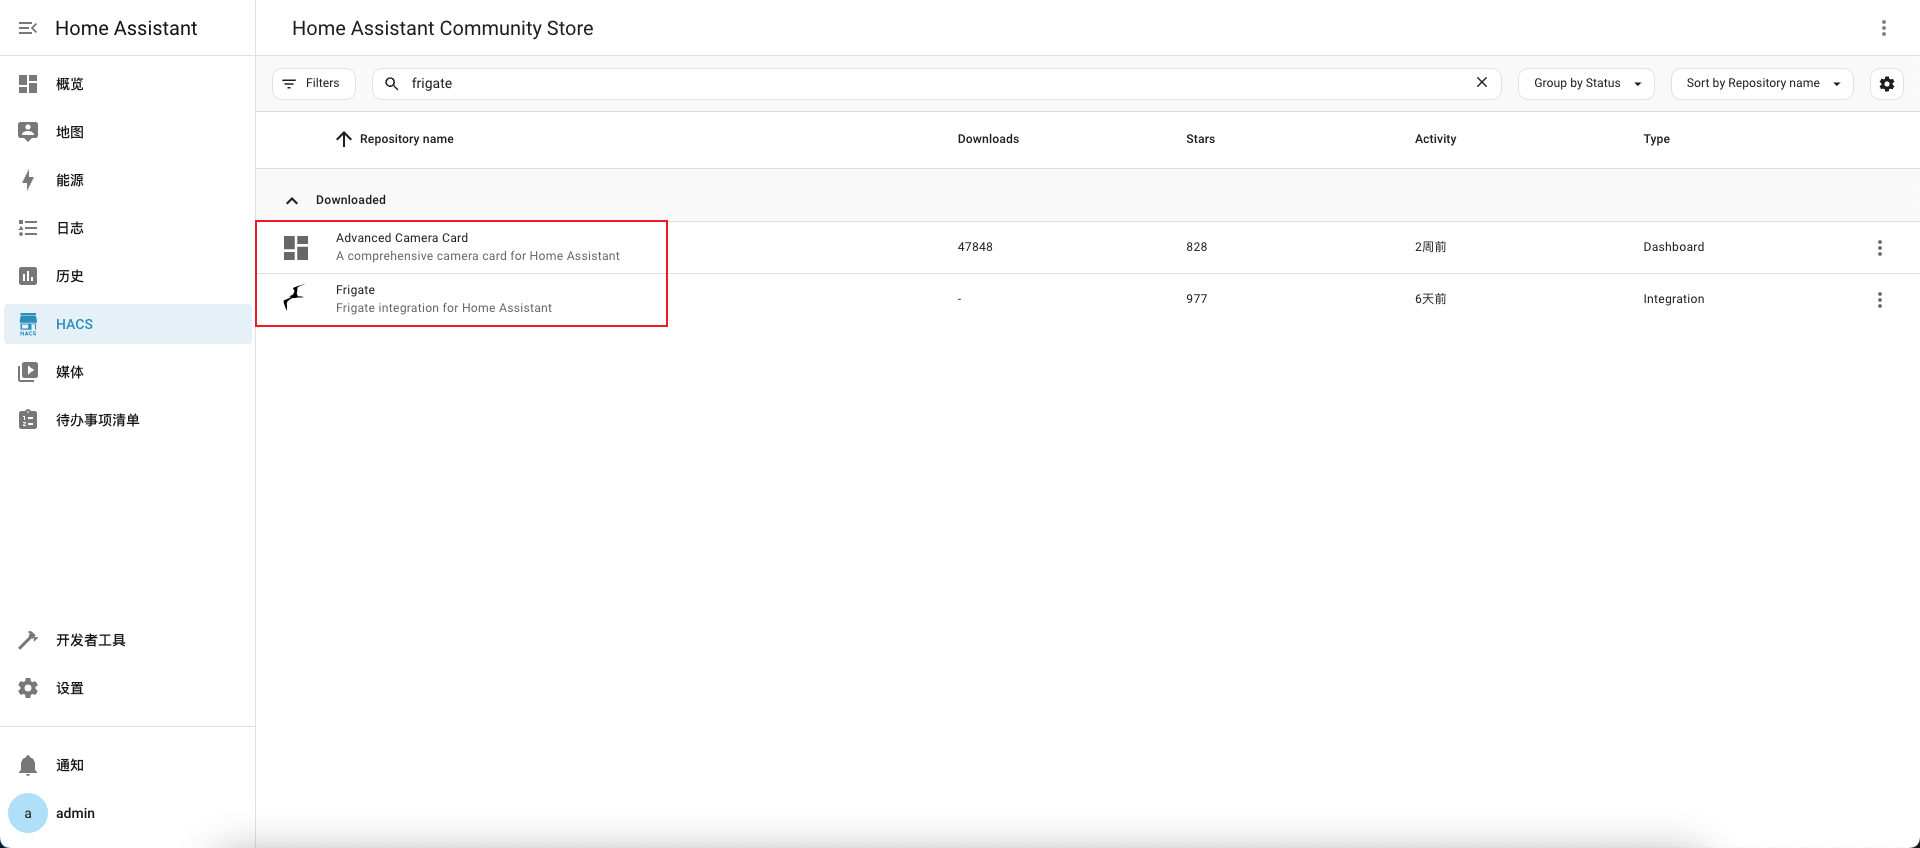
添加Frigate
1.安装 Advanced Camera Card 和 Frigate
 (
(图1)
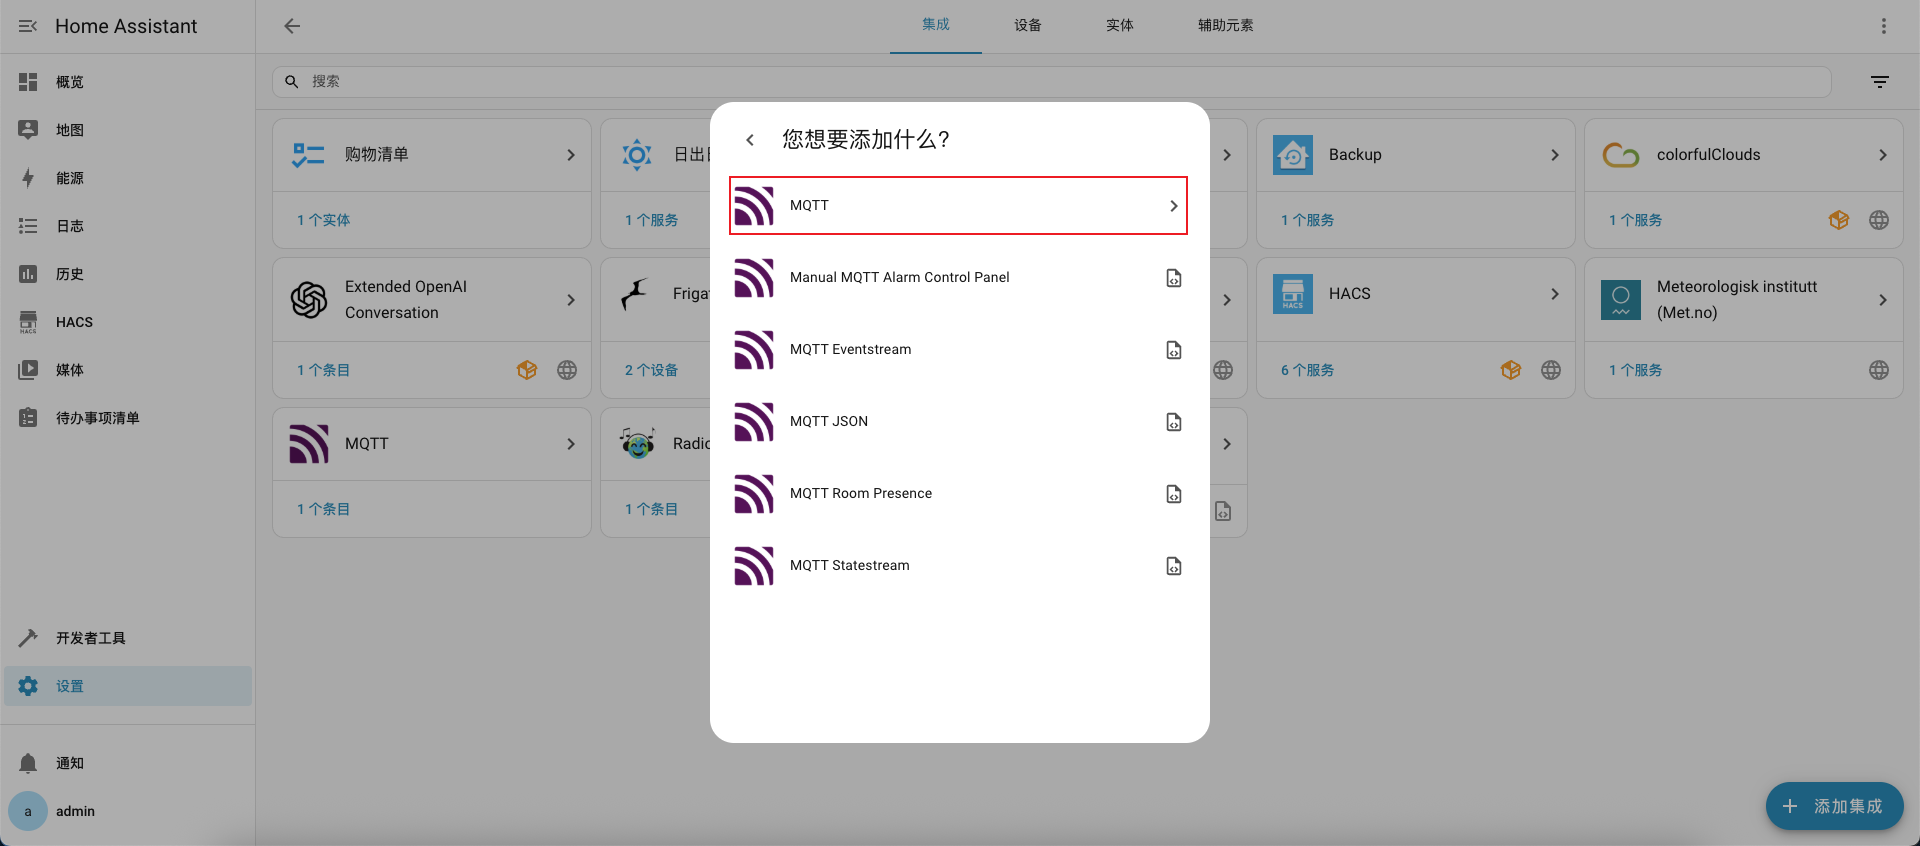
2.添加 MQTT
 (
(图2)
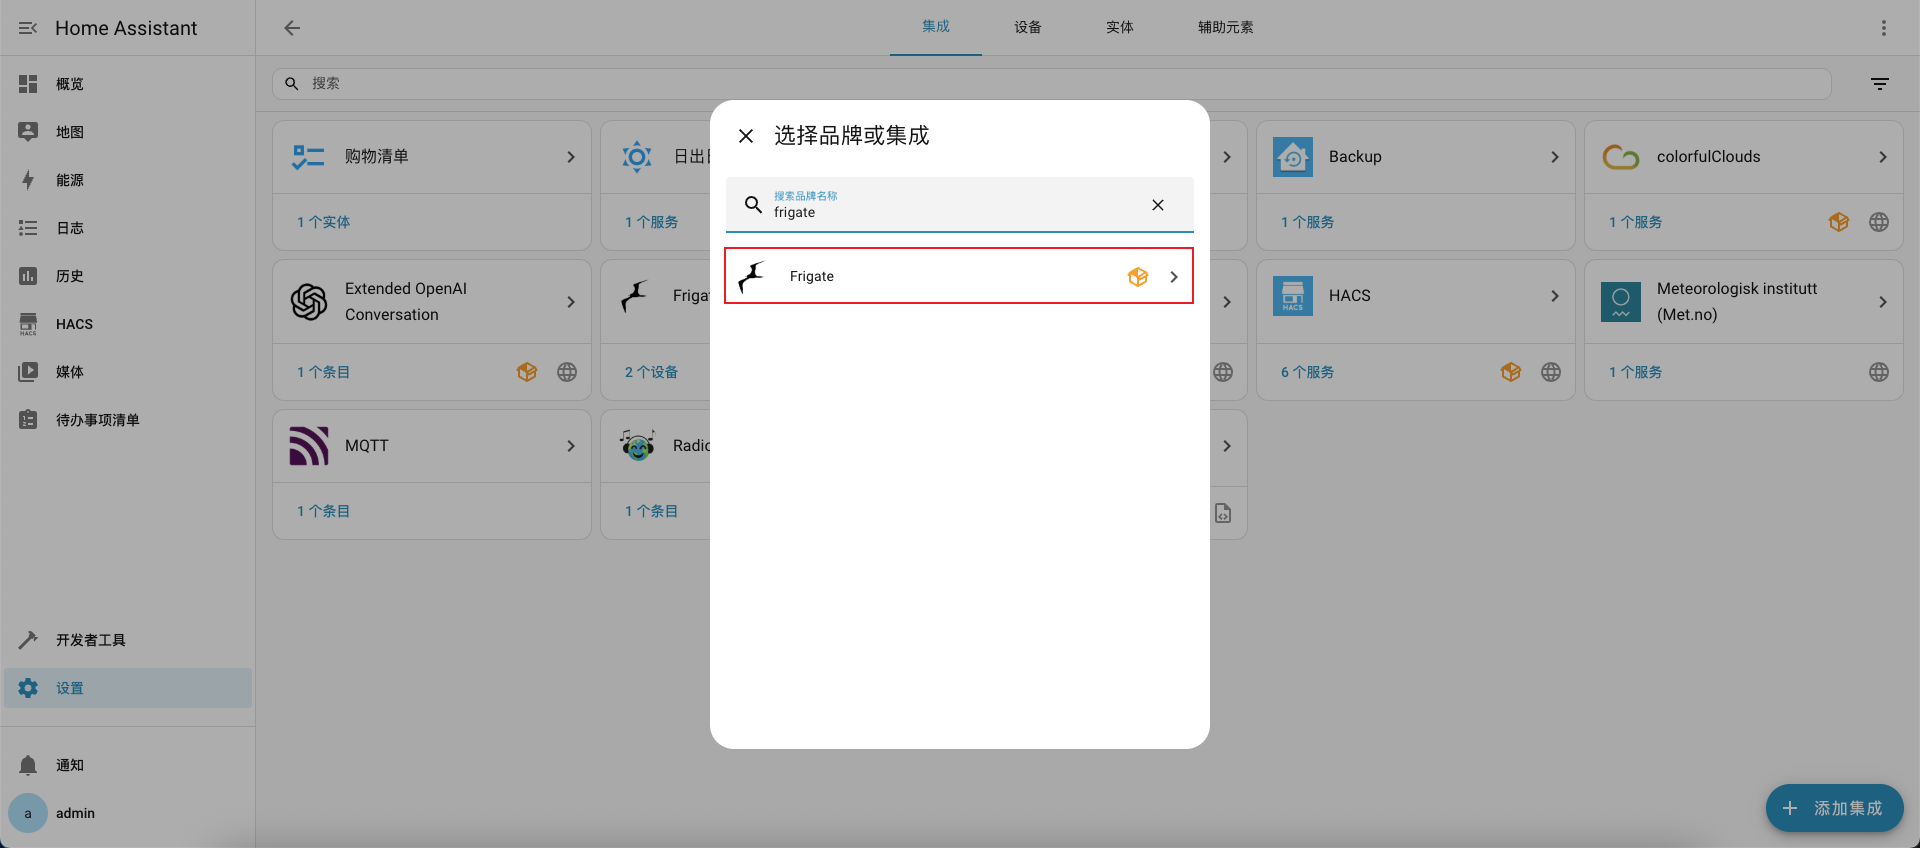
3.添加 Frigate
 (
(图3)
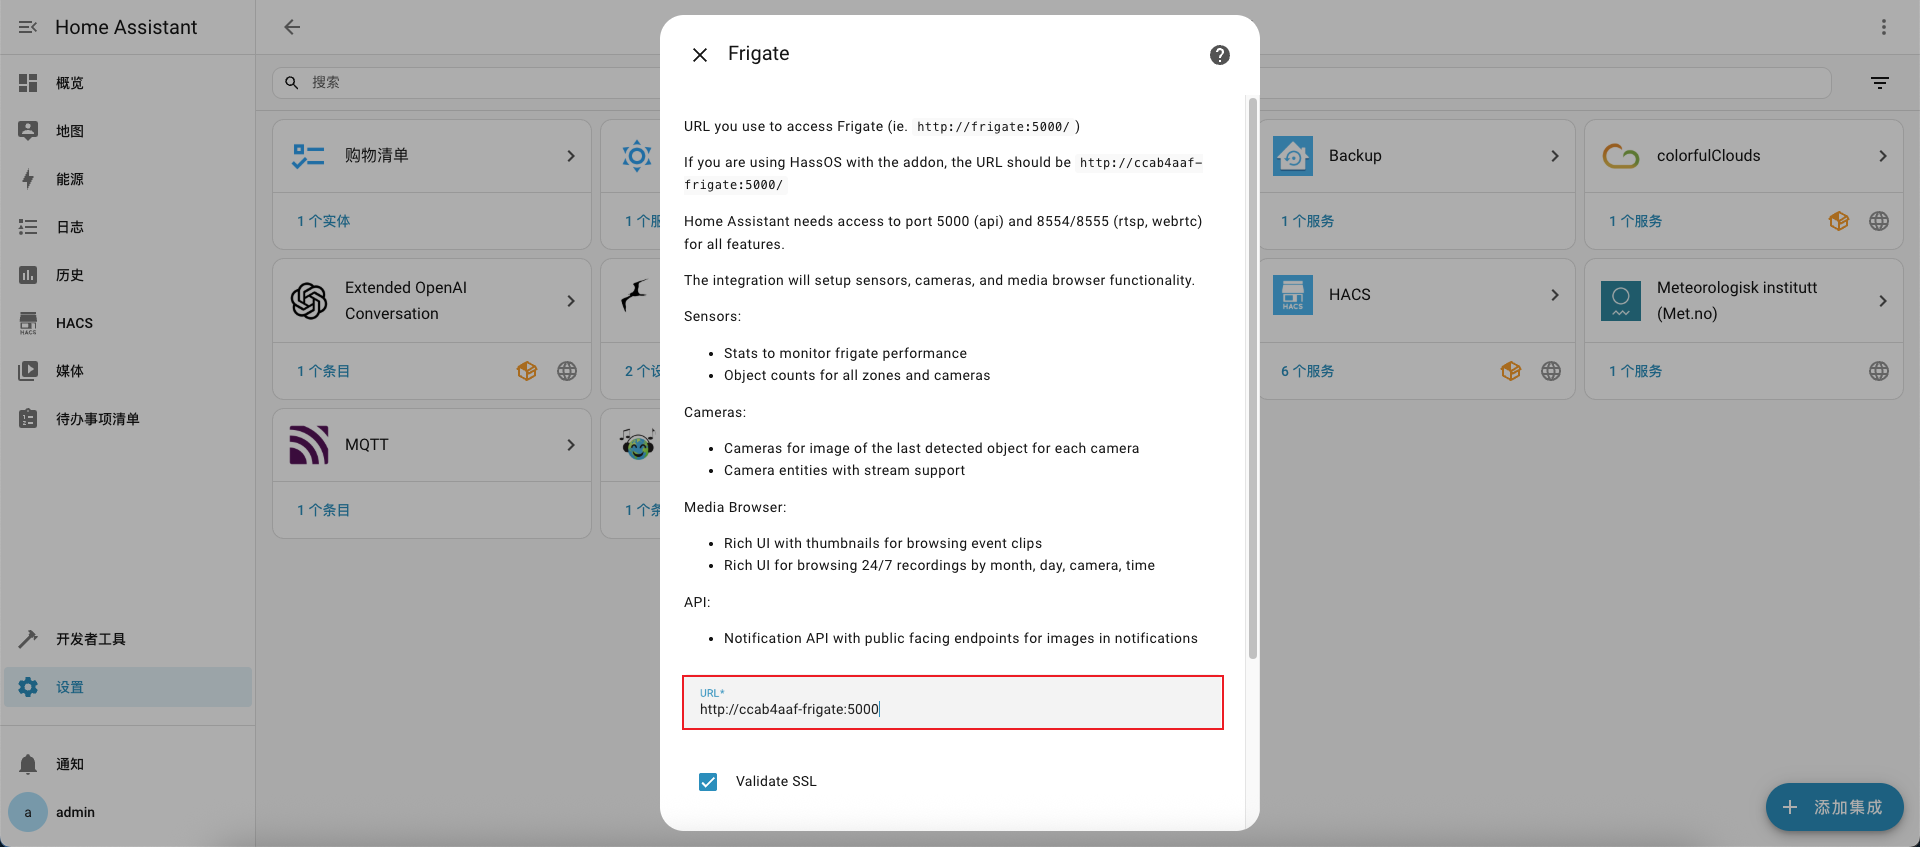
4.地址填写 Frigate 的 Web UI 地址
 (
(图4)
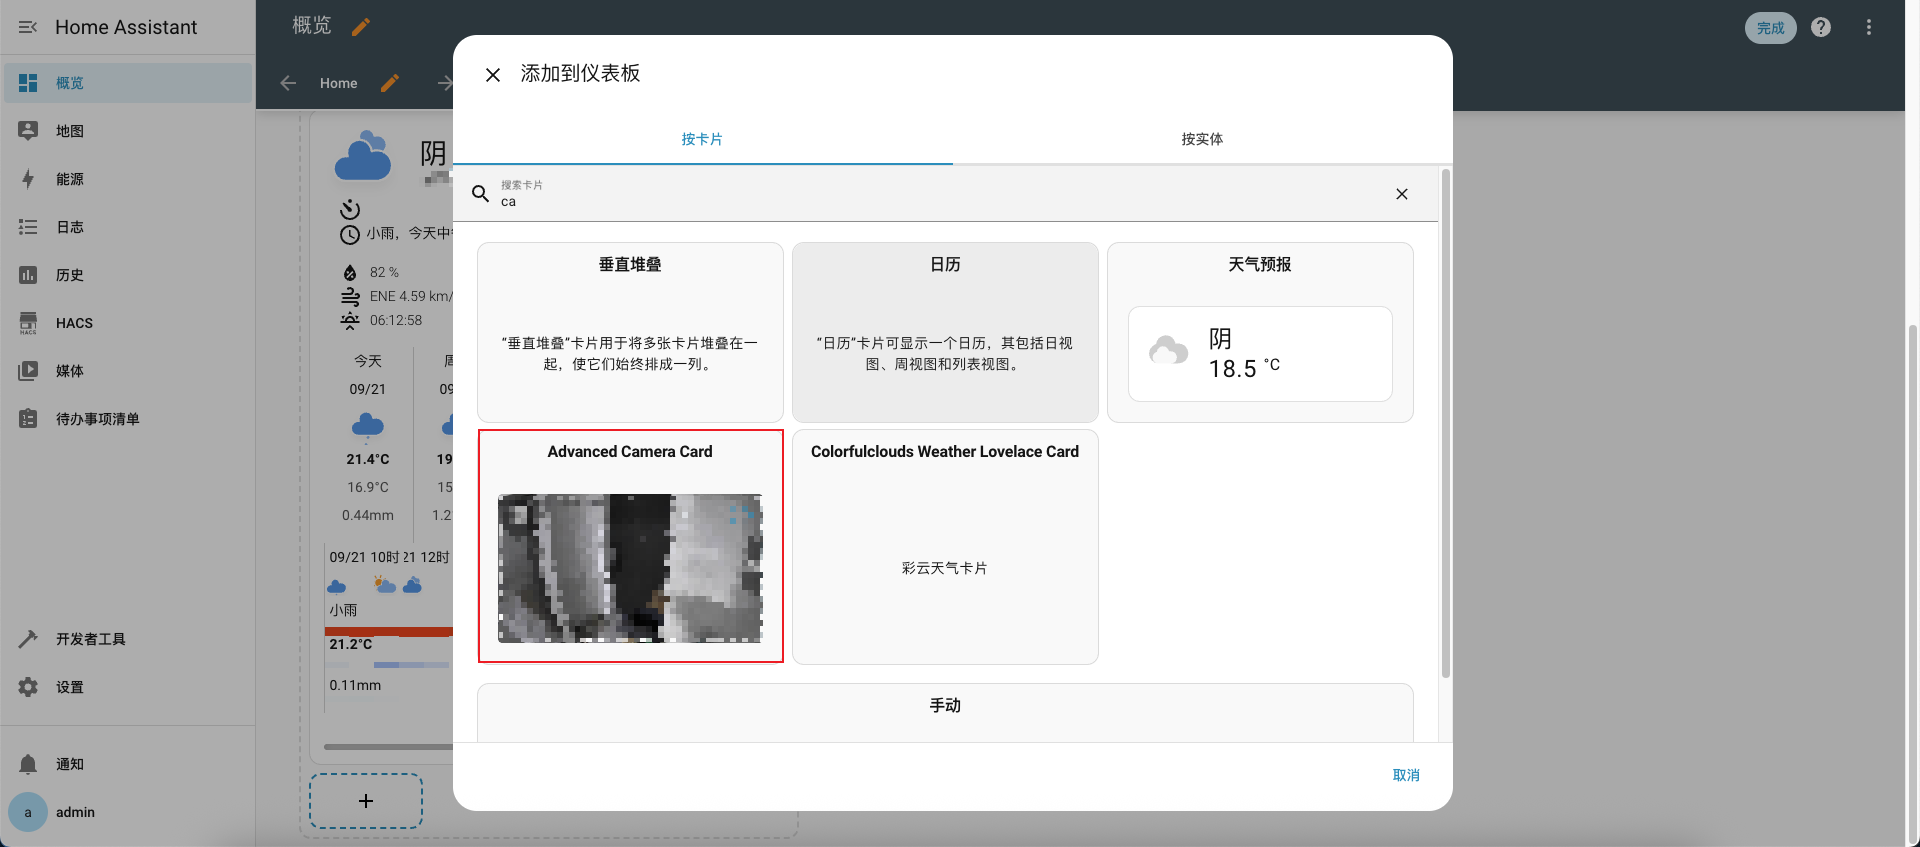
5.添加卡片
 (
(图5)
6.首页效果
 (
(图6)